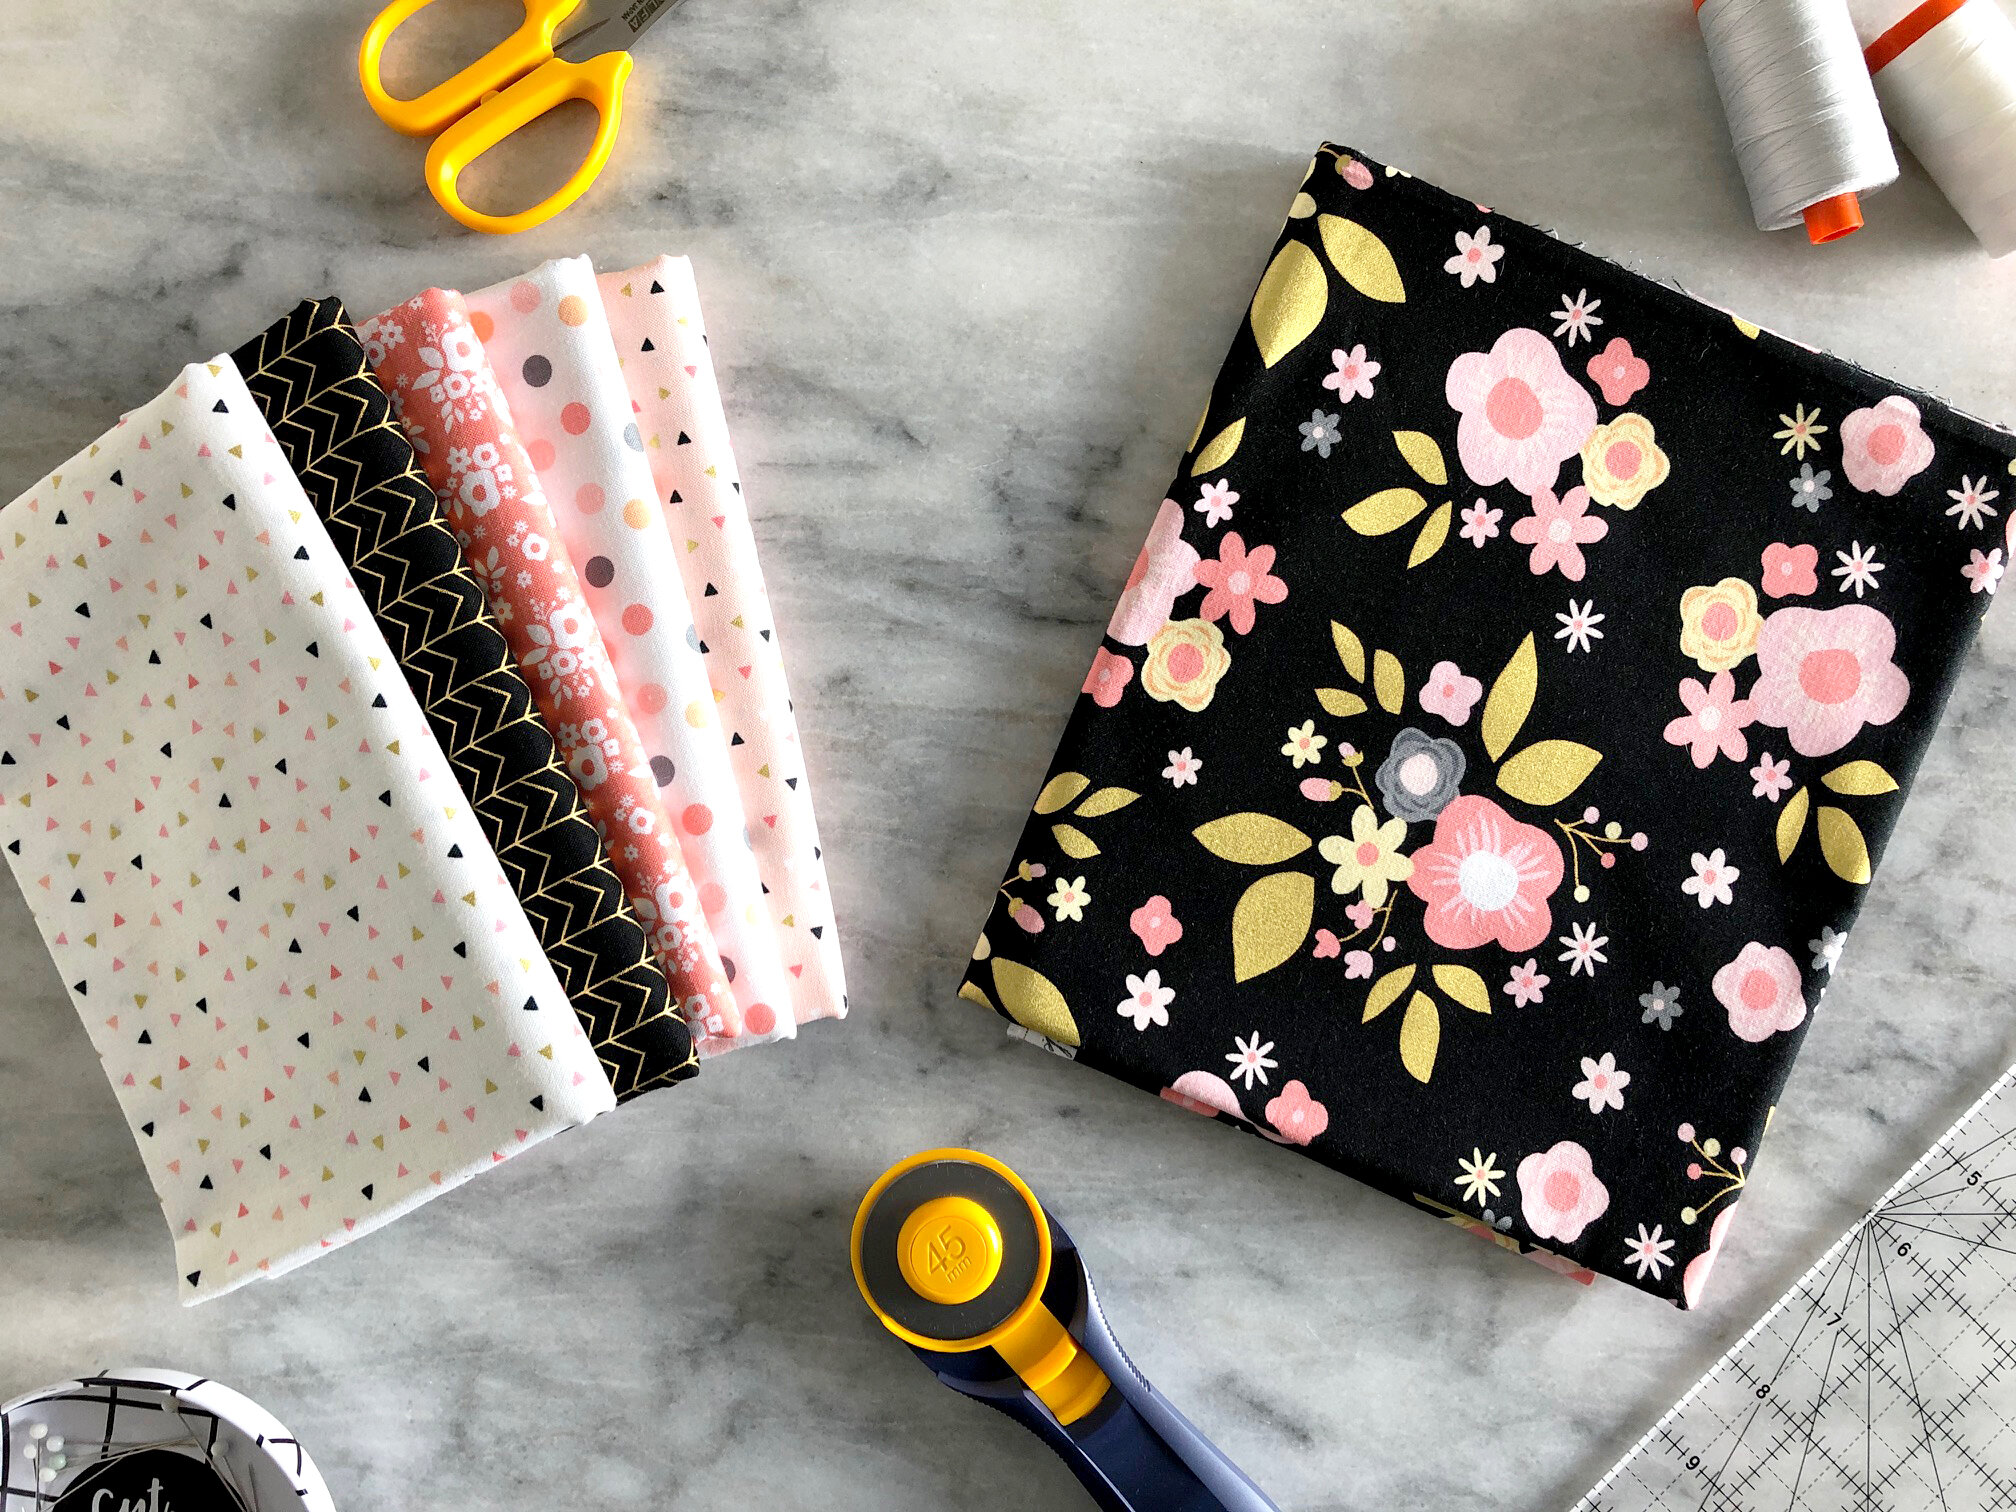
A Little Bit of Sparkle Fabric...


I’m excited to share a new fabric collection from Riley Blake Designs.
A Little Bit of Sparkle by Zoe Pearn, features stripes, dots, and blinged out florals. The main floral, in black is bold and a tad bit dramatic. Wait, did I just describe myself? Bold and a tad bit dramatic? Haha.
There are a total of 7 prints across 3 color ways. I decided not to work with the entire collection, hand selecting the ones that really stood out to me. You can review the full range here.


My friend, Andy Knowlton’s new book, Fresh Fat Quarter Quilts book arrived the same day as the fabric and one quilt in particular, I knew, would be perfect to highlight the collection.
Venture Out, inspired by the “fear of driving the wrong way on a one way street,” is absolutely relateable. Imagine driving through Manhattan! Haha.
This mini quilt includes 8 Venture Out blocks and one big mistake: there is no sashing between the columns. But instead of calling it a mistake, I’m going to call it a design choice. Yeah, that’s right, a design choice. Haha.
The final outcome is quite striking, isn’t it?
Using my Baby Lock Journey and Aurifil 2021 50 weight thread, I quilted this mini with the serpentine stitch. I used Blossom in Apricot Blush for the binding.
A Little Bit of Sparkle is perfect for just about any project and I stay tuned for another version of Venture Out.
Check out RBD’s blog for more projects featuring this dazzling collection.
cut, sew, repeat…
Personalized Holiday with the Cricut Maker...


Share the love this holiday season with personalized gifts using the Cricut Maker!
The Cricut Maker cuts through just about every type of paper, felt, fabric, basswood and makes gift giving for the holidays a snap, especially with the fine tip blade, knife blade, and rotary cutter.
Cricut recently released the smallest member of the Easy Press family, the Easy Press Mini. The hottest little iron out there. With its compact size, the Easy Press Mini is ideal for unusually small heat transfer projects like hats, shoes, or stuffed animals. It also features three heat settings—hot, hotter, and hottest.
Infusible Ink is also a new material and delivers seamlessly smooth, professional-quality transfers. Infusible Ink heat transfers are permanently infused into your Cricut Blank. There is no flaking, no peeling, no cracking, and no wrinkling—ever! It’s really cool.
Using Lori Holt’s new home decor fabric collection, My Happy Place, for Riley Blake Designs, I decided to “hack” the Cricut tote bag blank. And since every creative needs tool storage, I made a Infusible Ink Pen/Marker holder.


Here’s what you need to make your own:
Cricut Maker Rotary Blade
Cricut Fabric Mat (12’’ x 24’’)
Home Decor Weight Fabric
Cricut Easy Press 2 or the Cricut Easy Press Mini
Small Piece of Ribbon for the Pen/Marker Holder
Misc. Sewing Supplies, including Thread, Iron, and Cricut Sewing Tools


Here’s how you can create your own tote bag hack:
Measure 8 1/2’’ inches away from the top of the tote bag. Using a rotary cutter and ruler, cut.
Using a seam ripper or small pair of scissors, unpick the tote bag bottom. See photo above.
Using the tote bag bottom as a template, cut out the new tote bag bottom with desired fabric.
Sew the new tote bag bottom together.
Sew the new tote bag bottom to the tote bag top.
Press seams and top stitch.
Use Cricut Design Space and Infusible Ink to create your own personalize saying. Have fun!
Here’s a link to my project.
Here’s how you can create your own pen/marker holder:
Using the shapes tool in Cricut Design Space, create an 13’’ x 11’’ rectangle.
Under ‘‘linetype’’ select cut.
Click Make it.
Under ‘‘prepare mats’’, click to add a second copy.
Place desired fabric on fabric mat and cut.
With right sides together, sew 1/4’’ around the two rectangles, leaving a 2’’ opening to turn.
Turn right sides out, press and close opening.
Fold one long section of the rectangle up 3 1/2’’ and press.
Mark desired “pockets’’ and stitch—backstitching at the start and finish.
Ta-da! You’ve just created a personalized gift for someone you love!
Handmade gifts are better than store bought because they come from your heart and creative hands!
Stay tuned for more personalized holiday gift ideas.
cut, sew, repeat…
the tattooed quilter
This is a sponsored conversation written by me on behalf of Cricut. The opinions and text are all mine.
Holiday Decor...Rainbow Trees


Warning!
This project will warm your heart and bring a smile to your face!
Proceed with caution.
I look forward to decorating for Christmas every year. Bringing the boxes in from storage, fluffing the tree, going through every ornament (talking about the special reason behind them), and listening to holiday music. It really is the most wonderful time of the year.
I also love making decorations with friends. One year we dyed dozens of sisal trees and the year after that we decorated glass ornaments. It’s a great way to spend time together and flex our creative muscles.
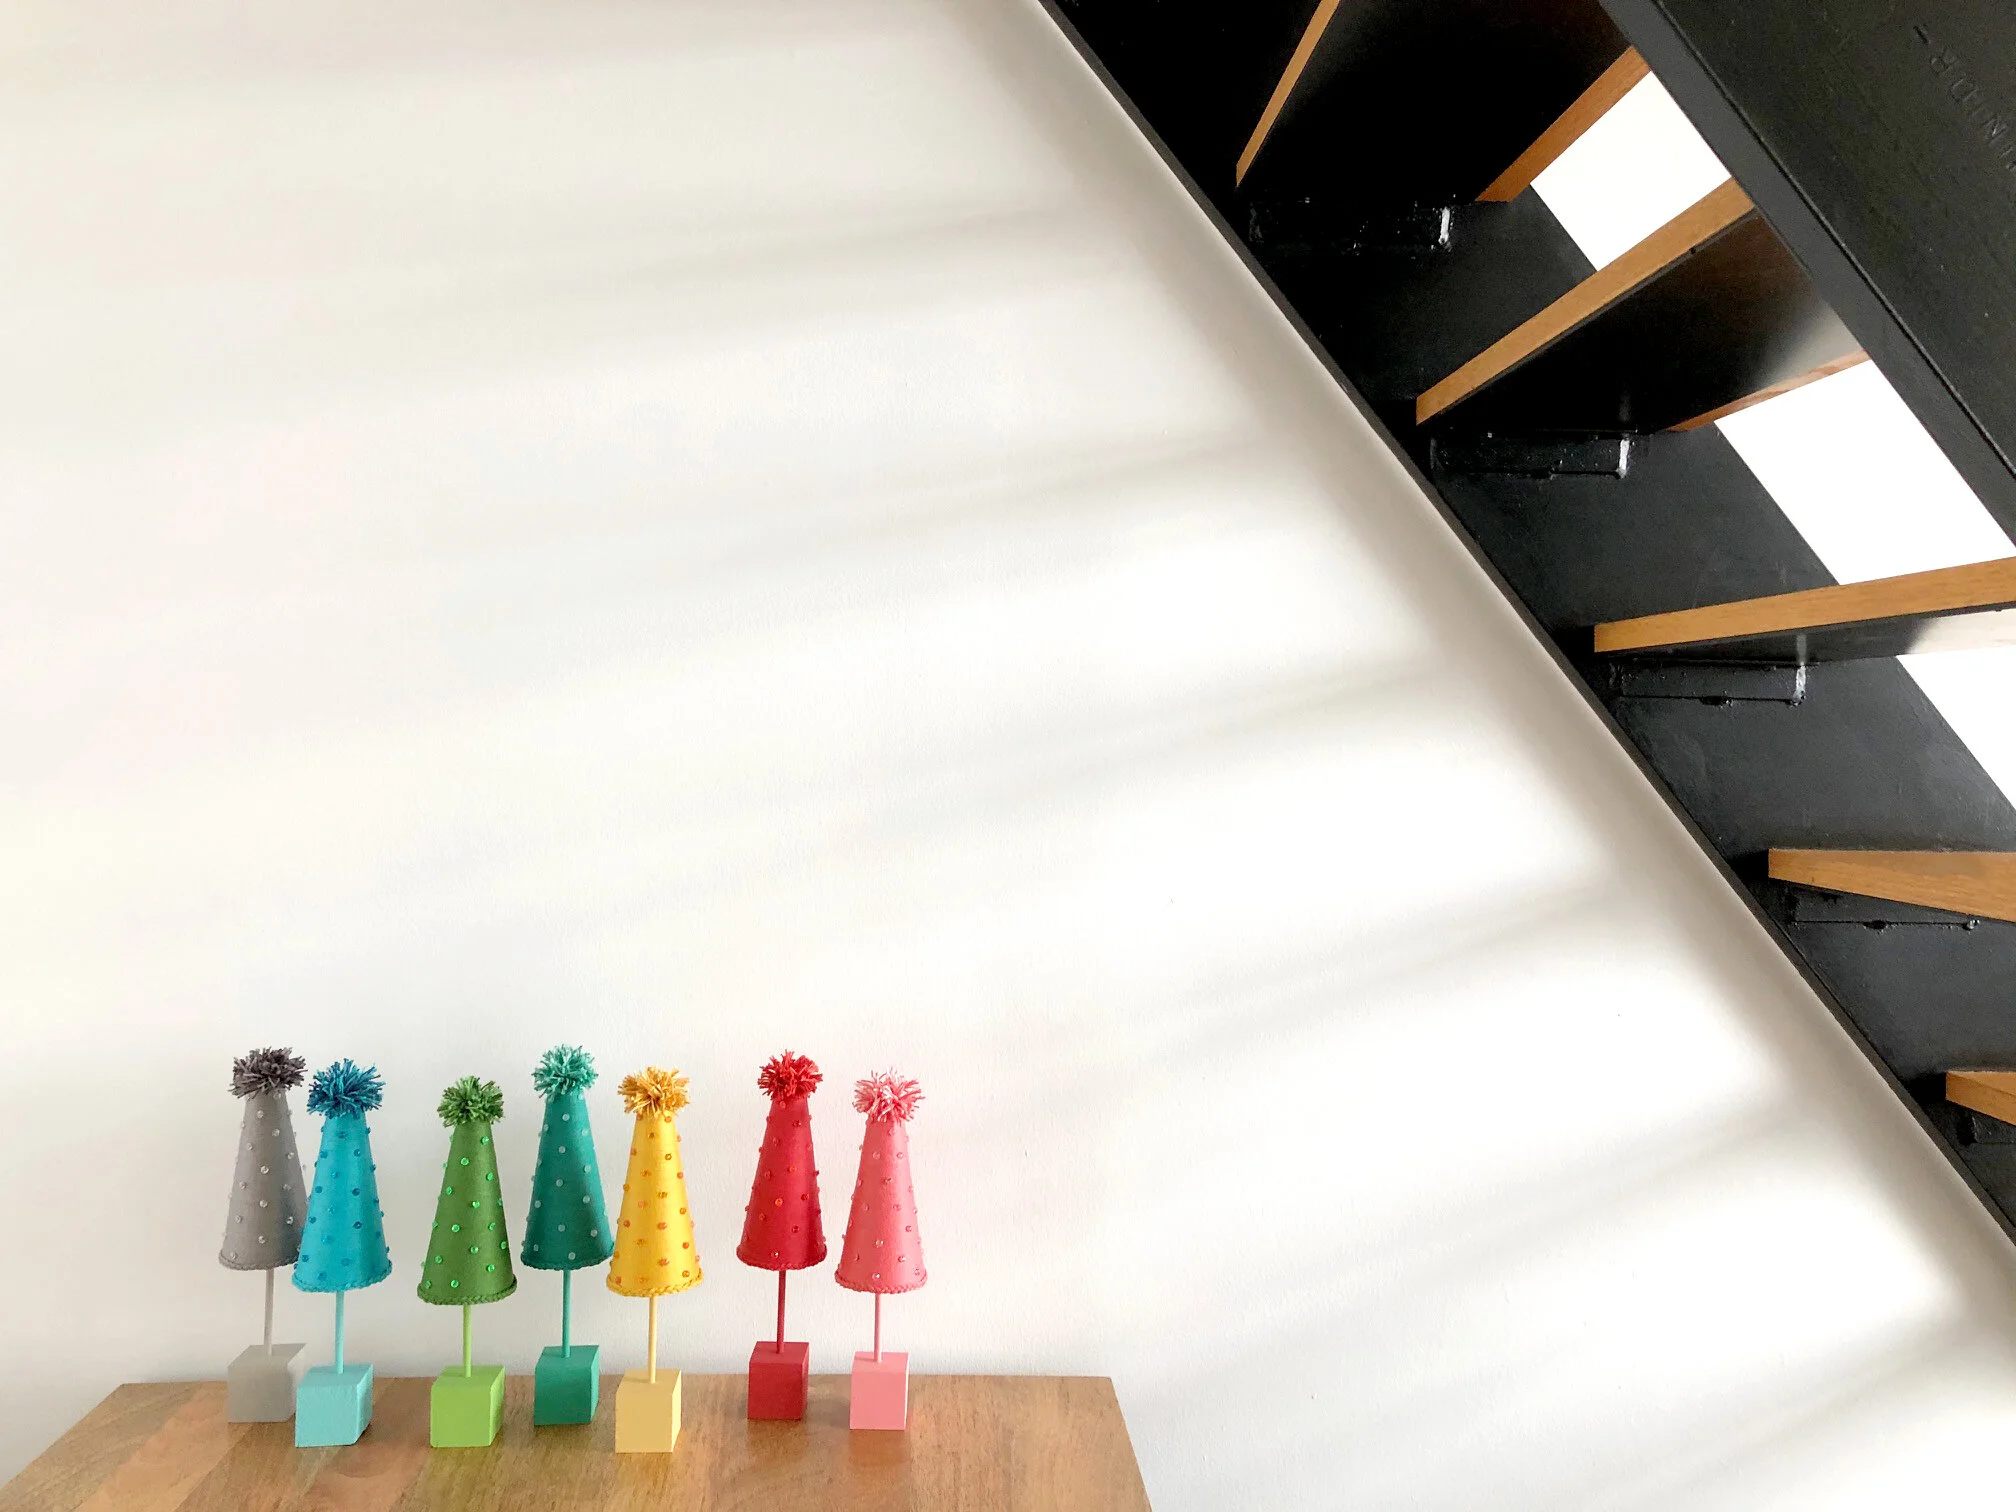
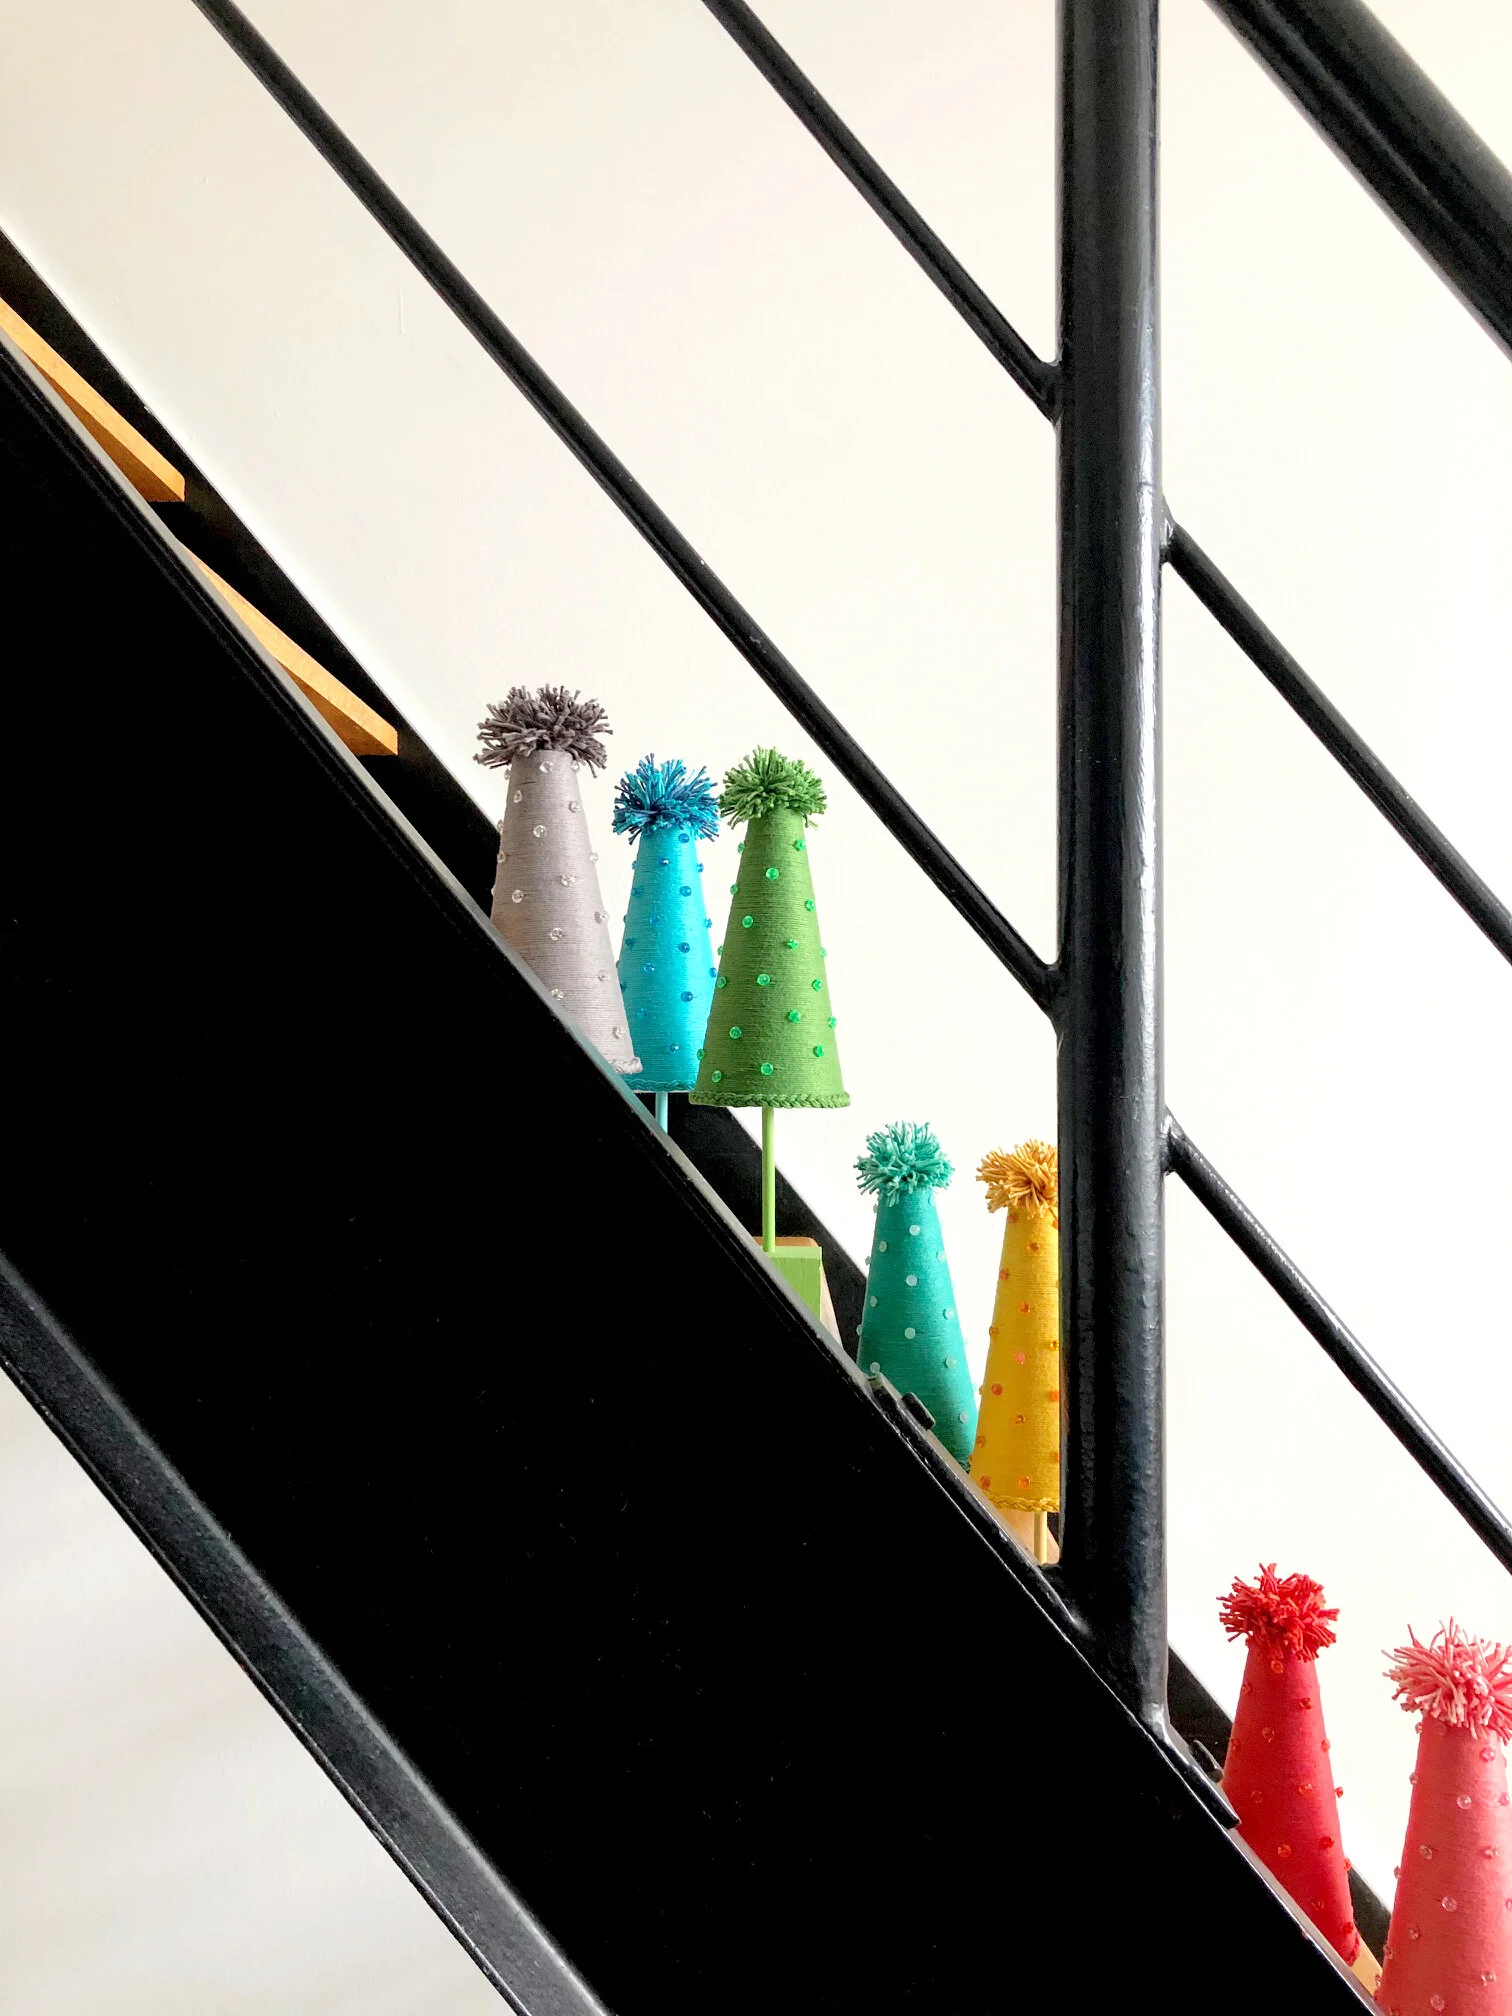
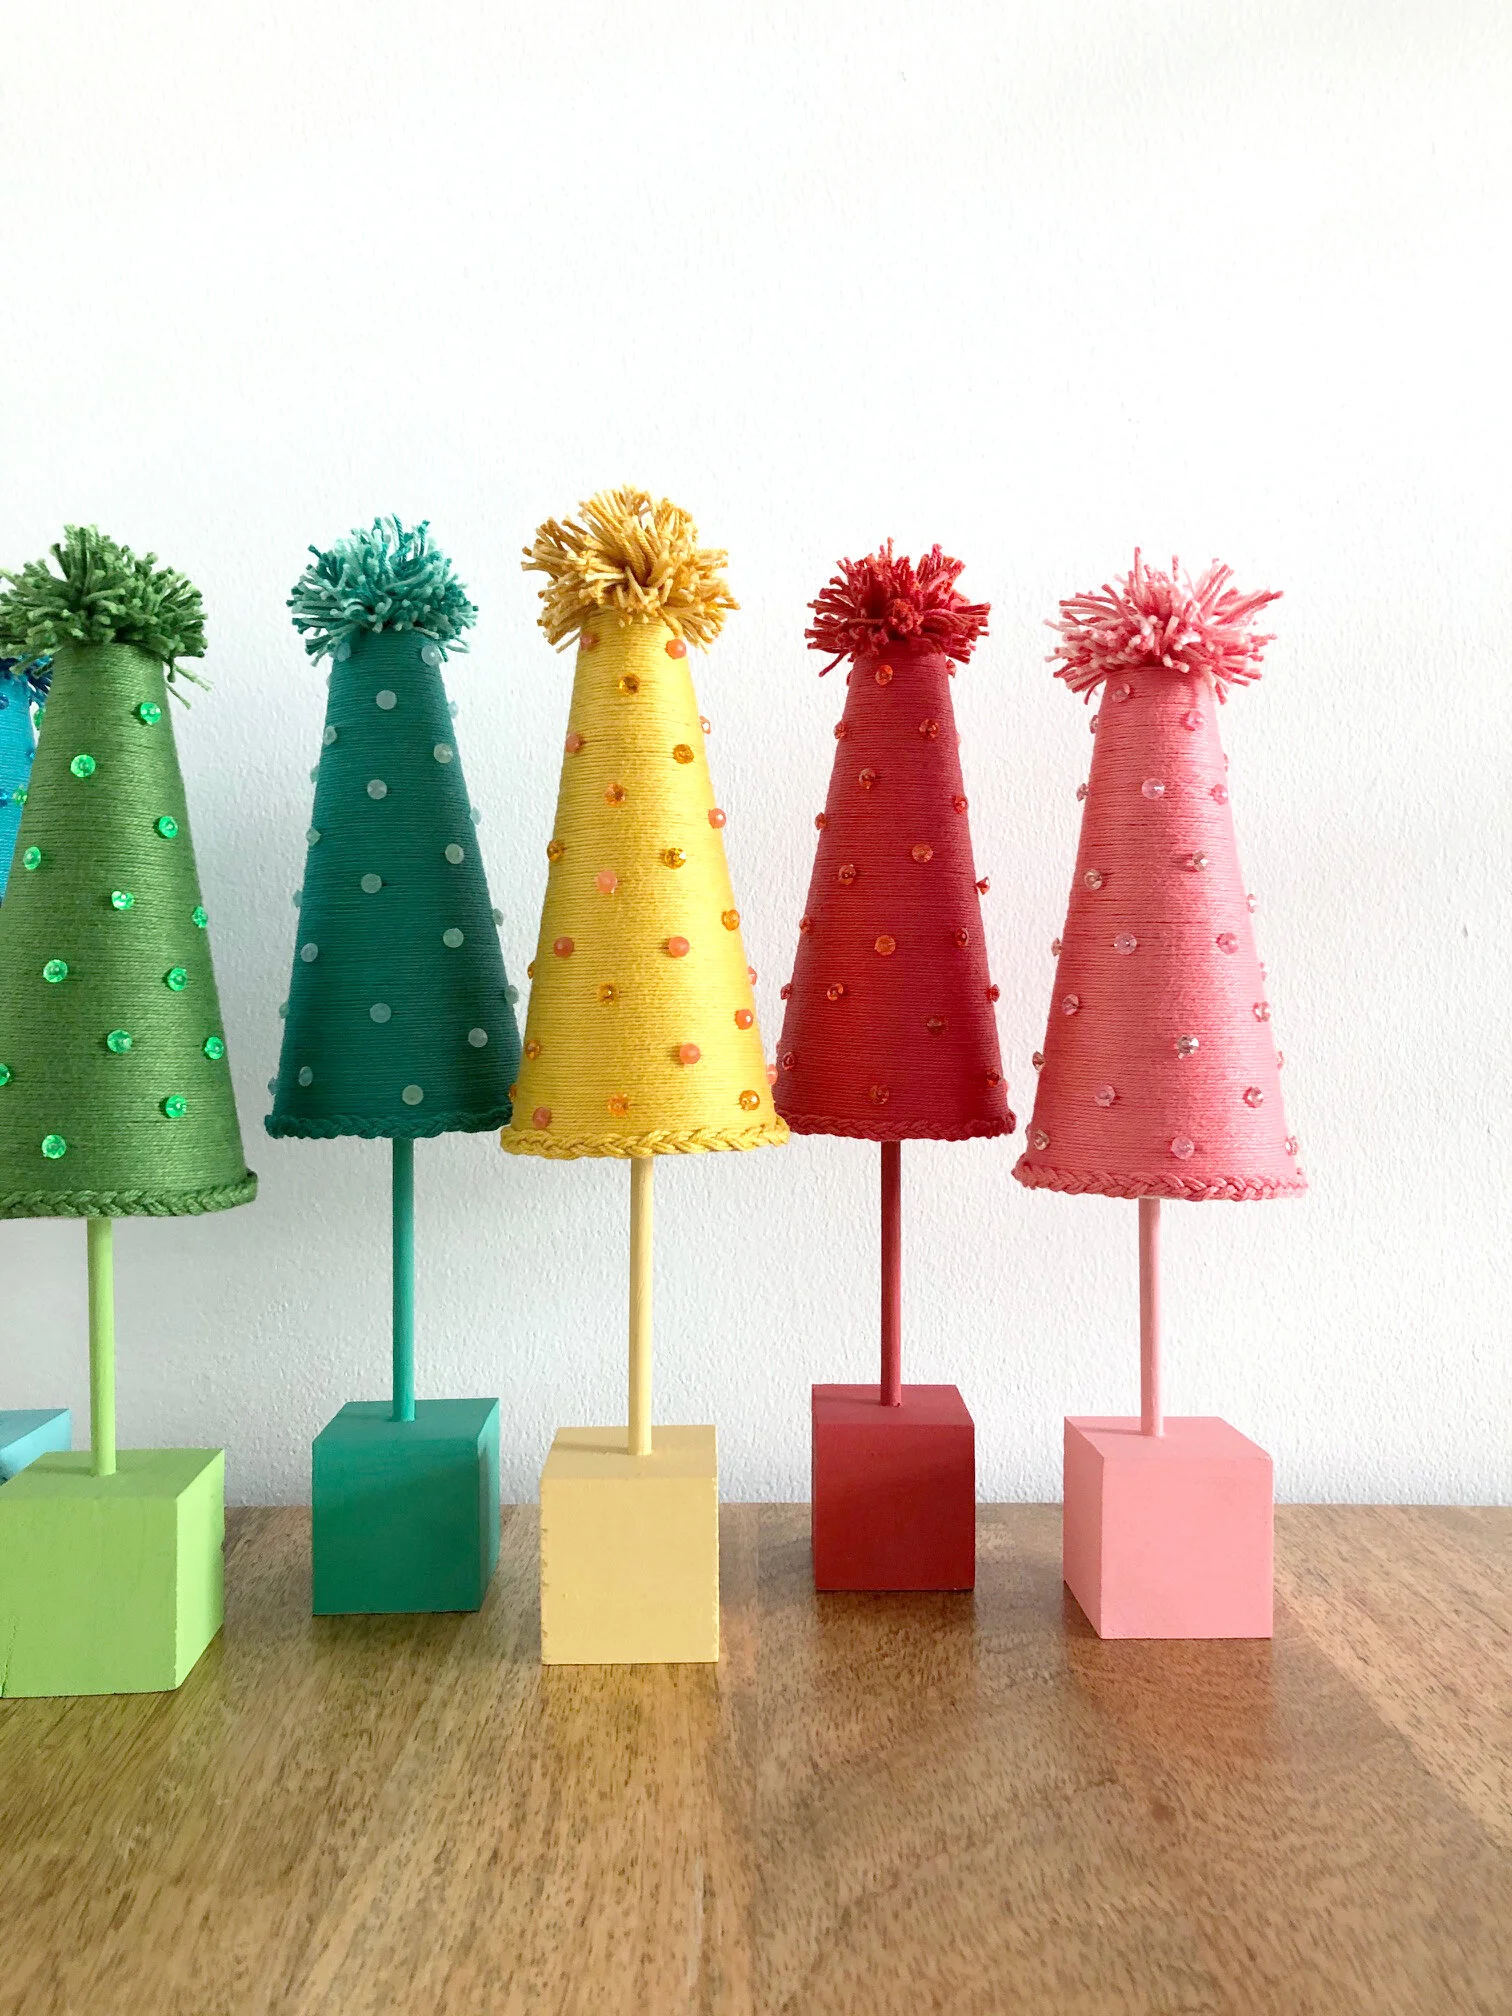
So this year, with the help of Jack and his dad, Ralph, we created these adorable rainbow trees.
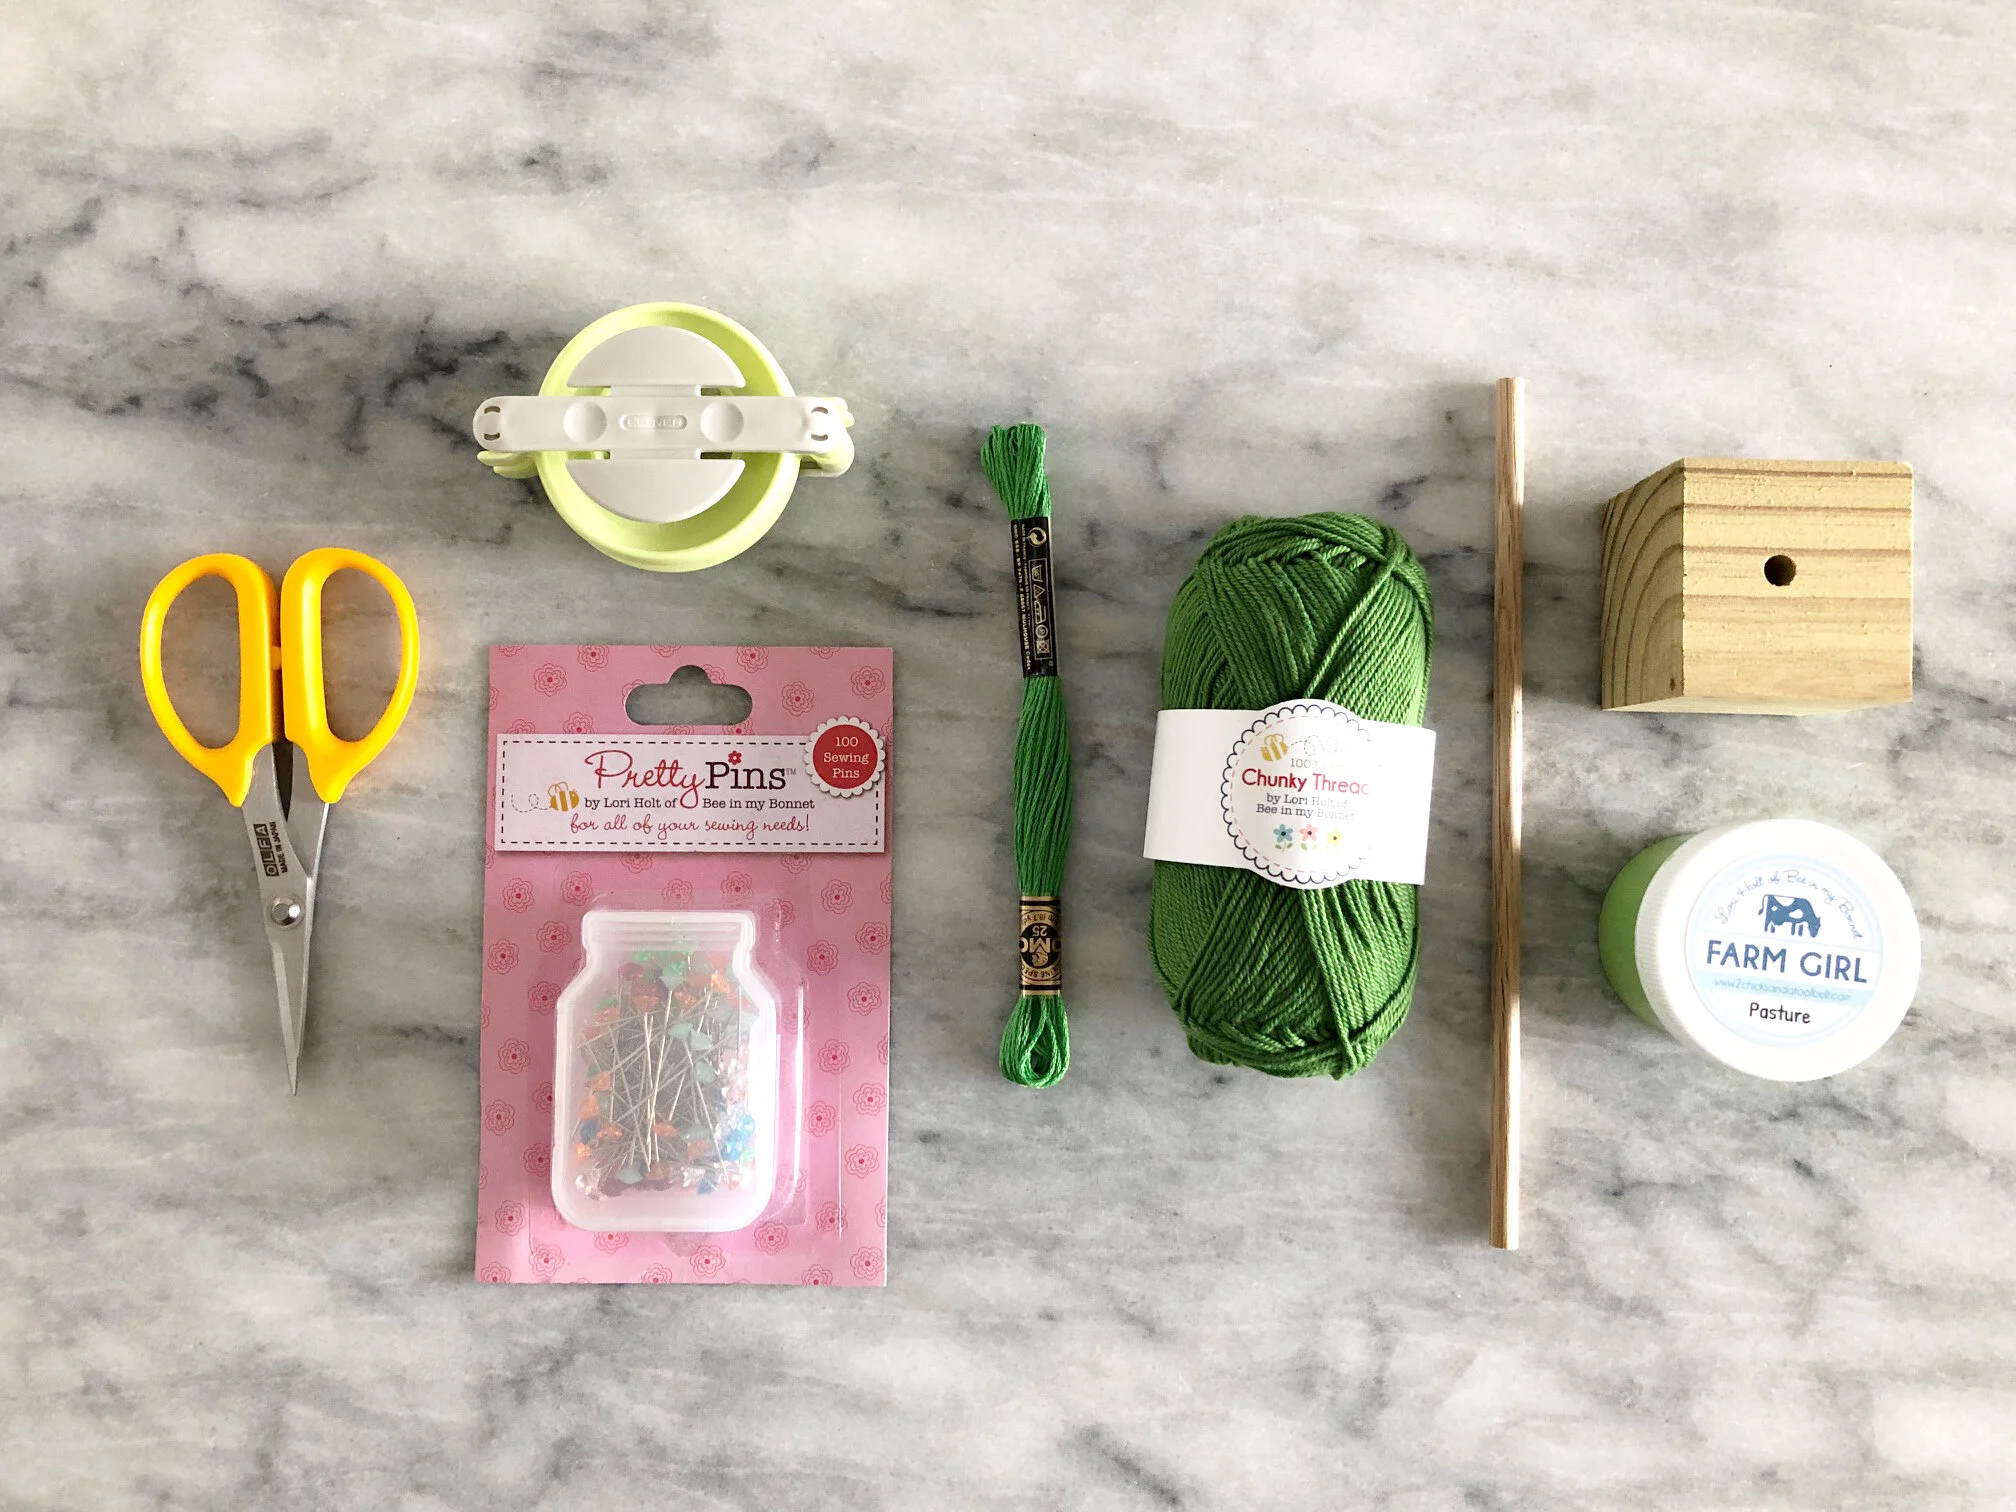
Here’s the supplies you’ll need for this weekend project:
Styrofoam Tree
Flat Head Sewing Pins
Sewing Pretty Pins (3 boxes)
2’’ square wood base
1/4’’ dowel rod
Wire Cutter
Scissors
Paint Brush
Ralph cut and pre-drilled the 2’’ square wood bases and the dowel rods for me. Check online or at your local home improvement store to see if they can cut the wood bases and dowel rods for you. The tree will be still be cute with or without the wood bases!
Here’s the instructions to make these rainbow trees:
Paint the wood base and dowel rod.
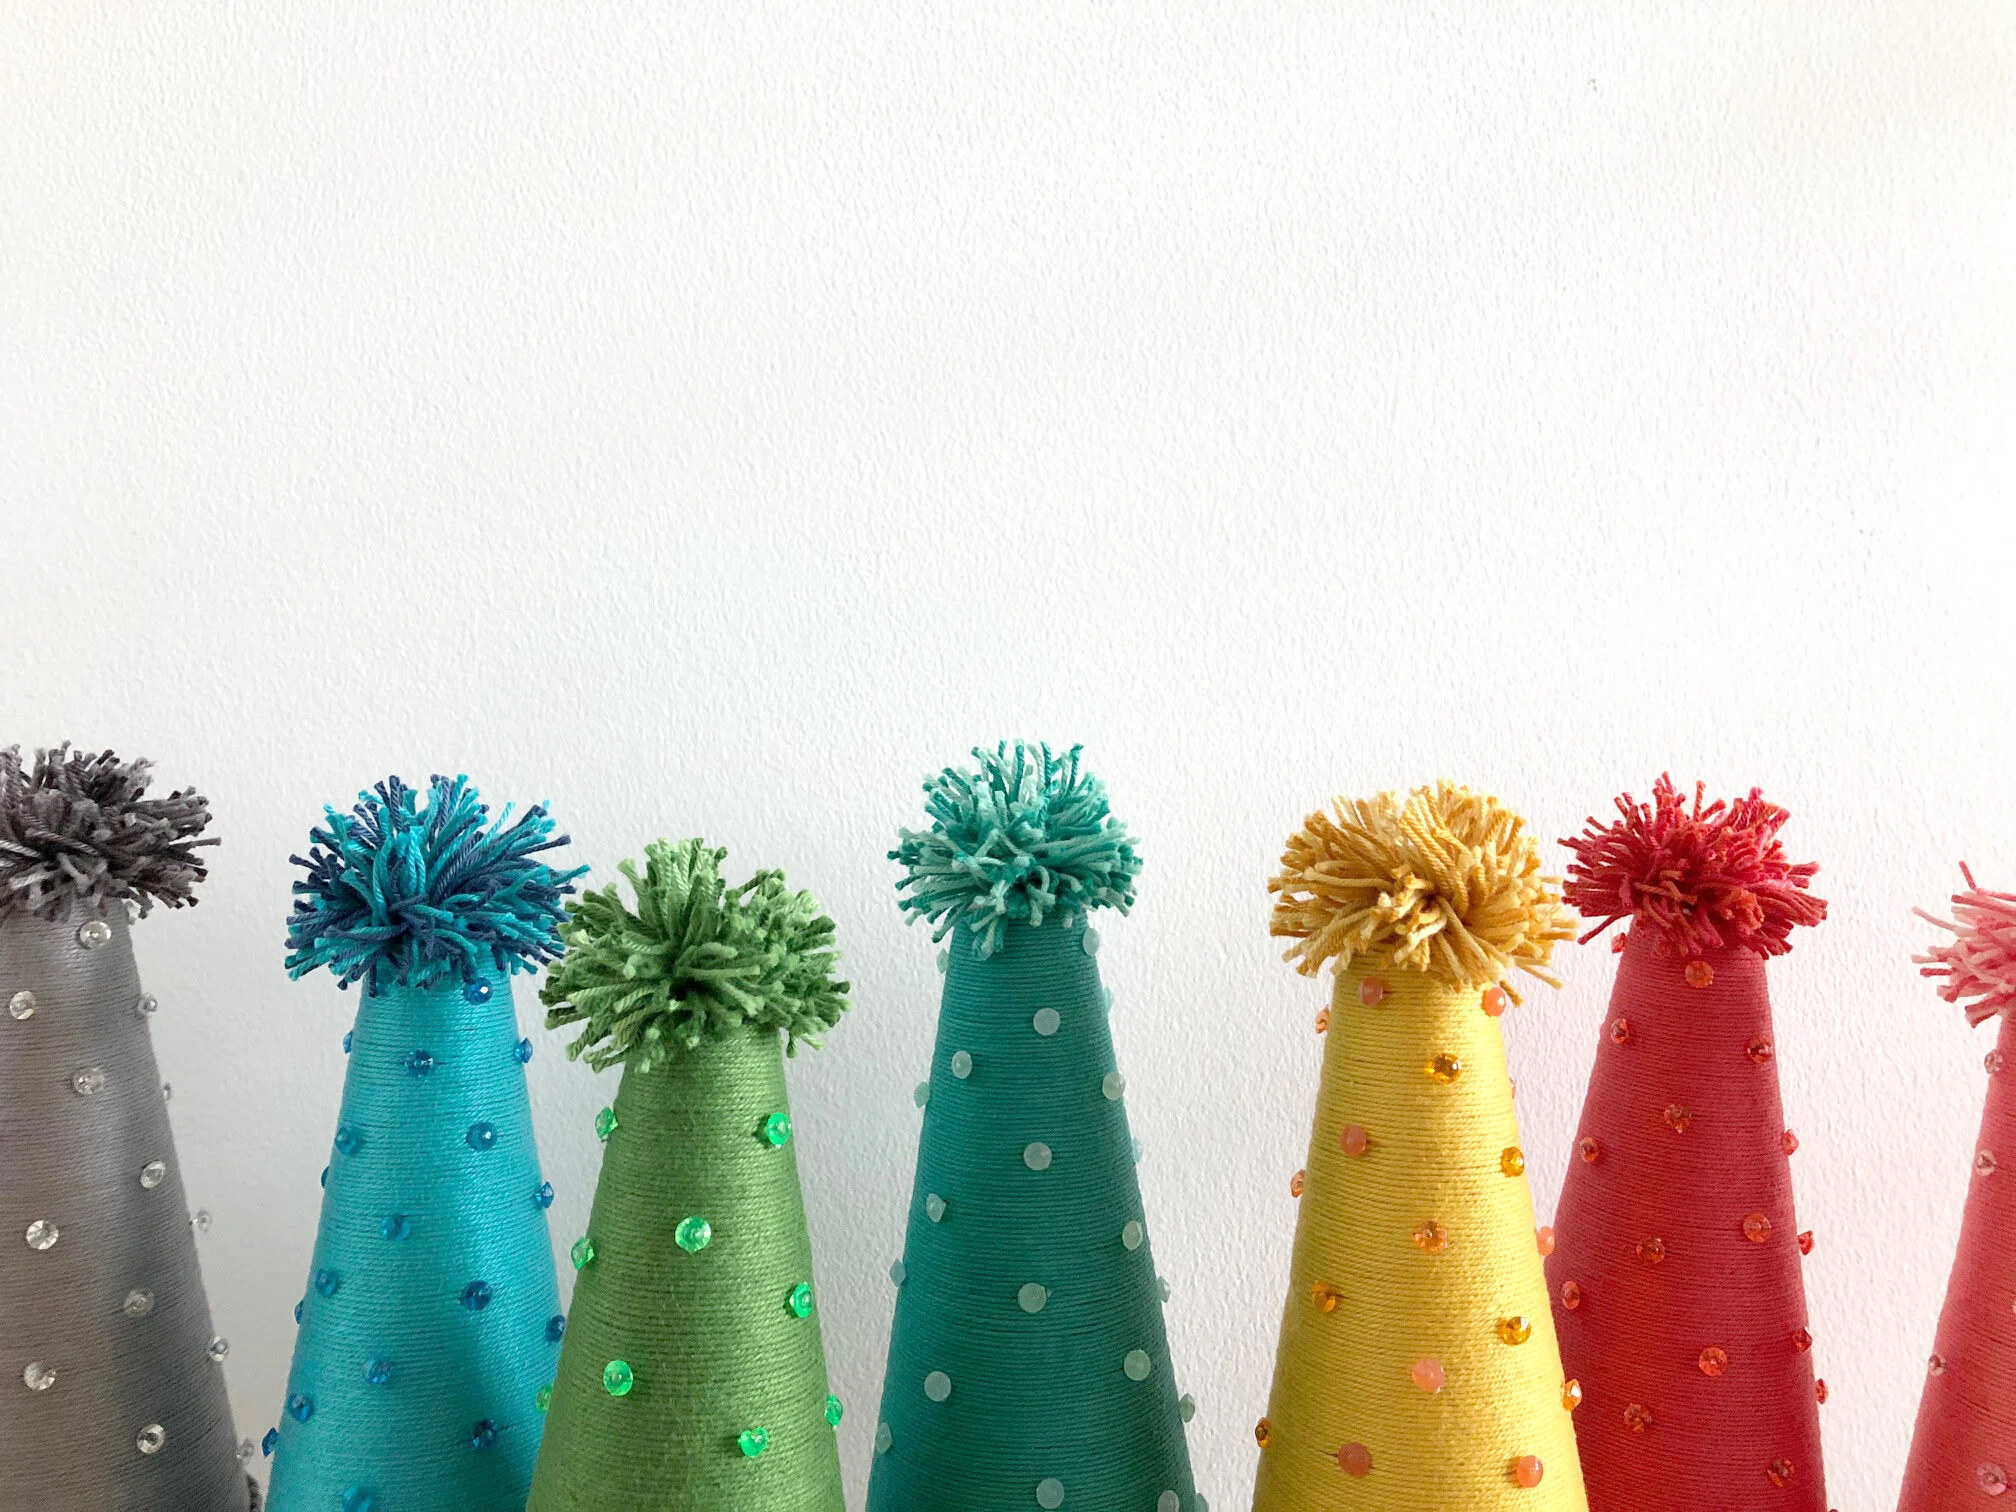
Using the 2 1/2’’ Pom-Pom Maker, make the pom-pom.
We used one side of the pom-on maker, wrapping the chunky thread 60 times. Use embroidery floss to secure the pom-pom together.
Place a flat head sewing pin at the start of the chunky thread and secure it to the top of the tree.
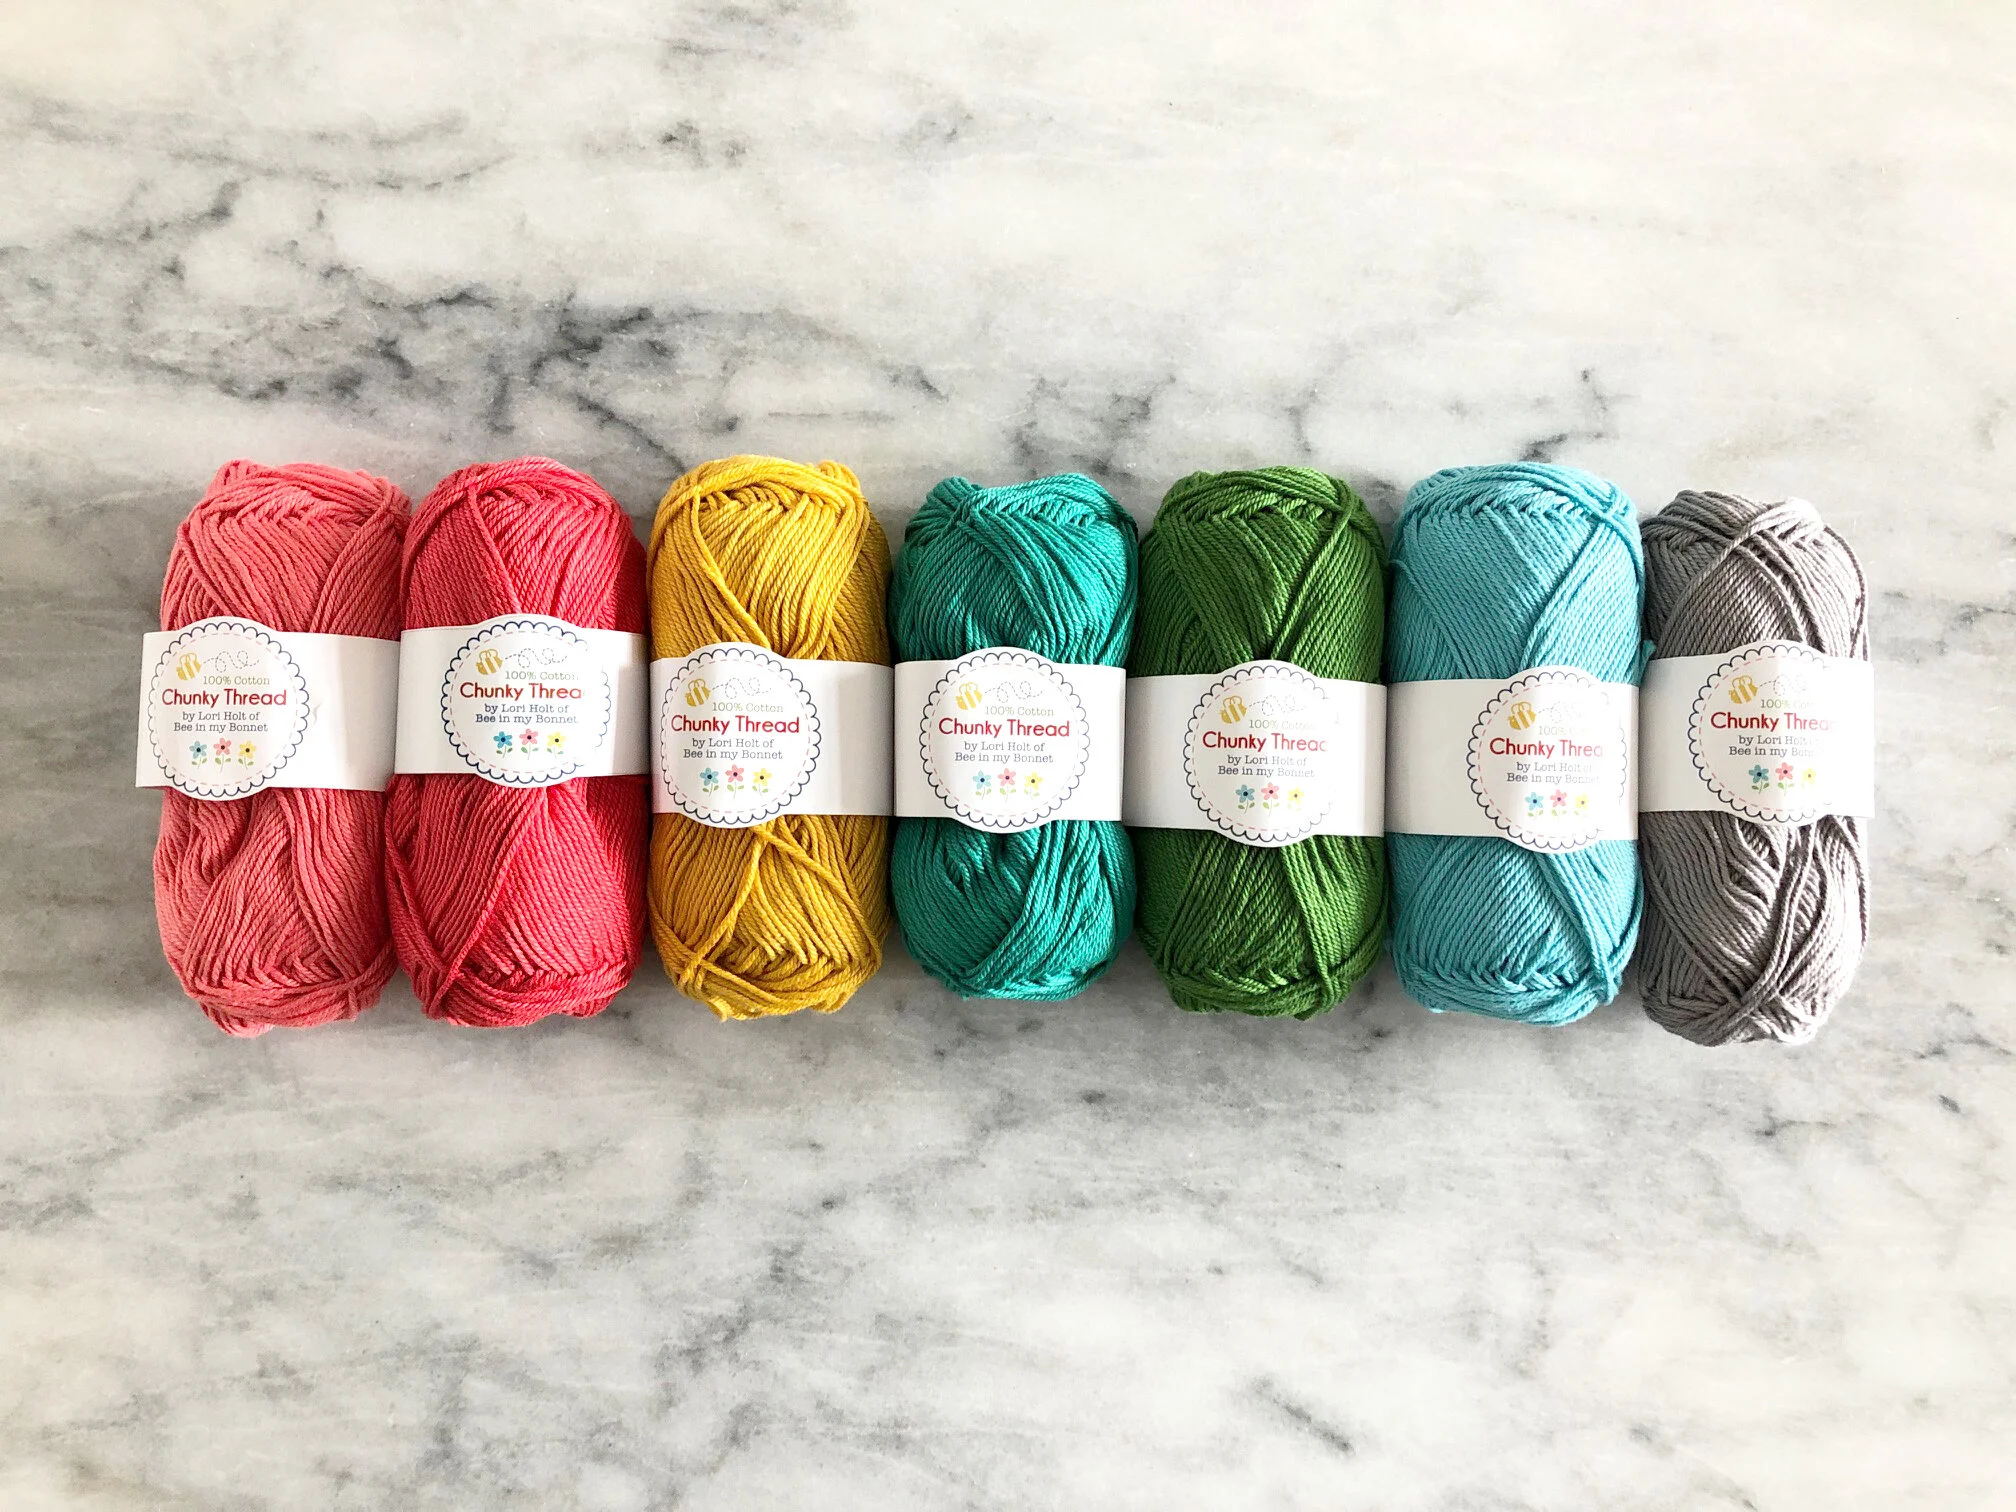
Wrap the chunky thread carefully around the tree.
When you reach the bottom, cut the chunky thread, and secure with a flat head sewing pin.
Braid six strands of chunky thread.
Wrap the finished braid around the base of the tree. Secure with a flat head sewing pin.
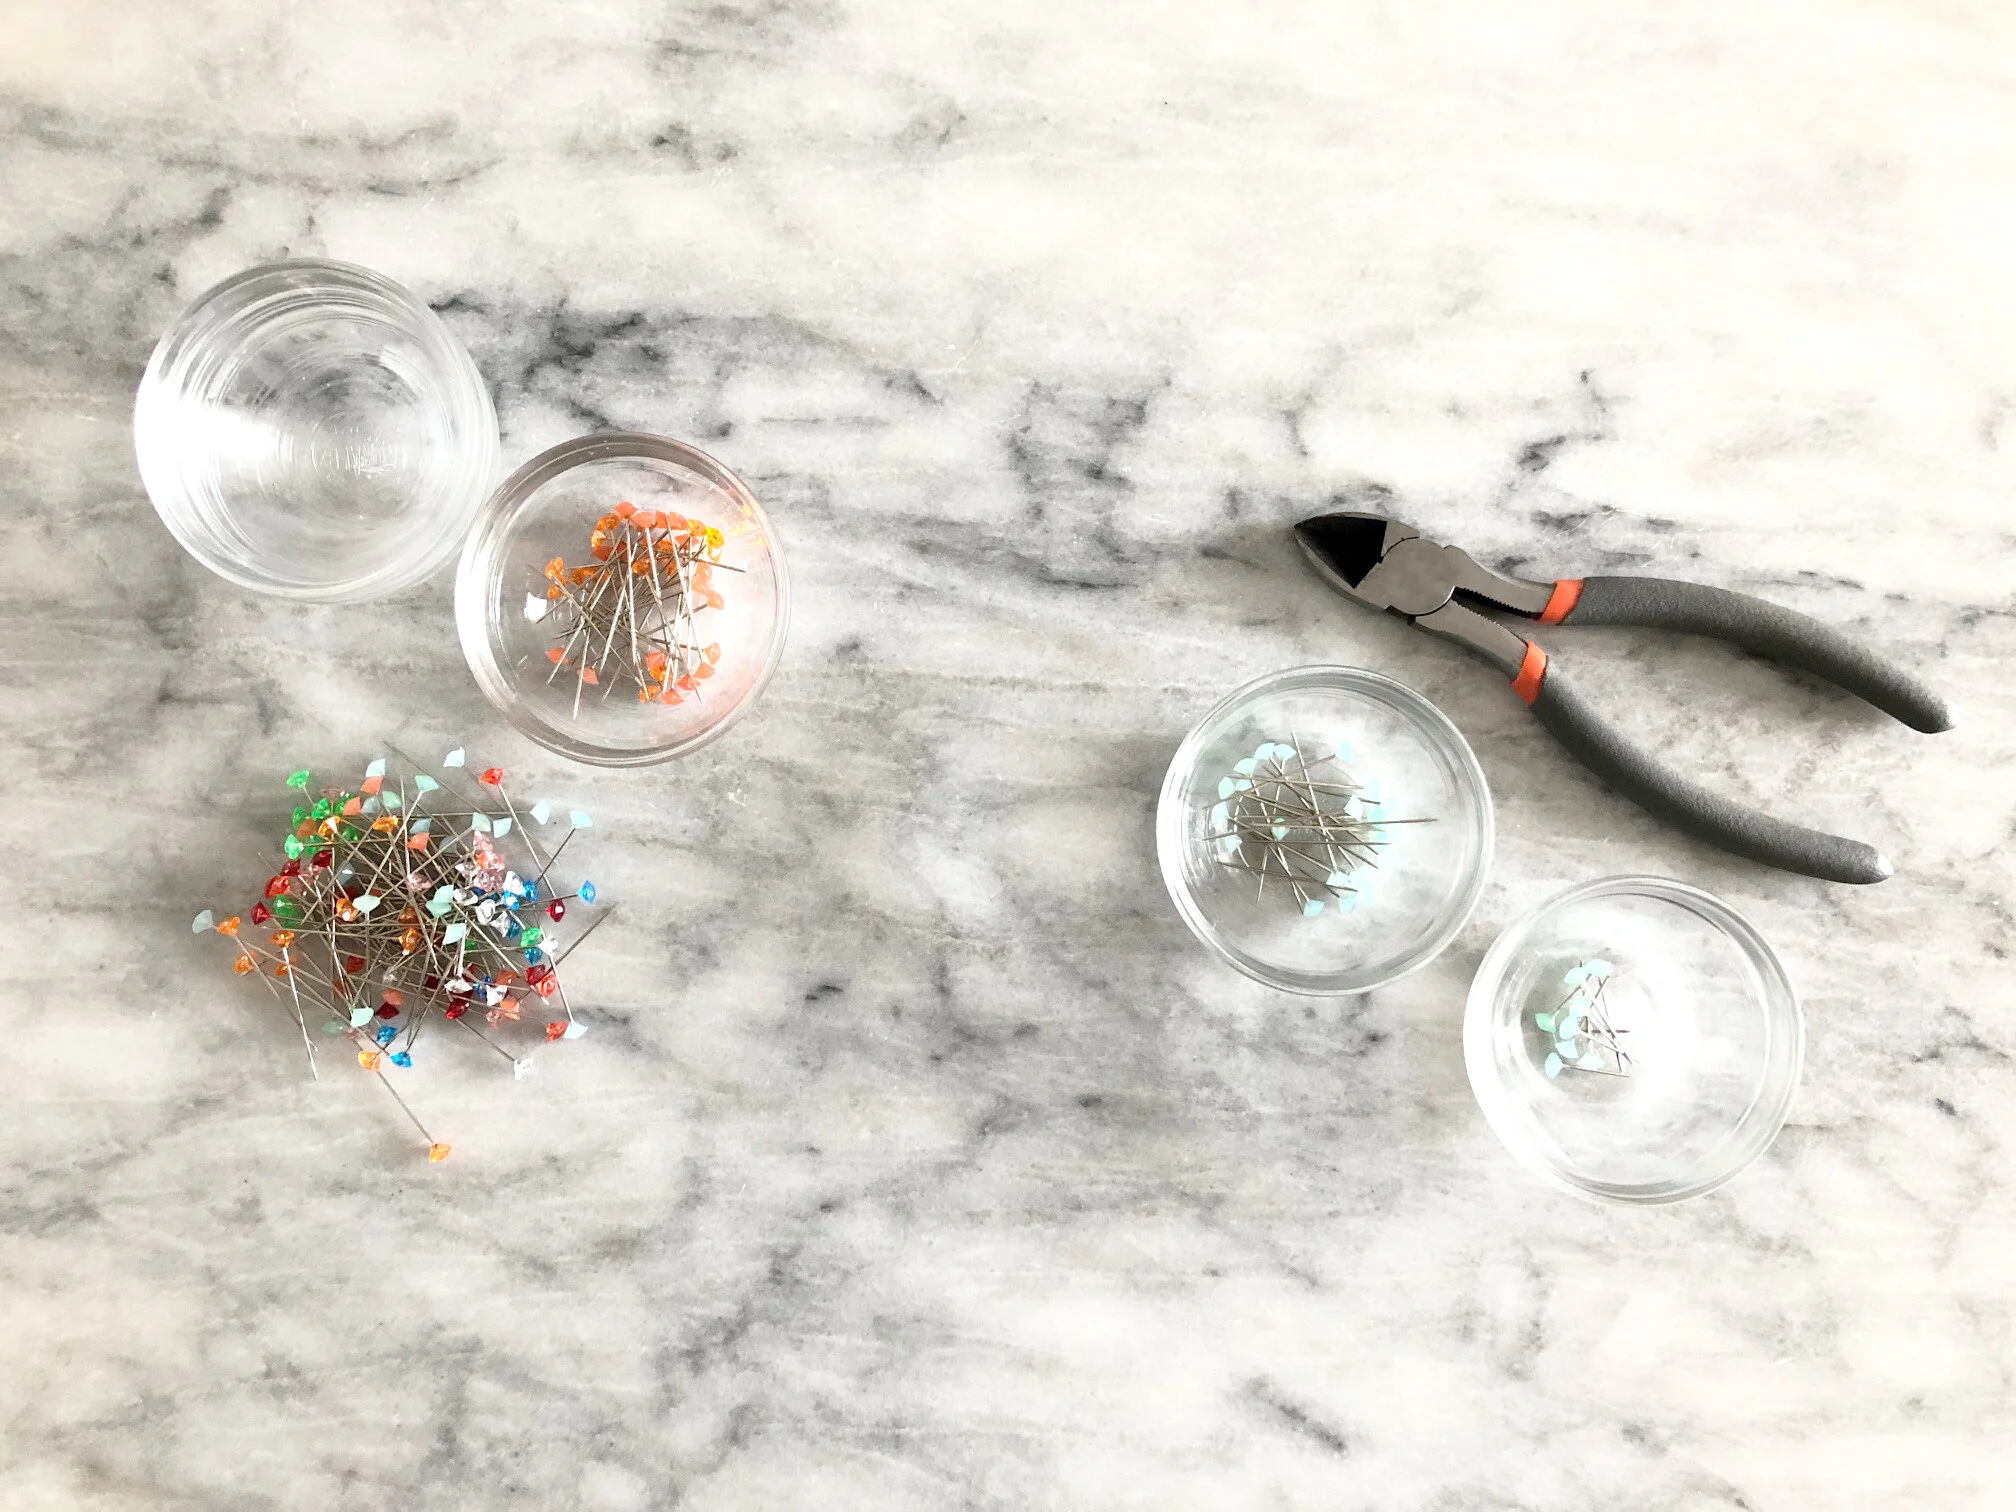
Separate the sewing pretty pins by color.
Using the wire cutter, trim a 1/4’’ section away from the bottom of the sewing pretty pins.
Wear safety goggles and trim the pins in a large bowl or plastic bag. Safety first!
Place the trimmed sewing pretty pins randomly around the finished tree.
Using a non-trimmed sewing pretty pin, secure the pom-pom to the top of tree.
Carefully push the dowel rod through the bottom of the tree.
Ta-da! Repeat the steps above to make a forest of rainbow trees. Aren’t they the cutest?
I hope you enjoyed this holiday decor project as much as I enjoyed making it. The possibilities are endless—imagine a color blocked tree. Yasss!
What are you favorite projects to make during the holidays?
cut, sew, repeat…
the tattooed quilter