diy sewing room decor...
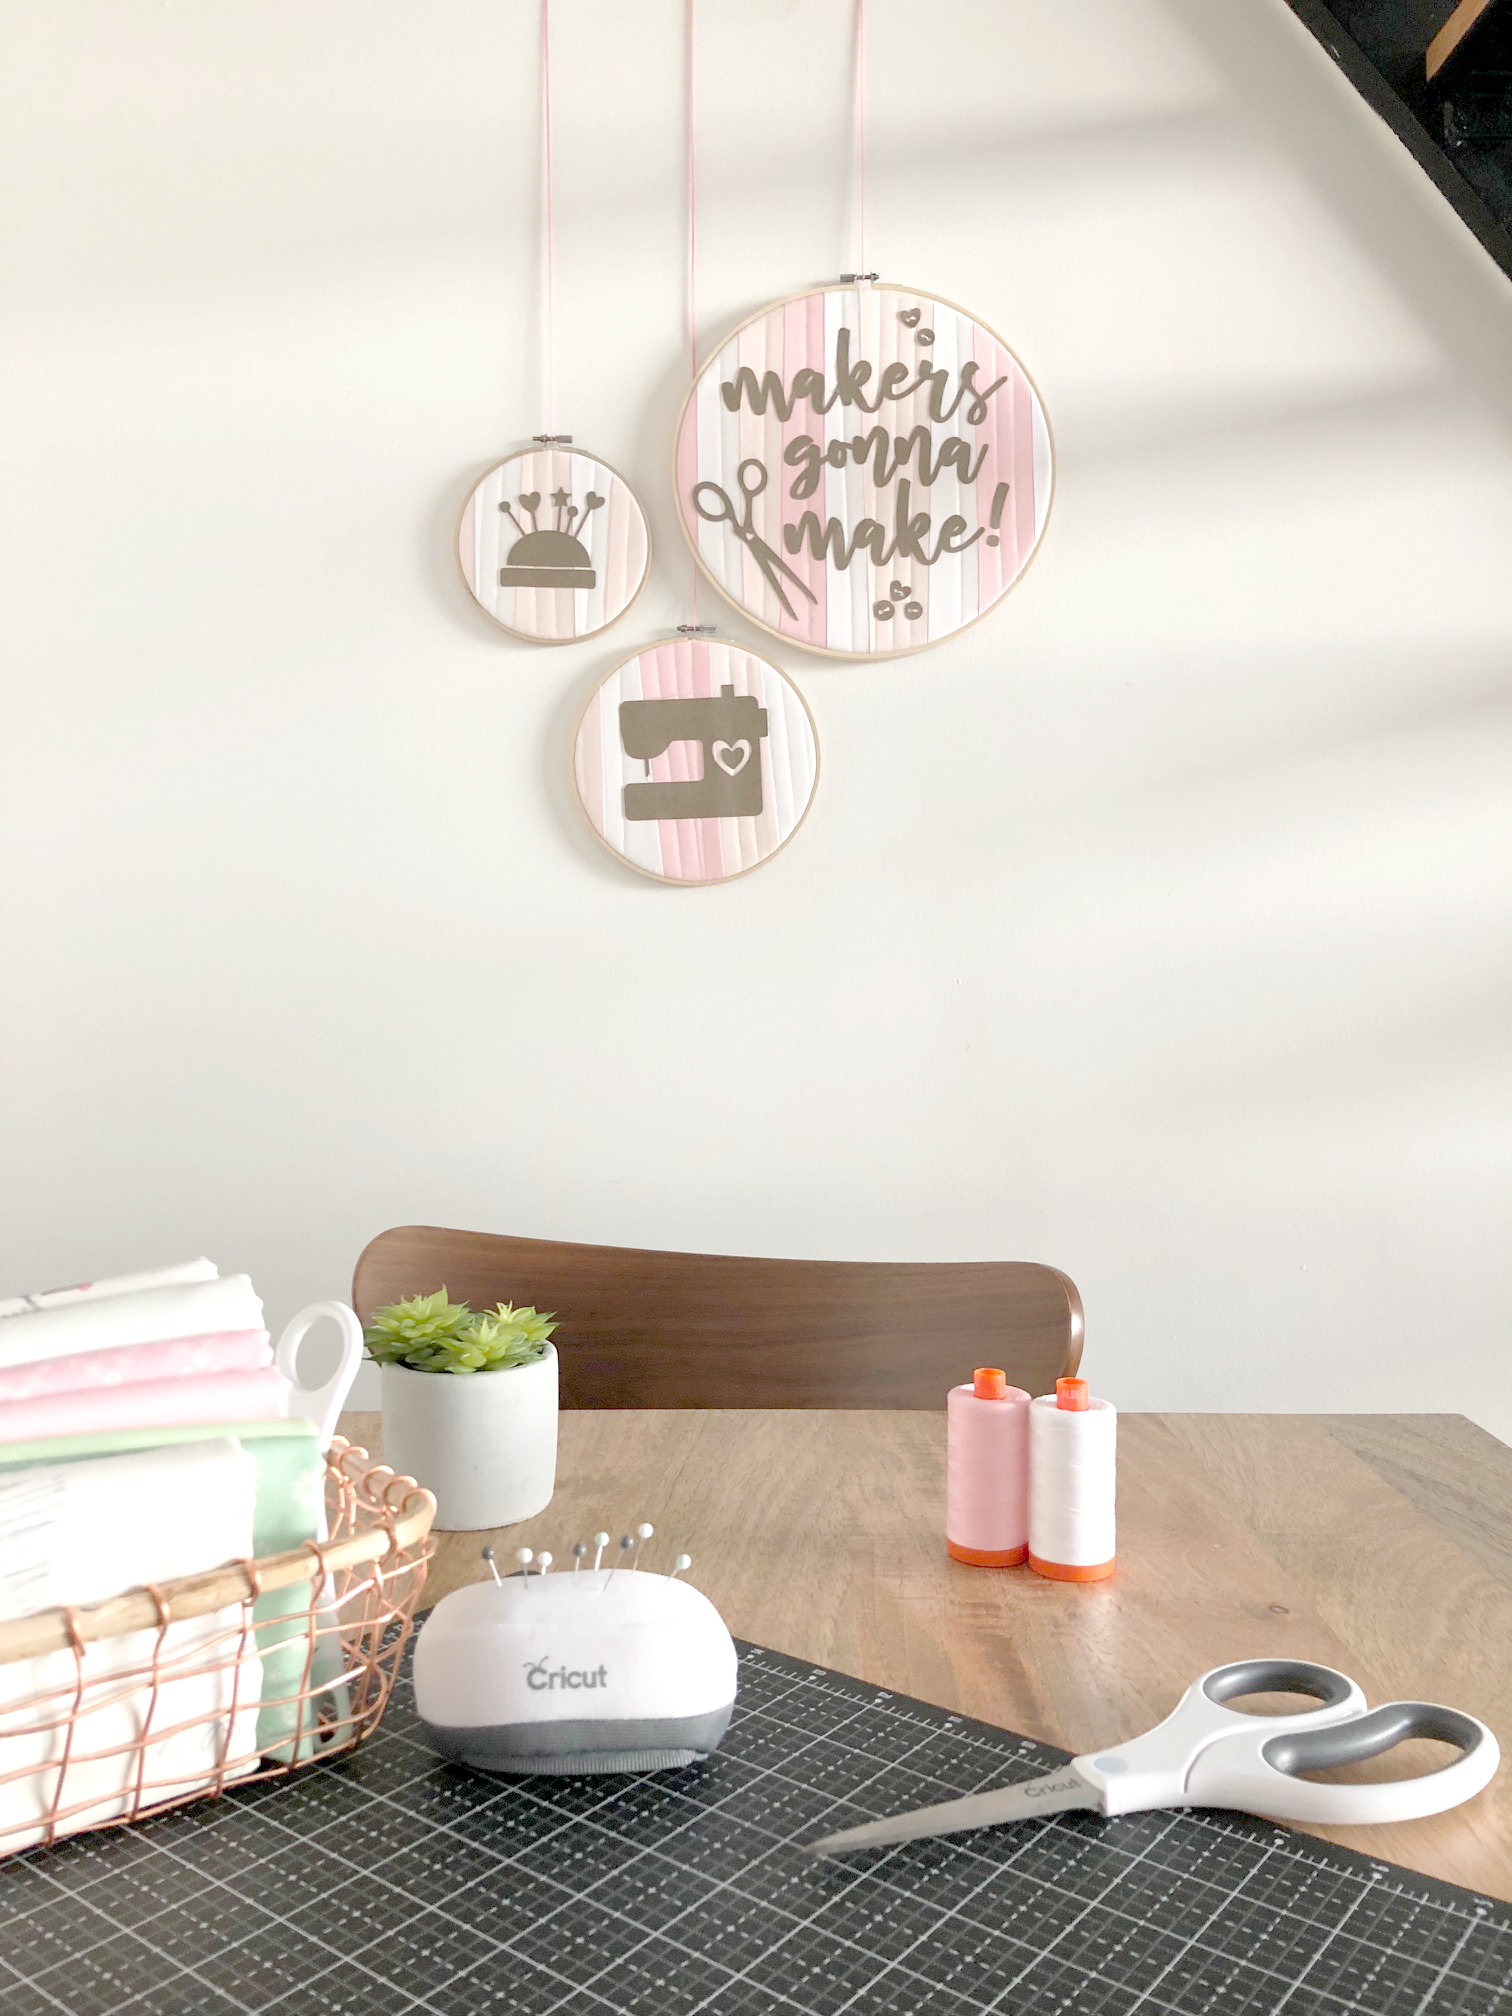


today, i'm excited to share this adorable diy sewing room decor project with you!
here's the materials you'll need for this project:
- cricut maker
- cricut maker fine-point blade
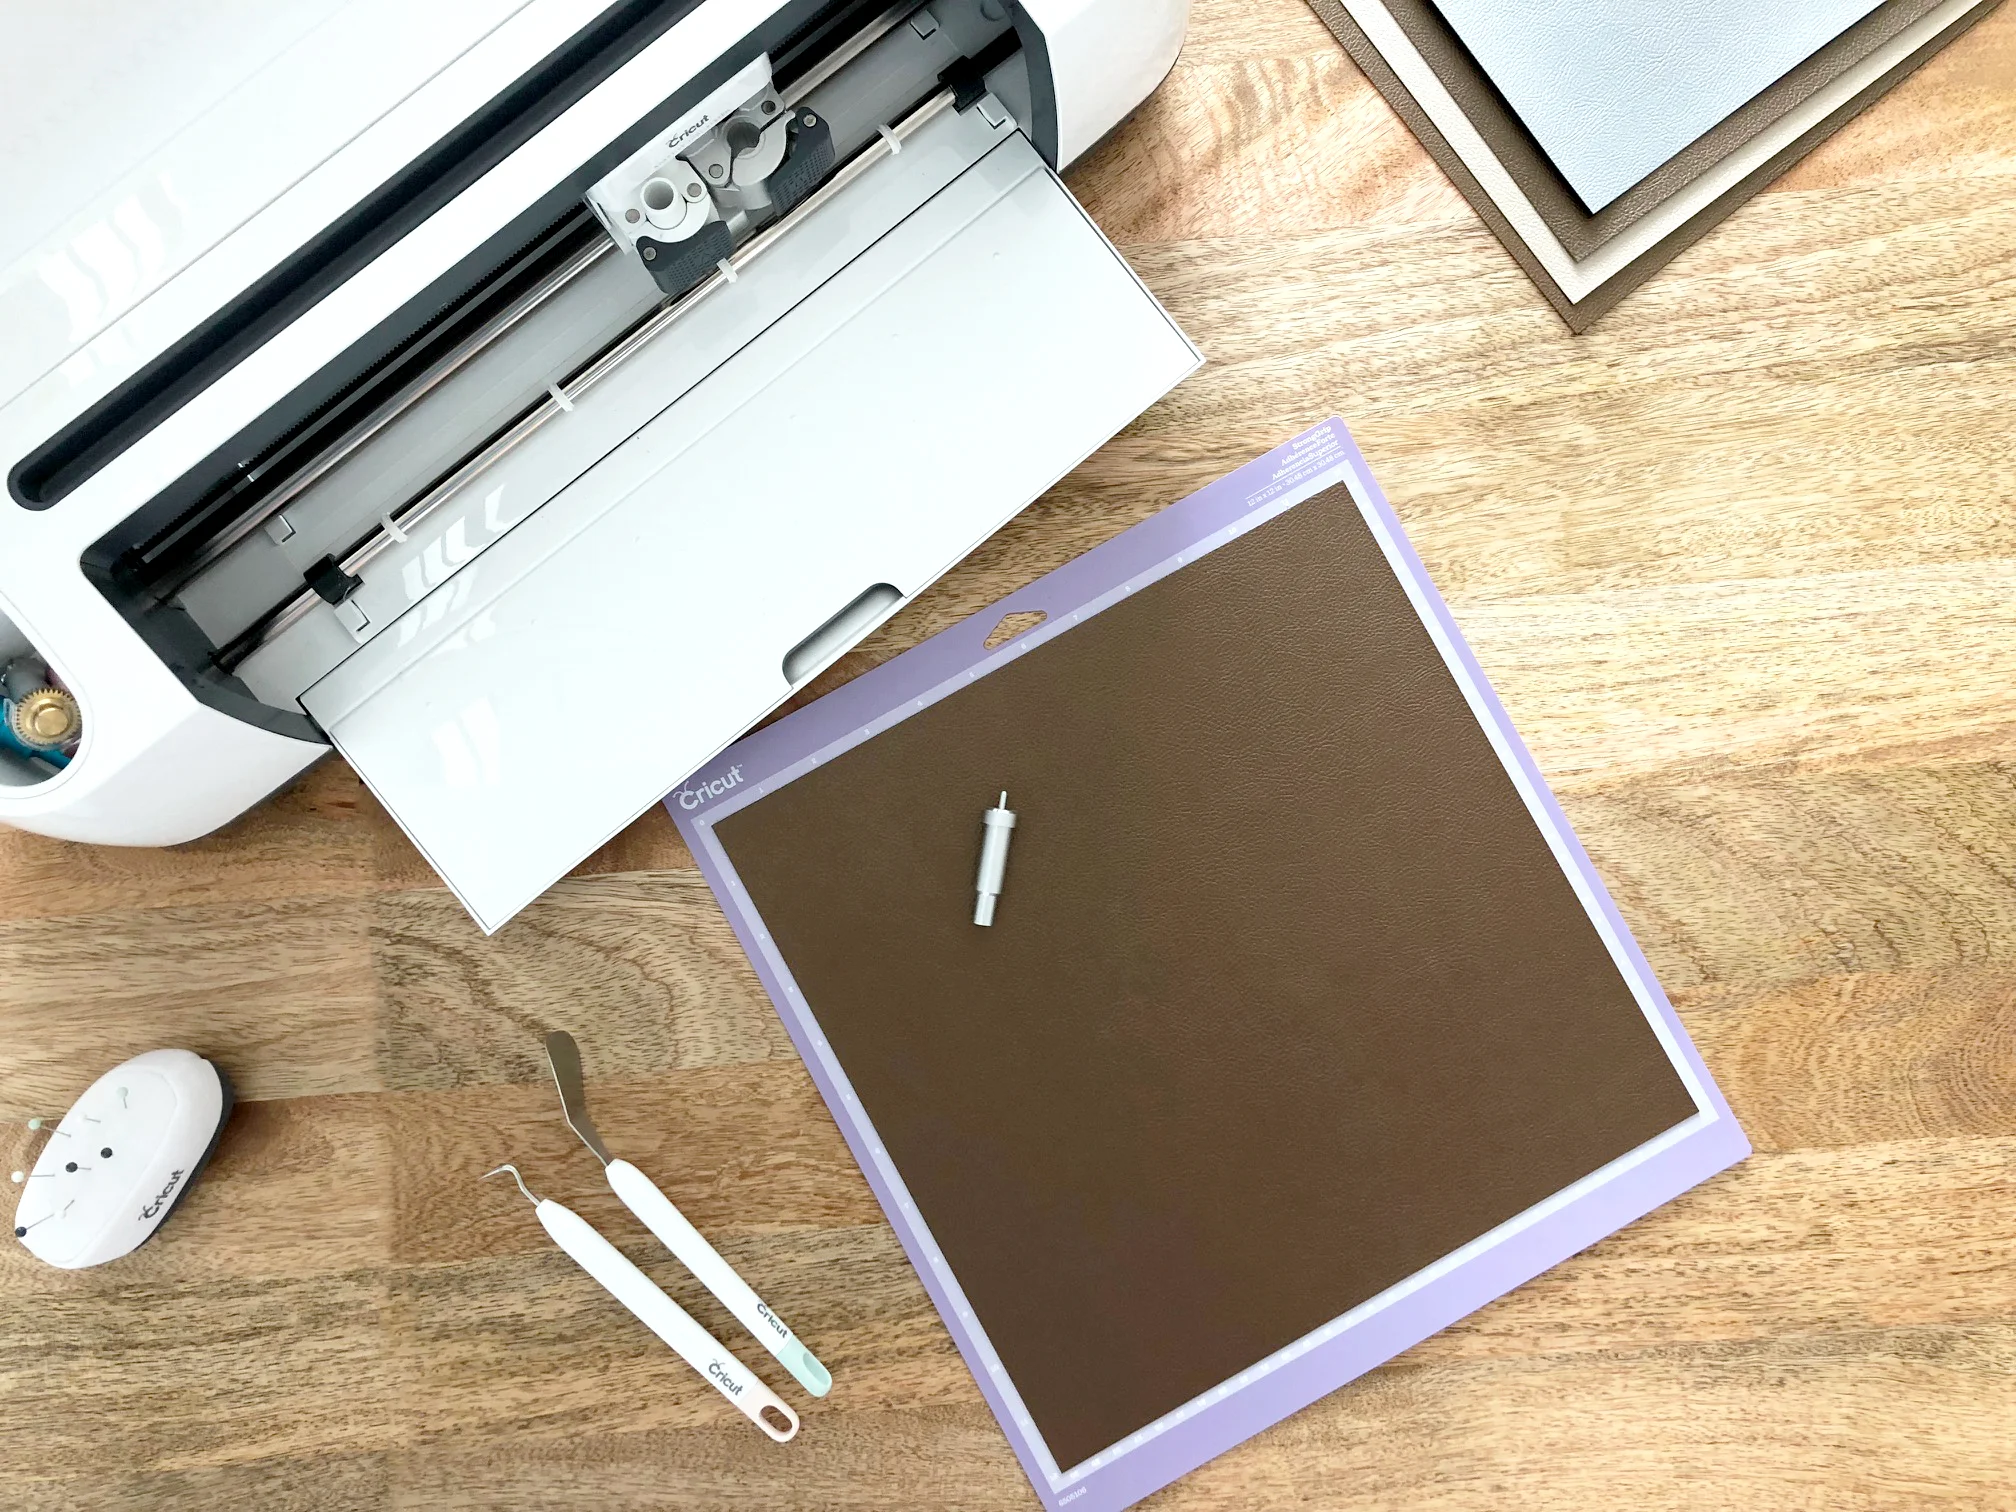
- cricut strong grip mat
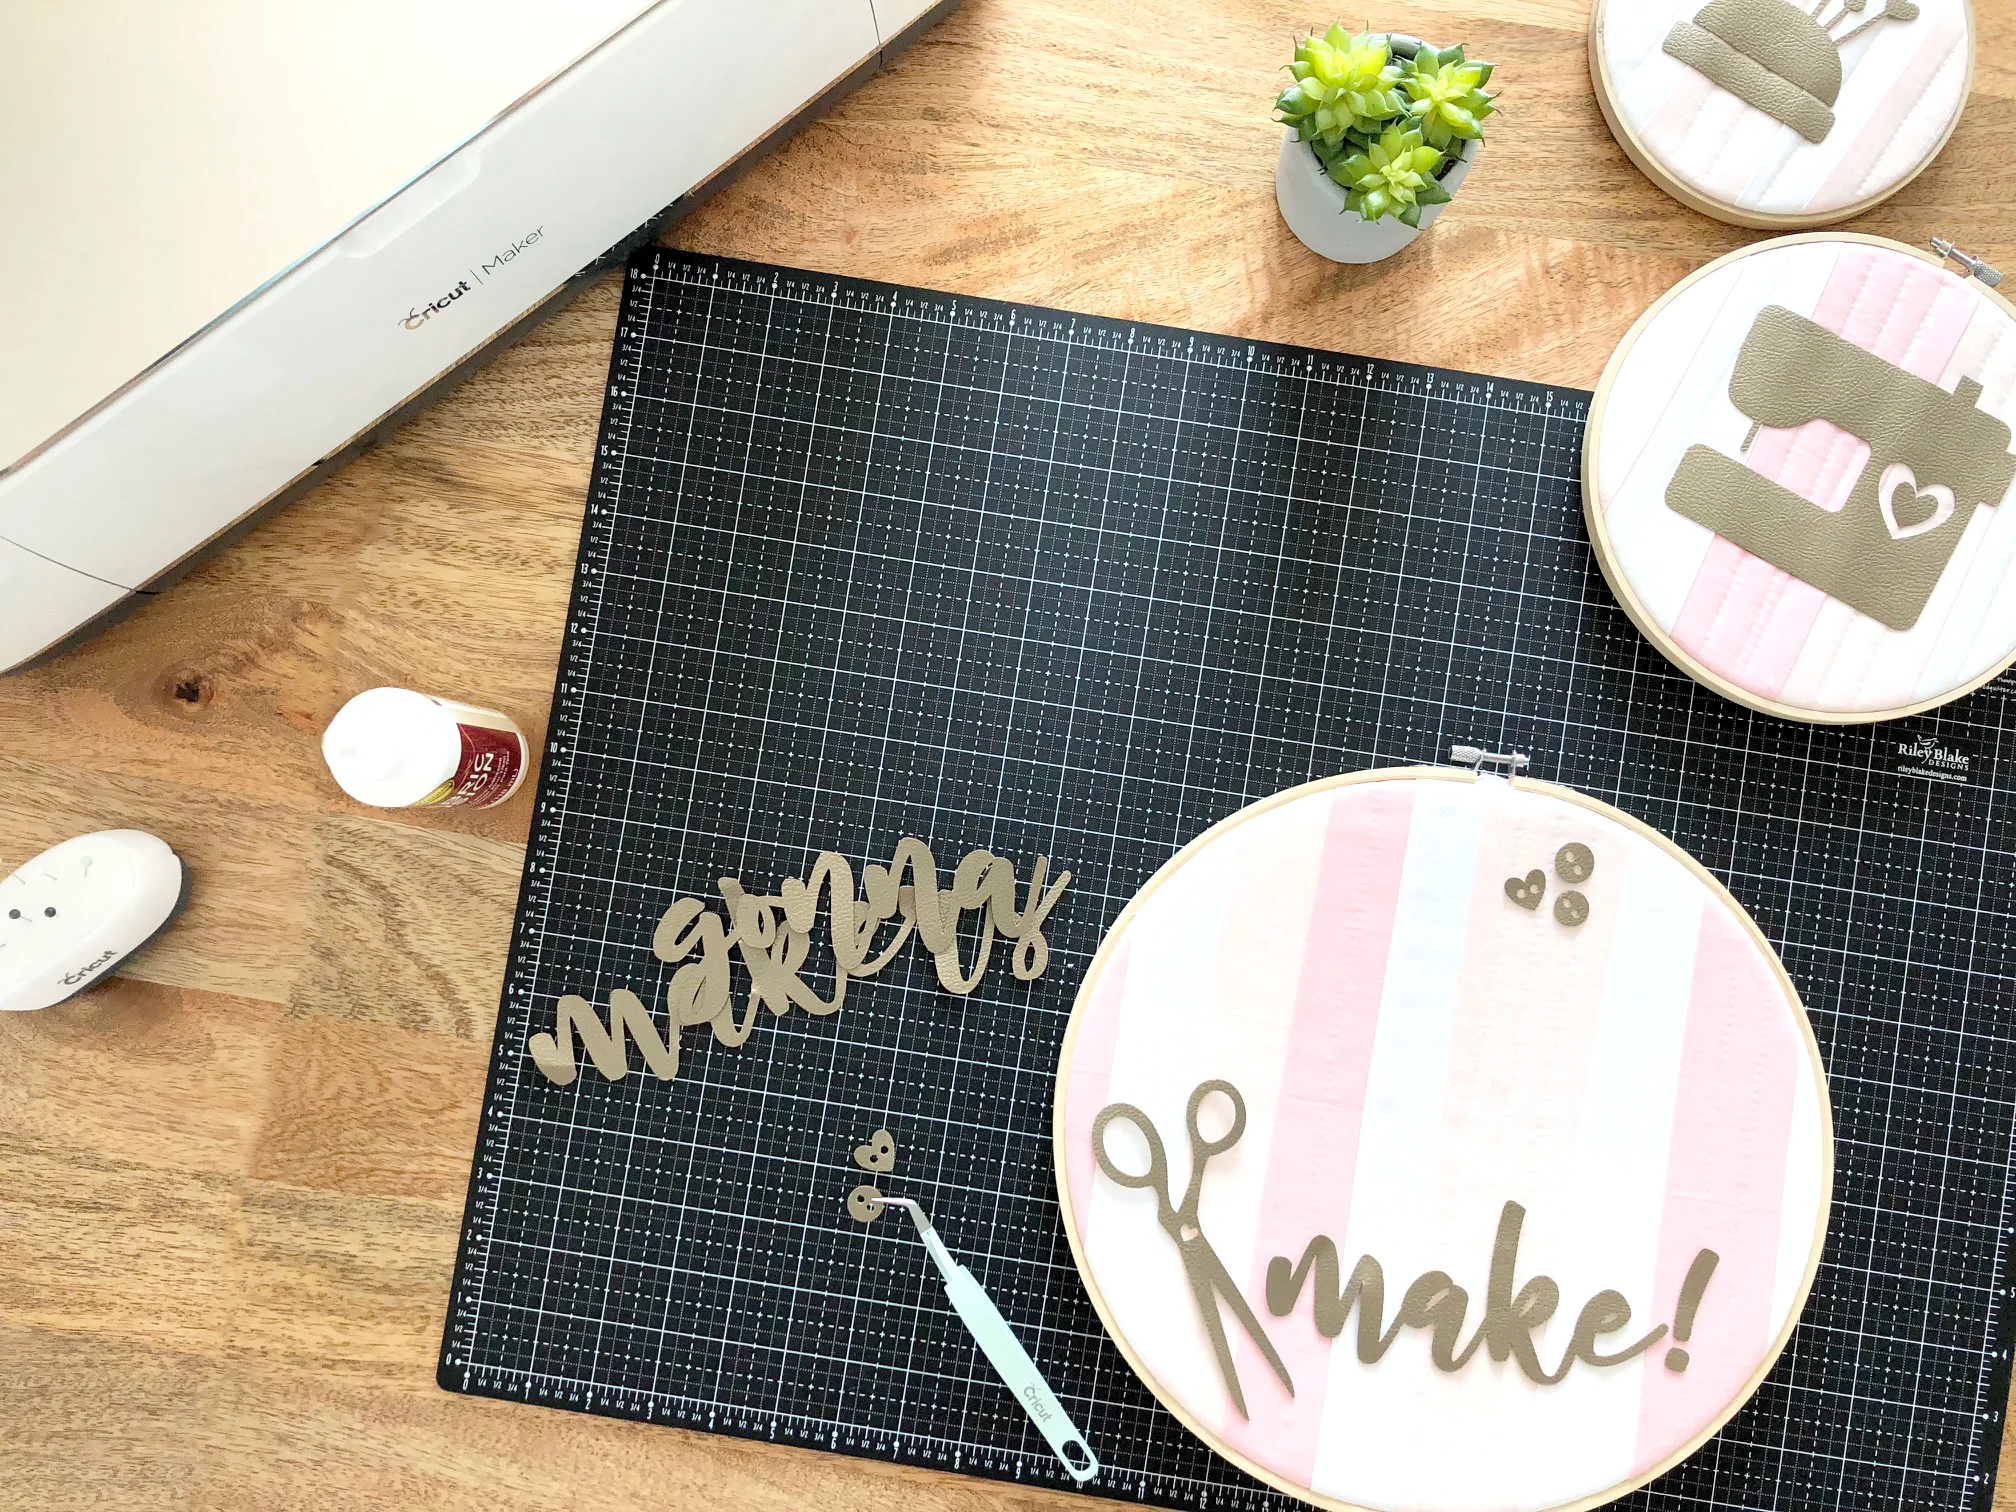
- cricut faux leather (limited quantities available)
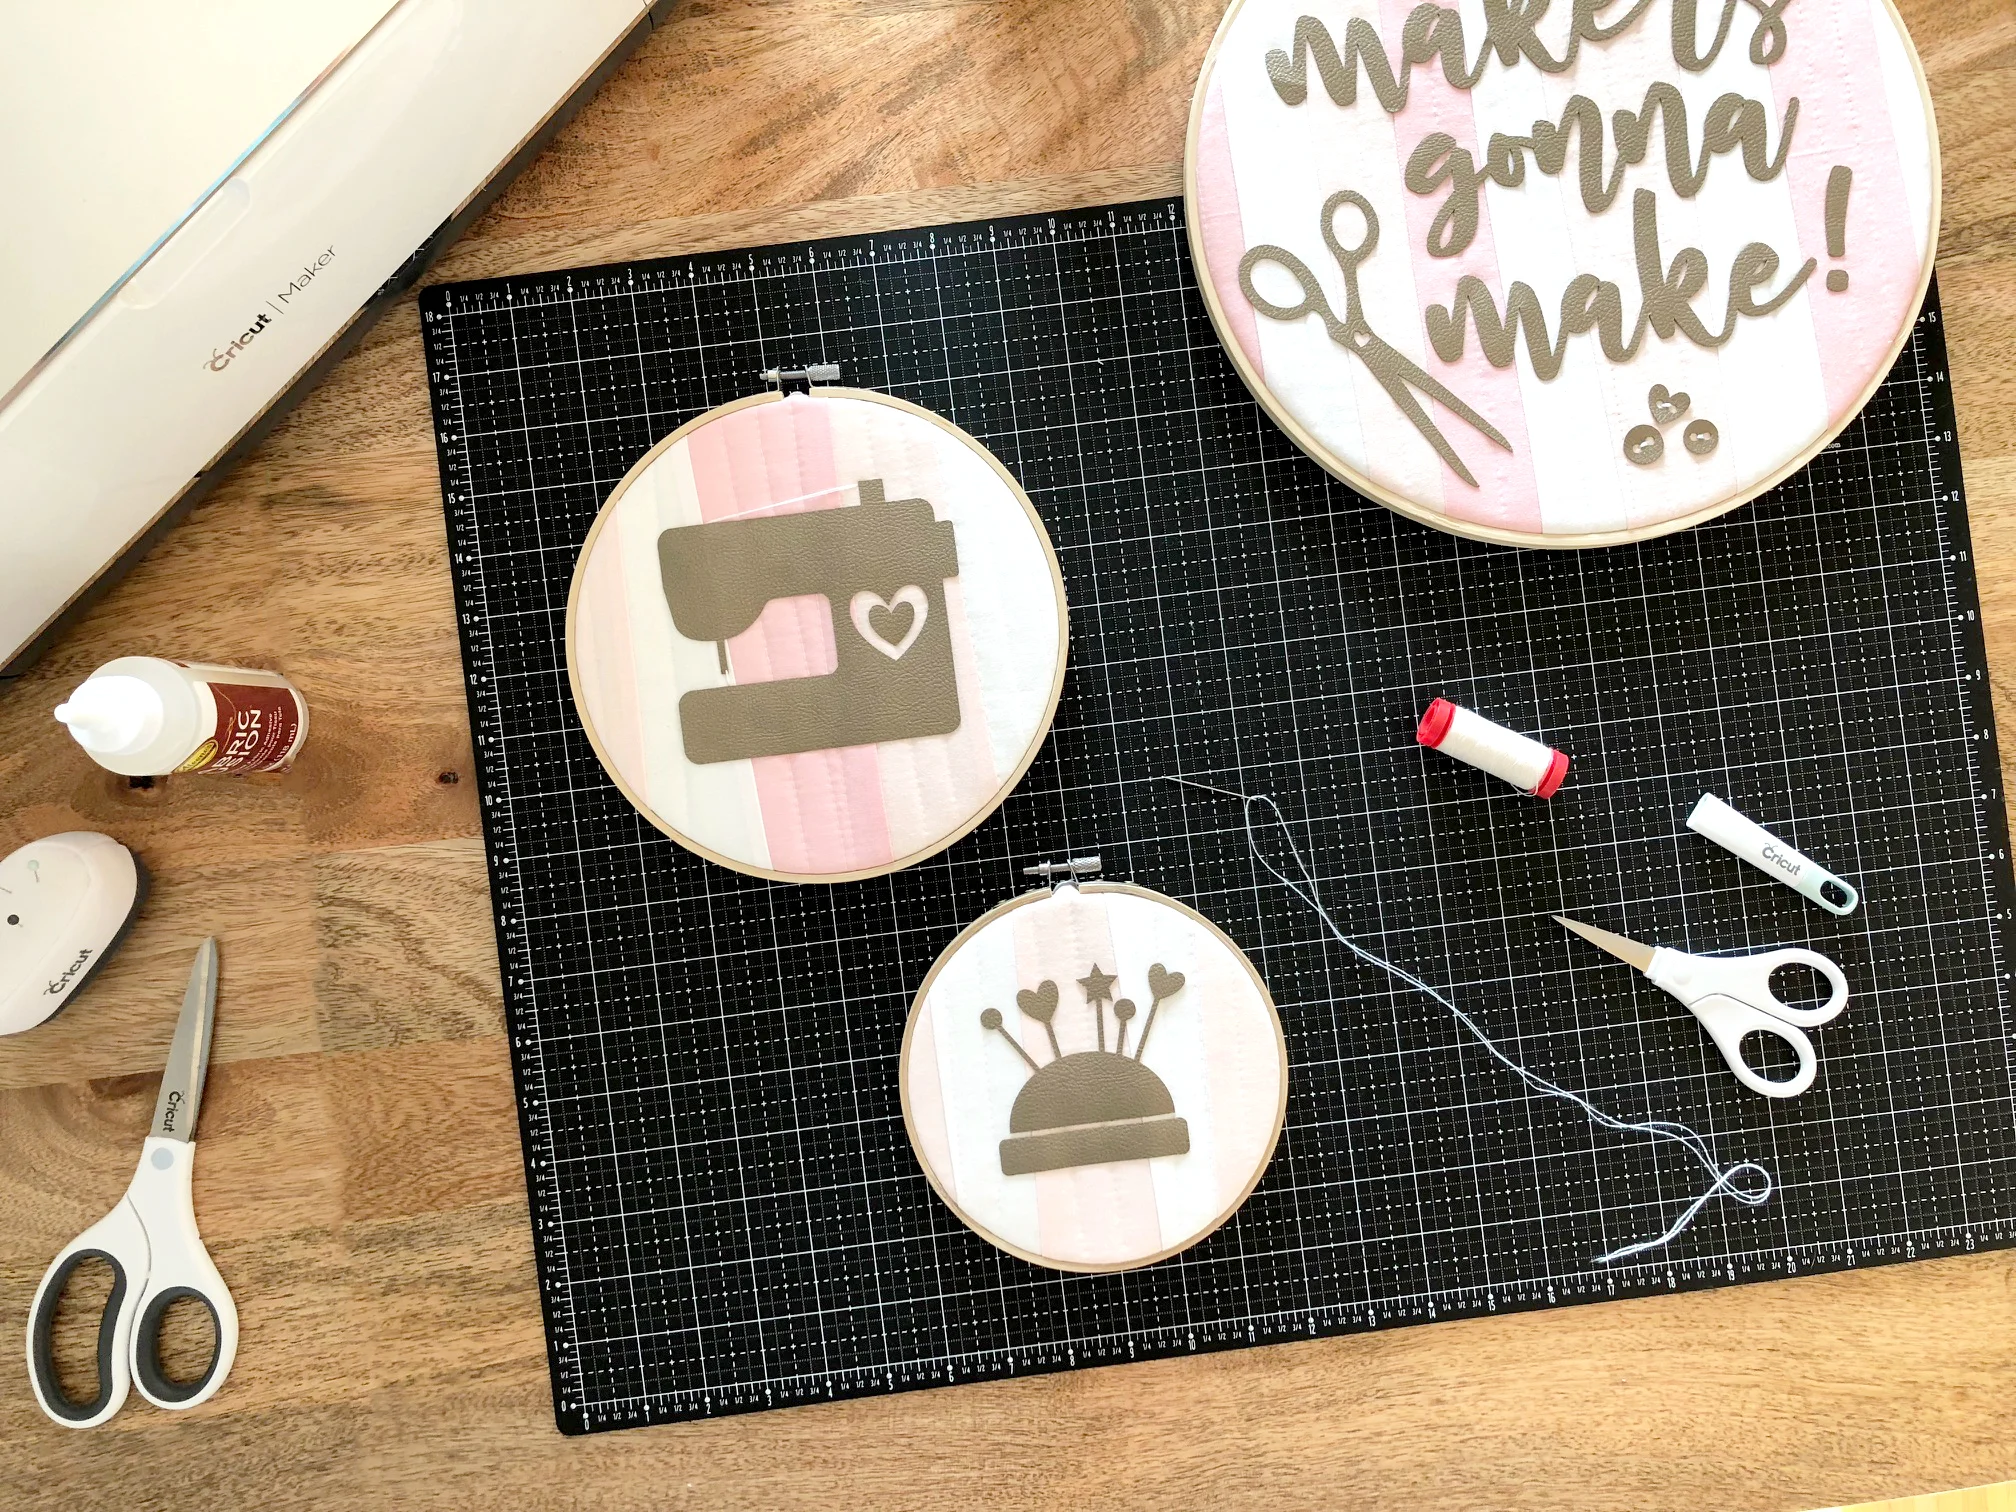
- embroidery hoops (a 12, 6, and 4 inch. was used for this version)
- fabric glue (aleene's fabric fusion was used for this version)
- fat quarter scraps of fabric for your background (confetti cottons was used for this version)
- scraps of fabric for your backing (3-4'' wider than your embroidery hoop)
- scraps of batting (3-4'' wider than your embroidery hoop)
- matching thread, hand-sewing needle, and small scissors
- misc. sewing supplies like a sewing machine and iron


here's the instructions you'll need for this project:
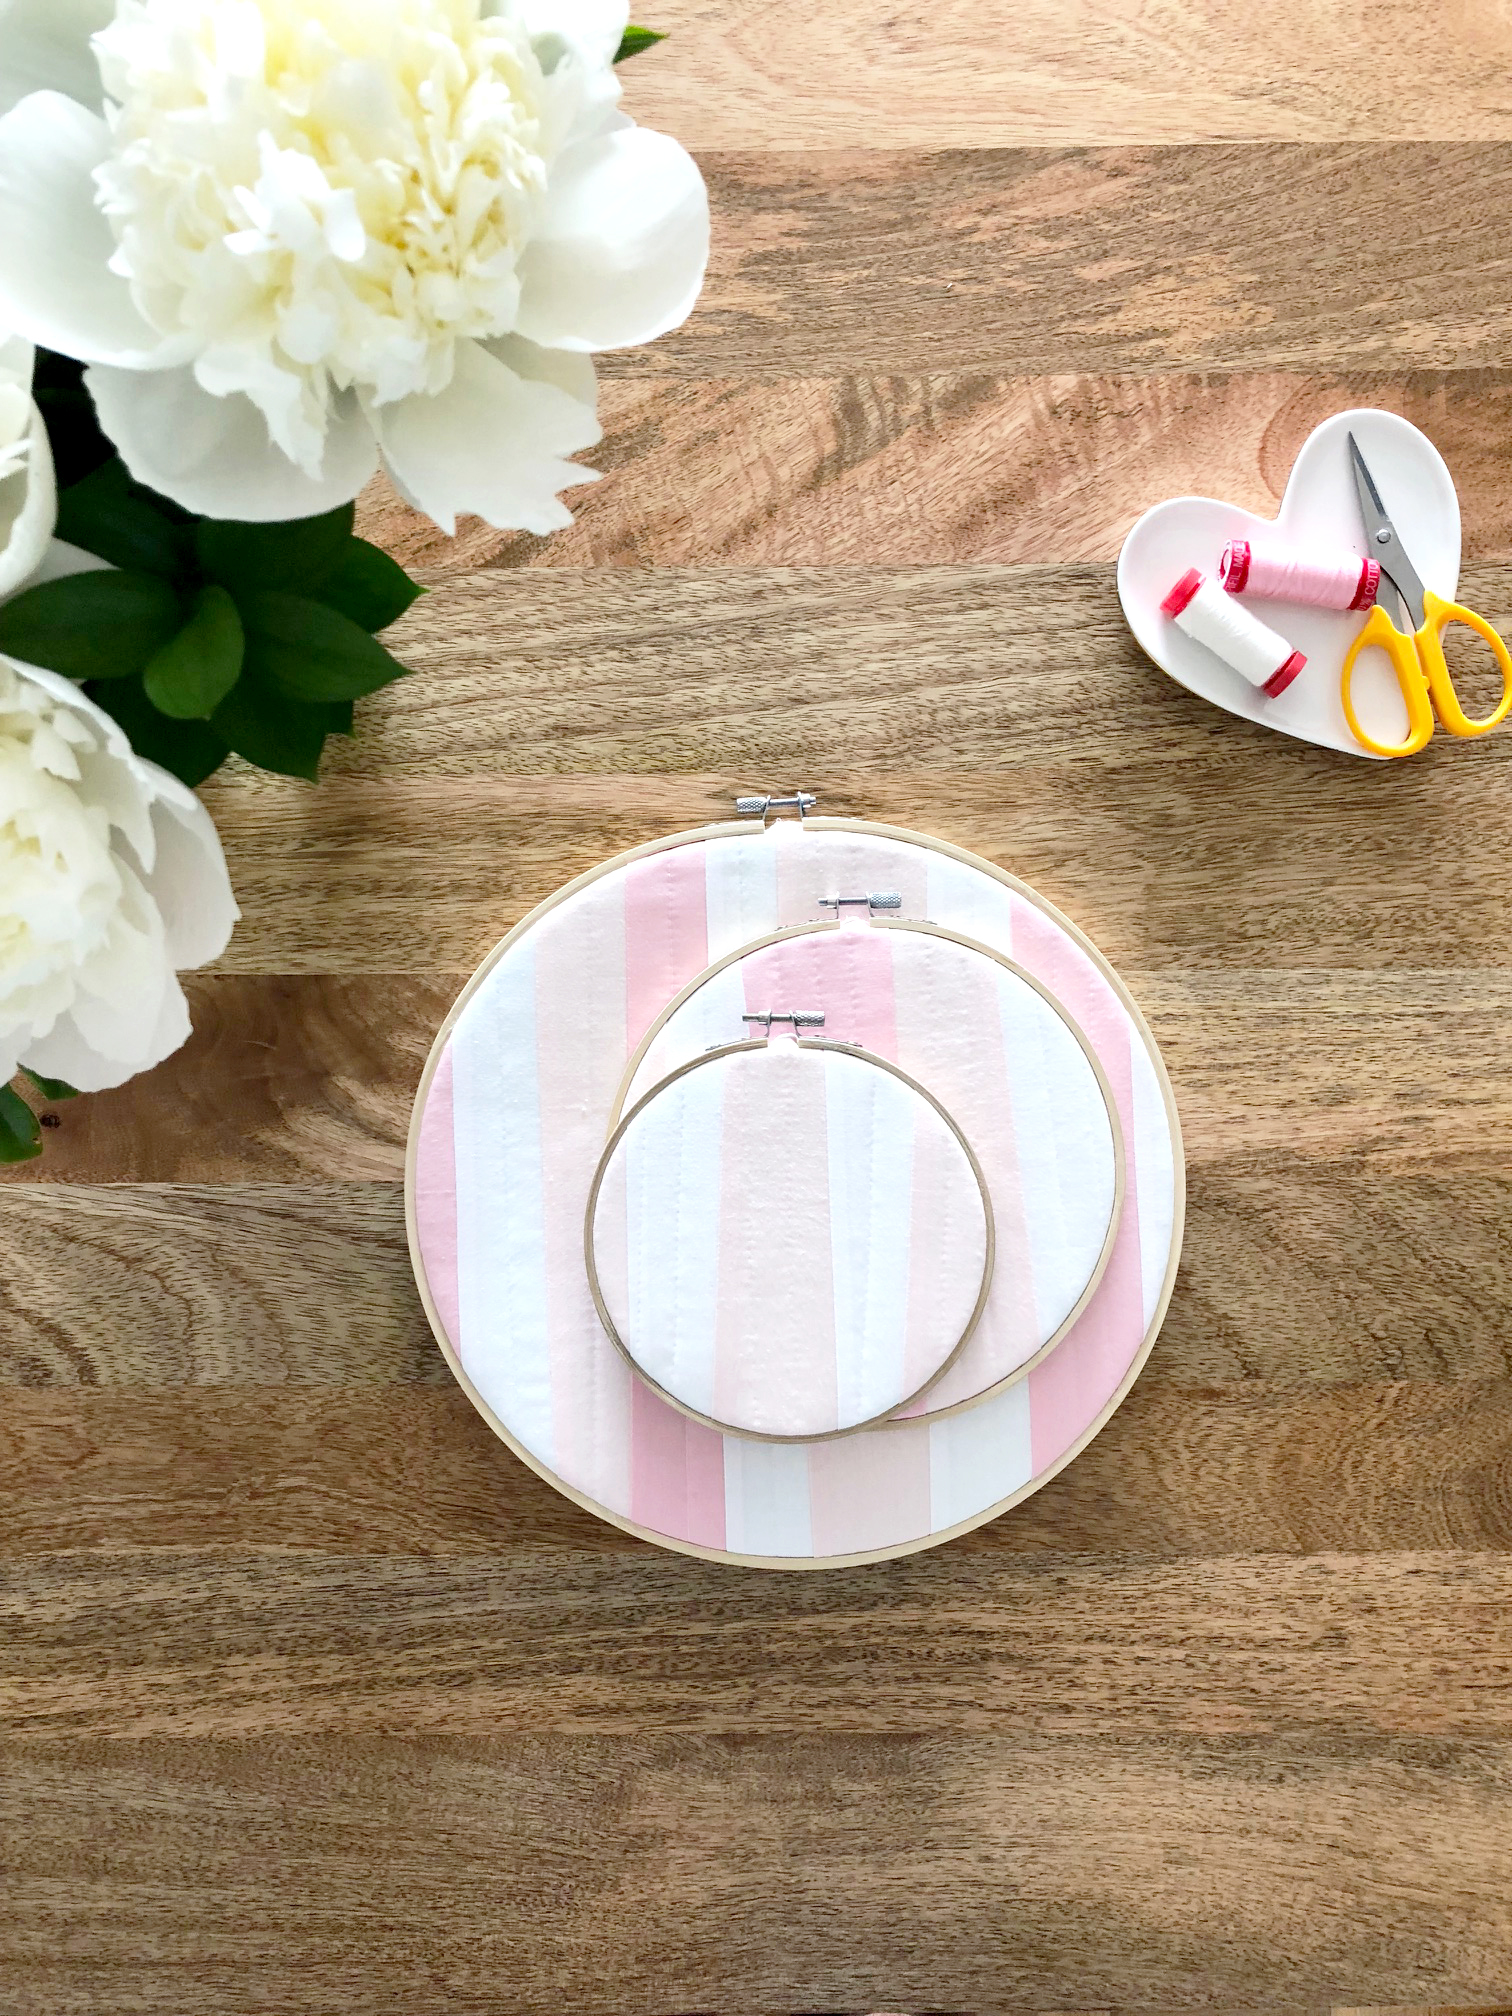
- make the embroidery hoop background.
- cut strips of fabric 3-4'' longer than your embroidery hoop in various widths.
- randomly sew the strips together, pressing your seams to one side to create the top.
- layer the batting and backing to the top and quilt as desired.
- insert the background into the embroidery hoop, trim away the excess.
- you can chose to leave it as is or cut a felt circle the size of your embroidery hoop to cover the back. if you choose to cover the back, you will not need to have a backing, just quilt your top and batting. i hope that make sense! =)
- make the embroidery hoop elements.
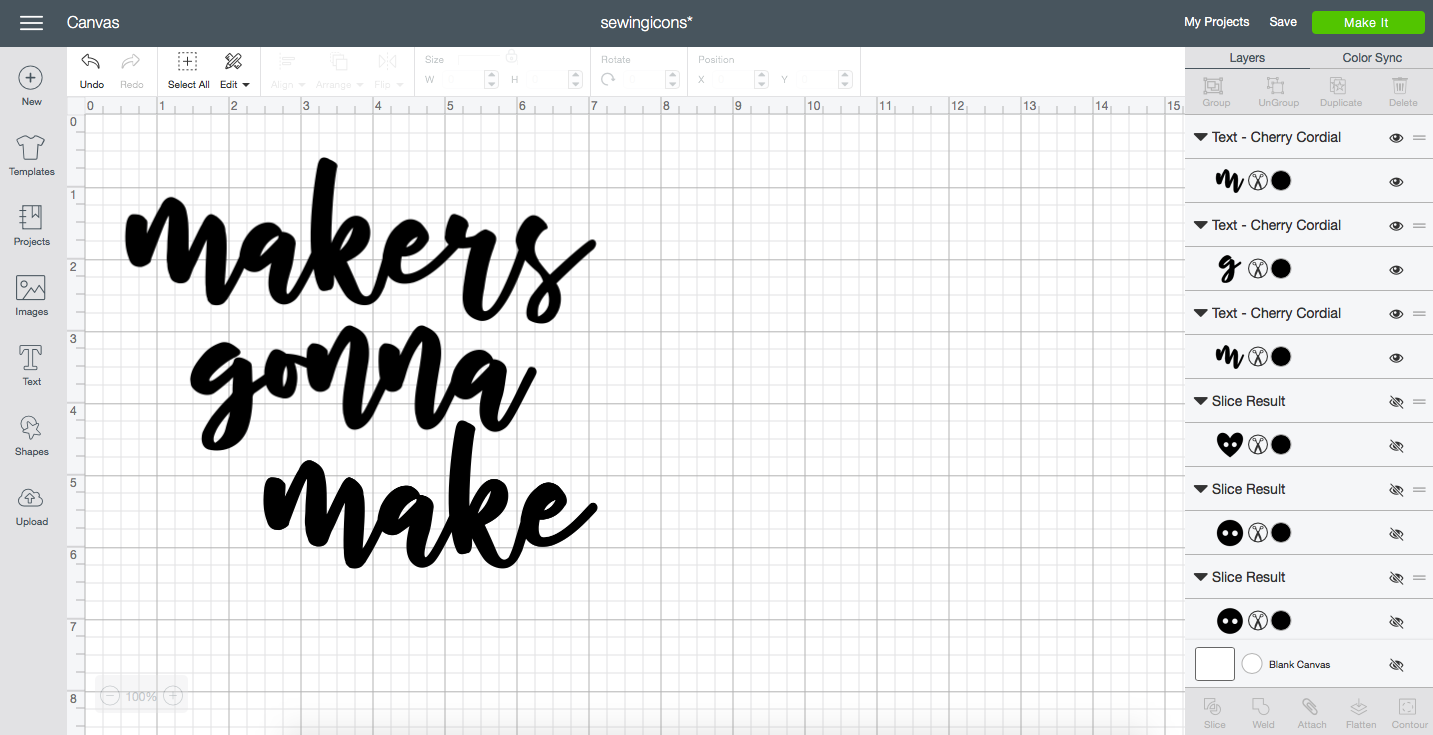
- using cricut's design space, start a new canvas.
- insert the art work (download here).
- adjust the size of the artwork to fit your embroidery hoops.
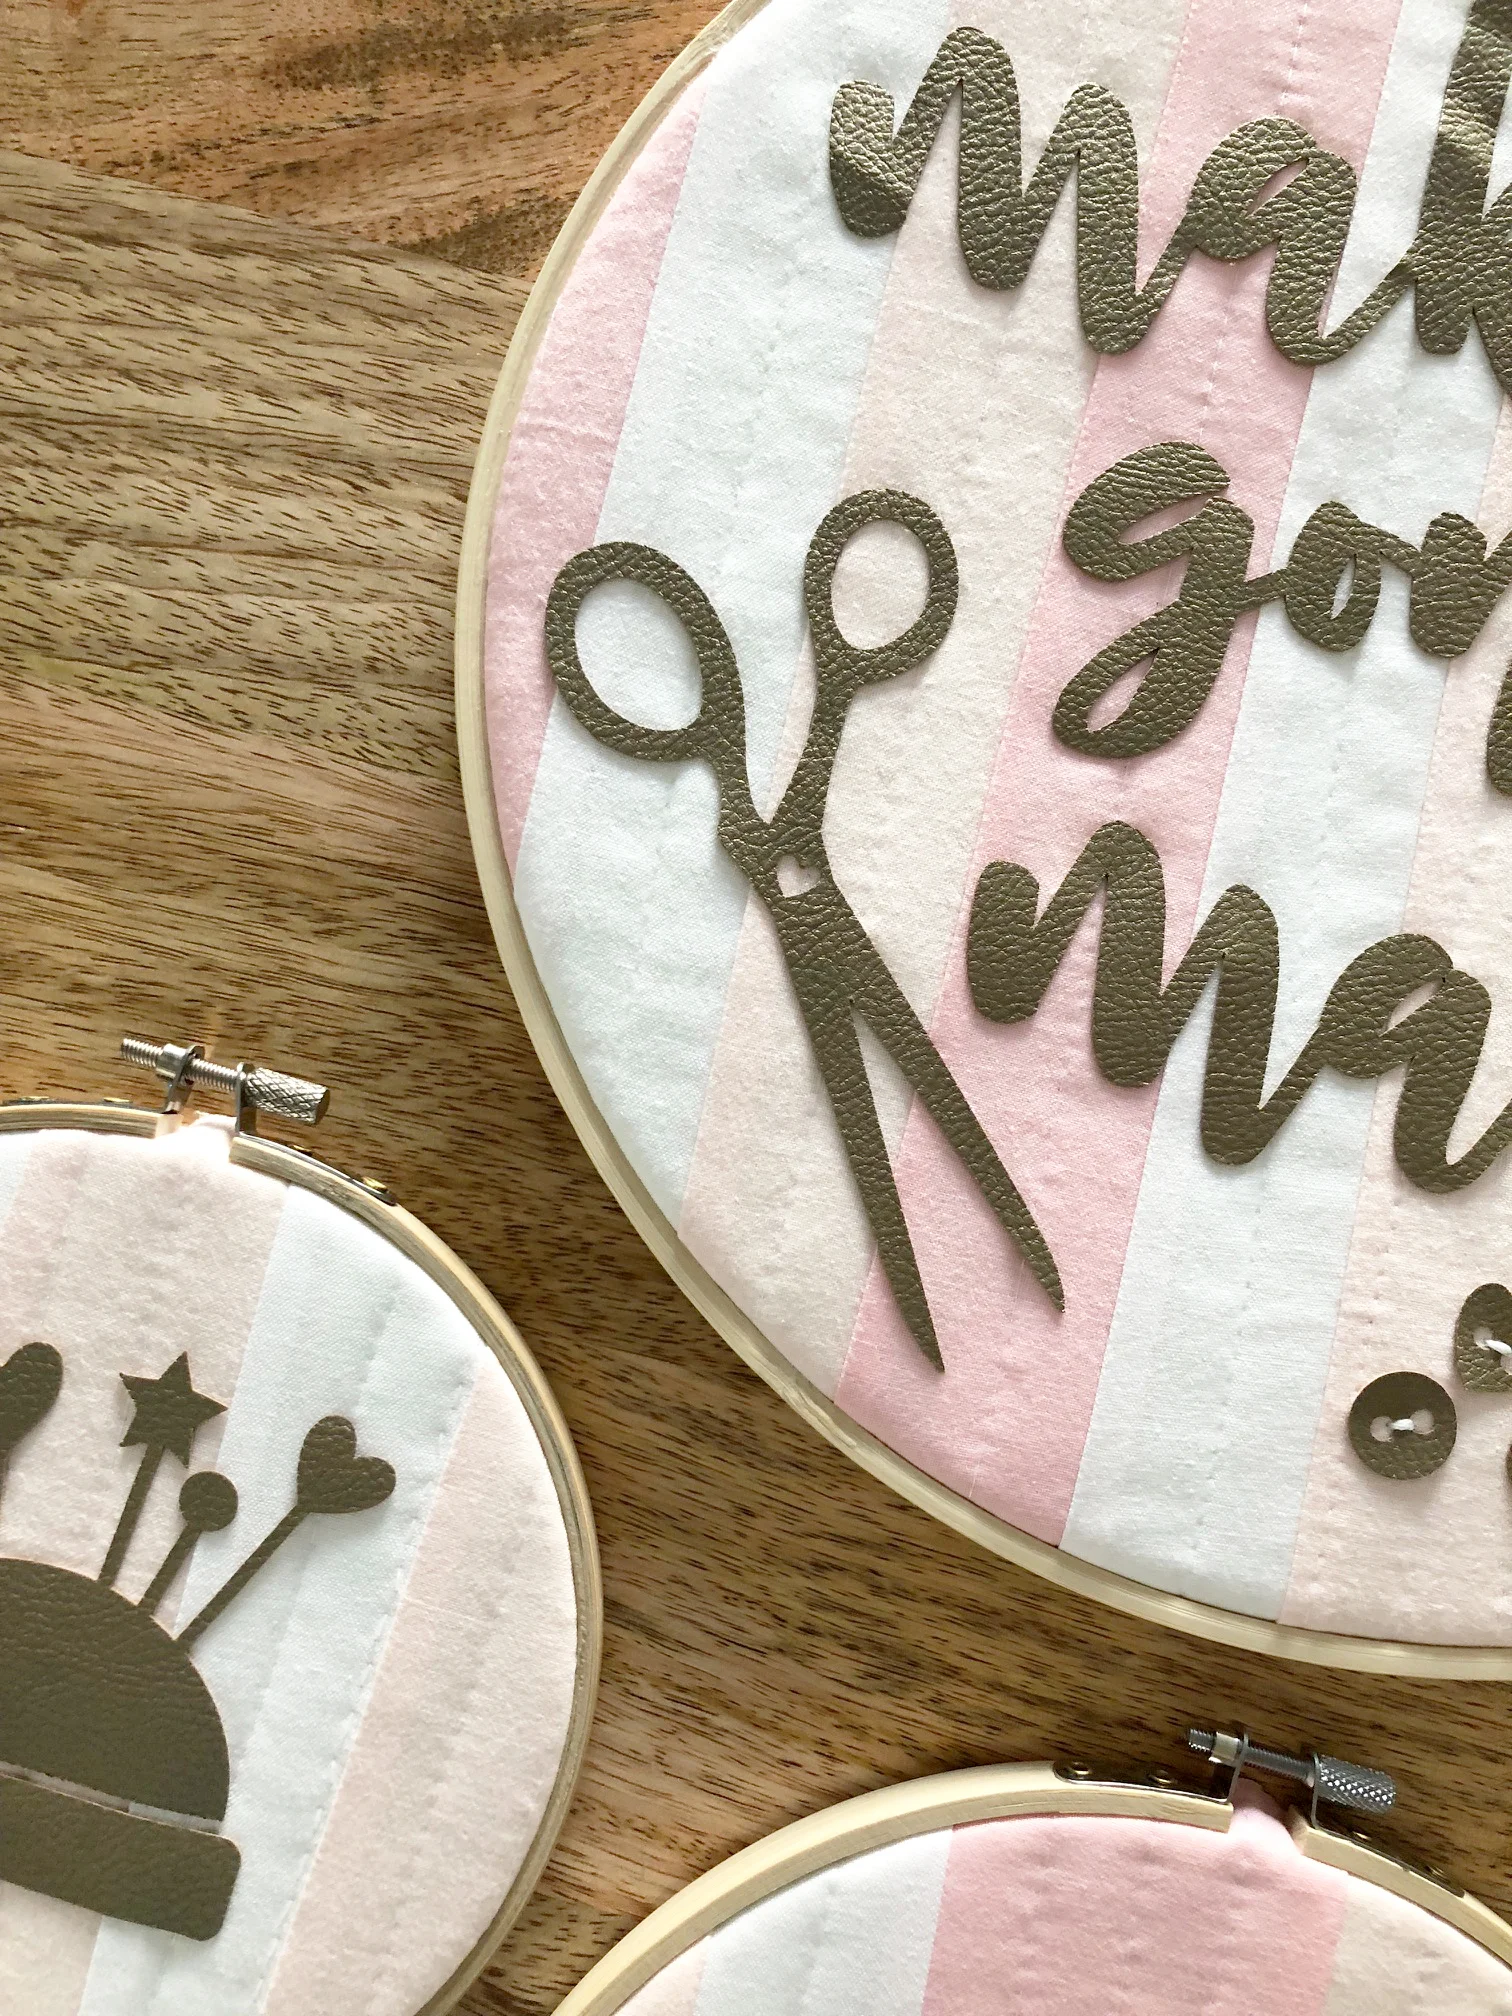
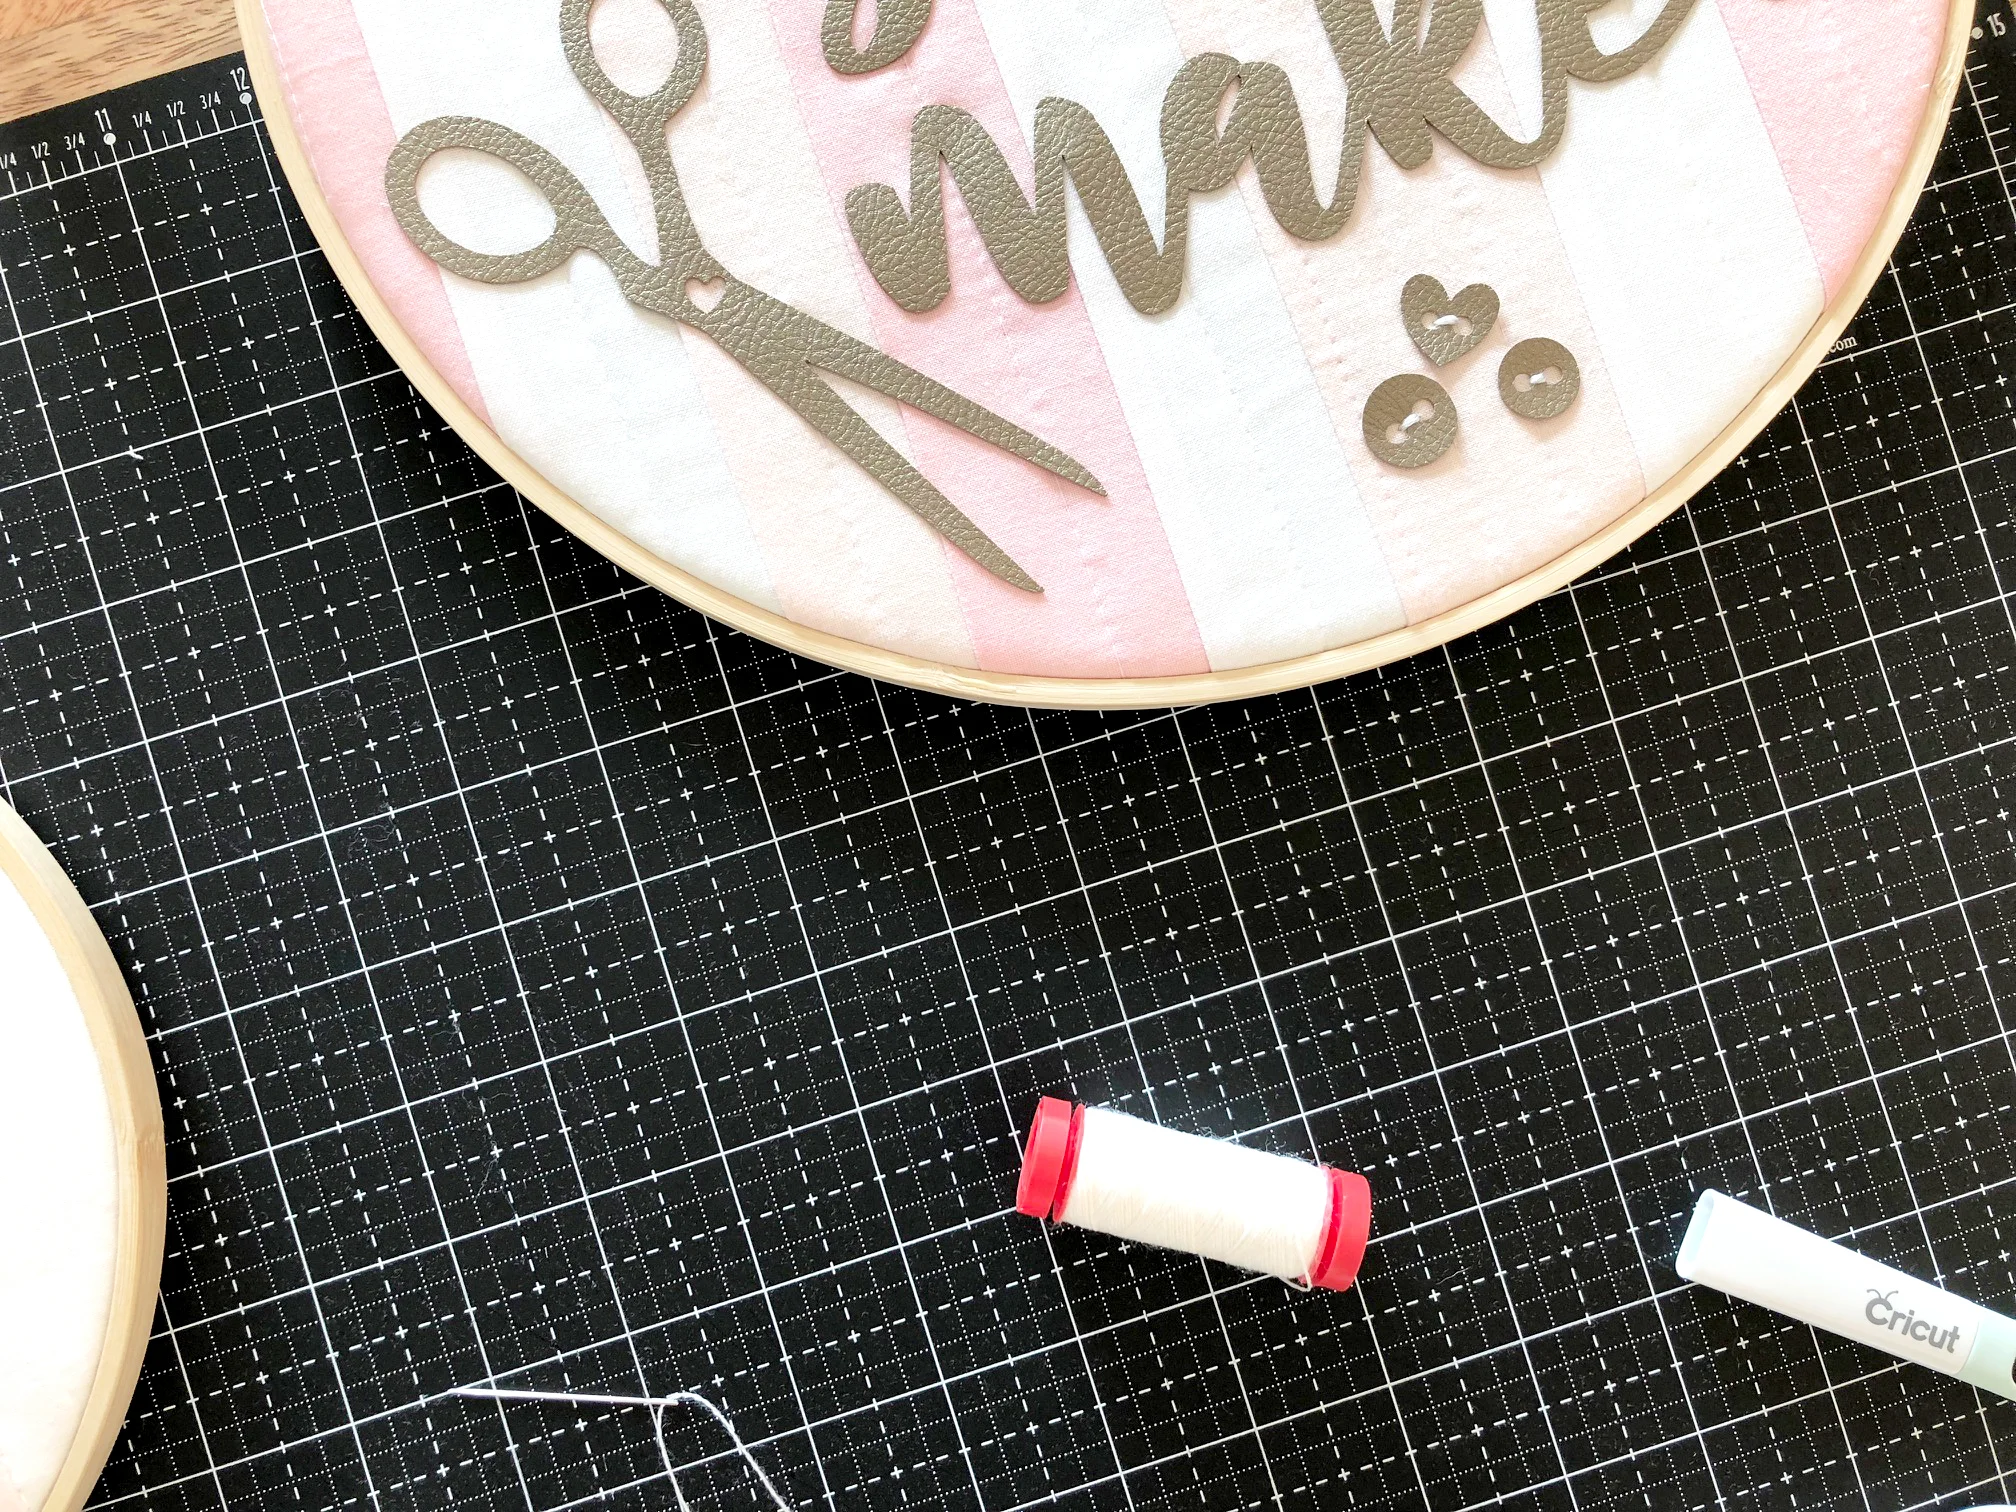
- slice a heart (in shapes) on the scissors and sewing machine.
- to create the buttons, use a circle and heart (in shapes), slicing smaller circles on top.
- i also added hearts and stars (in shapes) to the pins on the pincushion. =)
- you're all set. click make it!
- place a faux leather sheet on the strong grip mat, leather side up.
- choose faux leather under material and add more cutting pressure.
- insert the mat into the maker and press go!
- weed your elements.
- repeat above steps for the text element.
- attach the embroidery hoop elements to the background.
- layout the embroidery hoop elements until desired outcome occurs.
- using a small amount of fabric glue, attach the embroidery hoop elements.
- use cricut's tweezers to help attach the smaller elements.
- allow elements to dry.
- using thread, attach the circle and heart buttons.
- using thread, add additional hand-quilting details.


ta-da! so cute, right? and so easy to make too! hang these adorable embroidery hoops in your sewing space or give them as a gift. you can hang them with yarn, ribbon, or if you're feeling ambitious, make your own fabric ribbon!
i hope you enjoyed learning how to make this as much i enjoyed making it for you!
cut, sew, repeat...
the tattooed quilter
This is a sponsored conversation written by me on behalf of Cricut. The opinions and text are all mine.