My Happy Place Fabric...


I’m excited to share a new fabric collection from Riley Blake Designs.
My Happy Place by Lori Holt, features button cards, vintage ladies, florals, quilt blocks, and gingham. New for RBD, this collection comes in home decor weight and is 57/58’’ wide—perfect for so many awesome projects like throw pillows, bags and totes, furniture, and everything else in between! And if these beautiful prints (in Lori’s signature colors) weren’t enough, there’s also a label panel. Yasss!
I was so inspired when I saw this collection that I couldn’t decide what to make.
The struggle is real, y’all!
I decided to make some sewing themed Christmas stockings and boy-oh-boy are they cute!


For this project, I used June Tailor’s Quilt As You Go Stripes Stocking for the base of my stocking.
I love June Tailor QAYG products. You’re essentially sewing-by-number and you quilt as you sew!
Awesome, right? Check out the Wine Totes I made here.
However, I mixed things up a bit. I totally went rogue.
Here are some rough (haha!) step-by-step instructions:
Start with the pre-printed batting.
Separate the pre-printed batting by cutting the two stockings sides apart.
Use the pre-printed batting rectangle you cut as a guide to cut the top and lining fabric.
Spray baste the top fabric to the batting, wrong sides together.
Repeat for the second side of the stocking.
Trim 1/2’’ to 1’’ away from the stocking outline.
Sew around the stocking outline, directly on top of the line.
Quilt directly on or used the pre-printed lines as my guide.
Spray baste the finished top section to the lining fabric. Wrong sides together.
Sew around the stocking outline, directly on top of the first sew line.
Trim right up next to the sew line.
Repeat for the other side of the stocking.
Follow the instructions for joining your two stocking sides together.
Follow the instructions for adding your hook and binding.
Each stocking was quilted differently, giving them lots of unique texture. I even added Lori Holt’s buttons to some of the button cards. They’re just sew perfect. Make one for you and all your quilty friends!
My Happy Place is arriving local quilt shops now. I can’t wait to see what you make!
cut, sew, repeat…
the tattooed quilter
RBDNotSoBasic...QAYG Wine Totes


Oh hai December!
The end of the decade is quickly approaching and I can’t believe it. The 2010’s ushered in challenges, a move across the country—twice, and a loving relationship I never thought I’d have. Oh, and two french bulldogs!
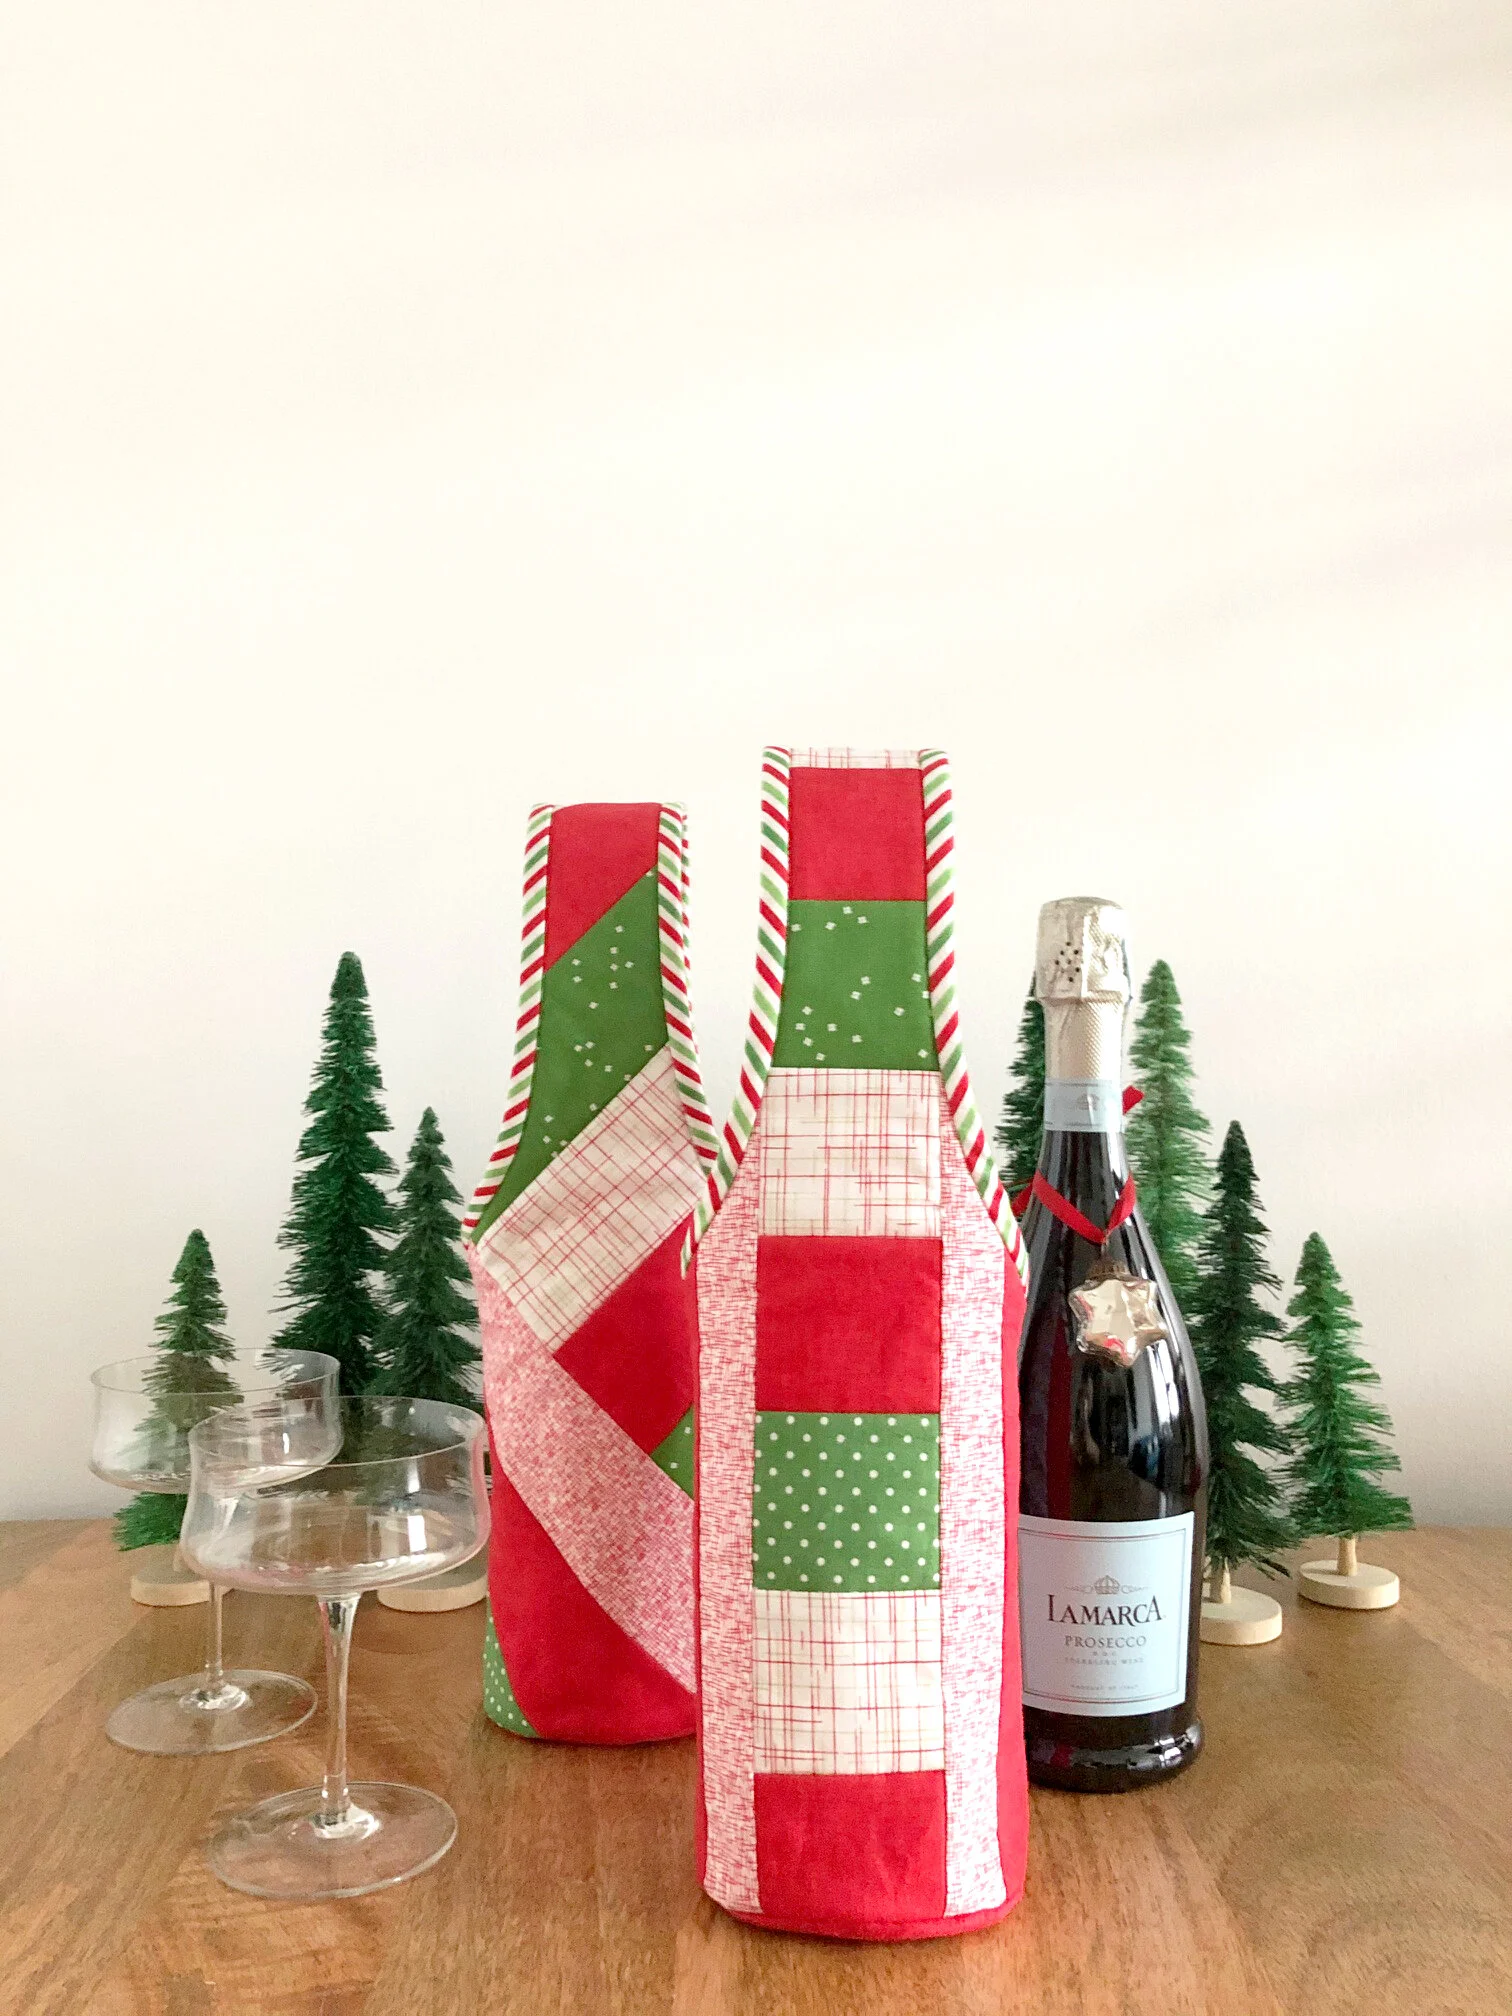
Grab a glass and let’s toast as we approach the 2020’s and all the wonderful components it has in store for us.
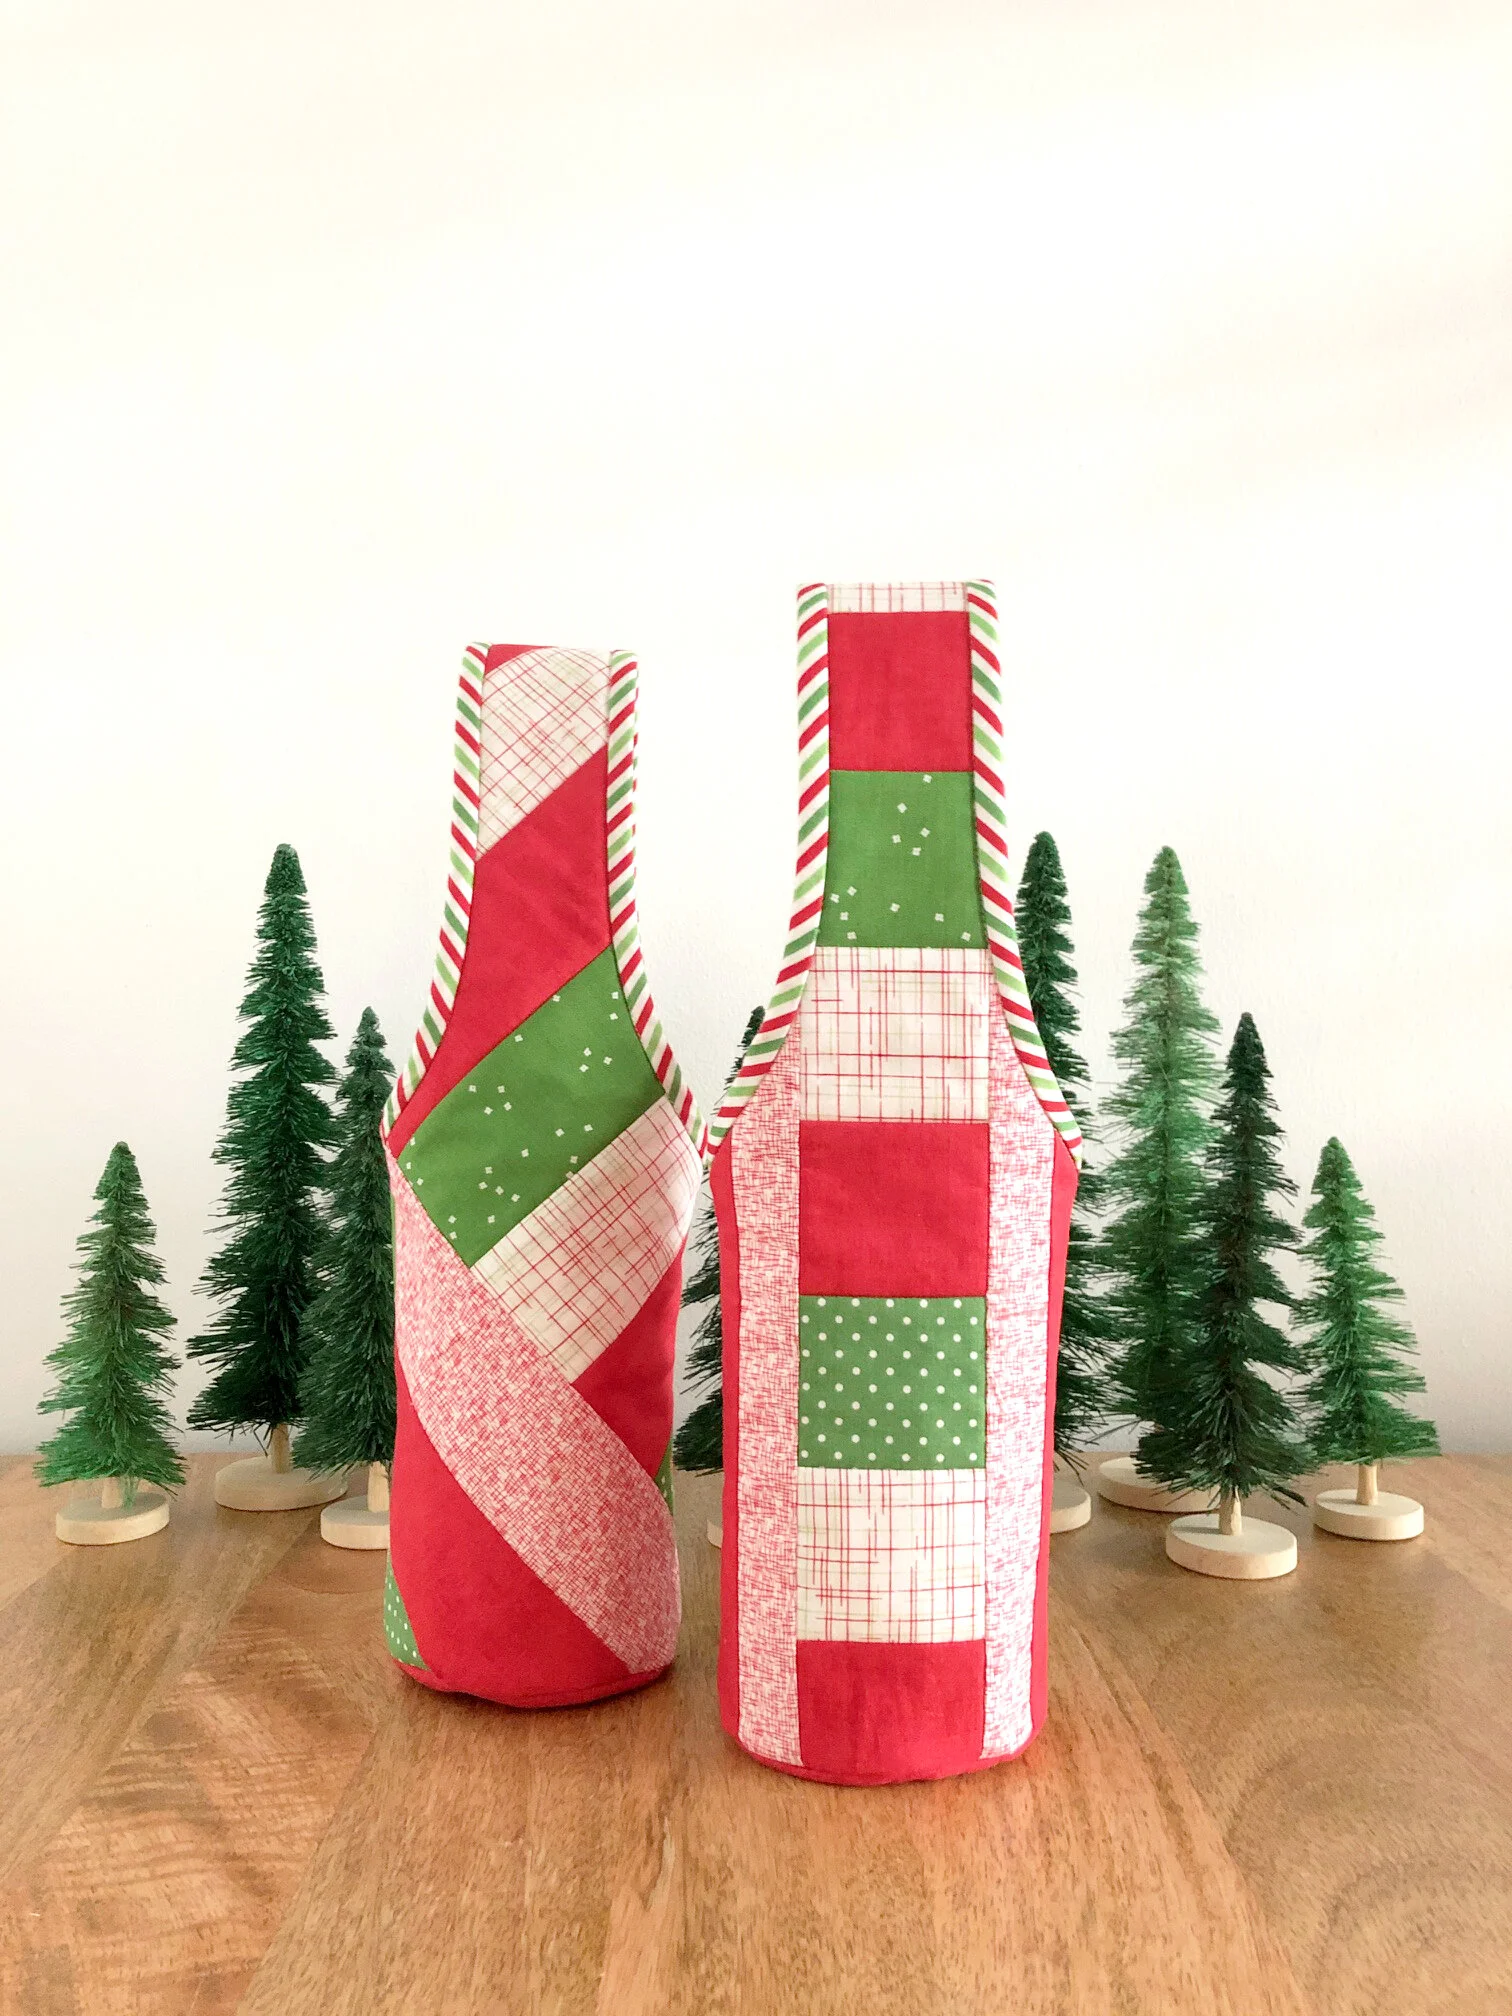
My latest #RBDNotSoBasic project kicks off the holiday season with pizazz!
A couple of months ago, my friends at June Tailor sent me a sampling of their new Quilt As You Go (QAYG) projects, including this awesome trio of wine totes.
QAYG is basically sewing by number. How neat is that? Their detailed instructions and online video resources make this beginner friendly and perfect for those—’’I’m not sure what to make’’—moments.


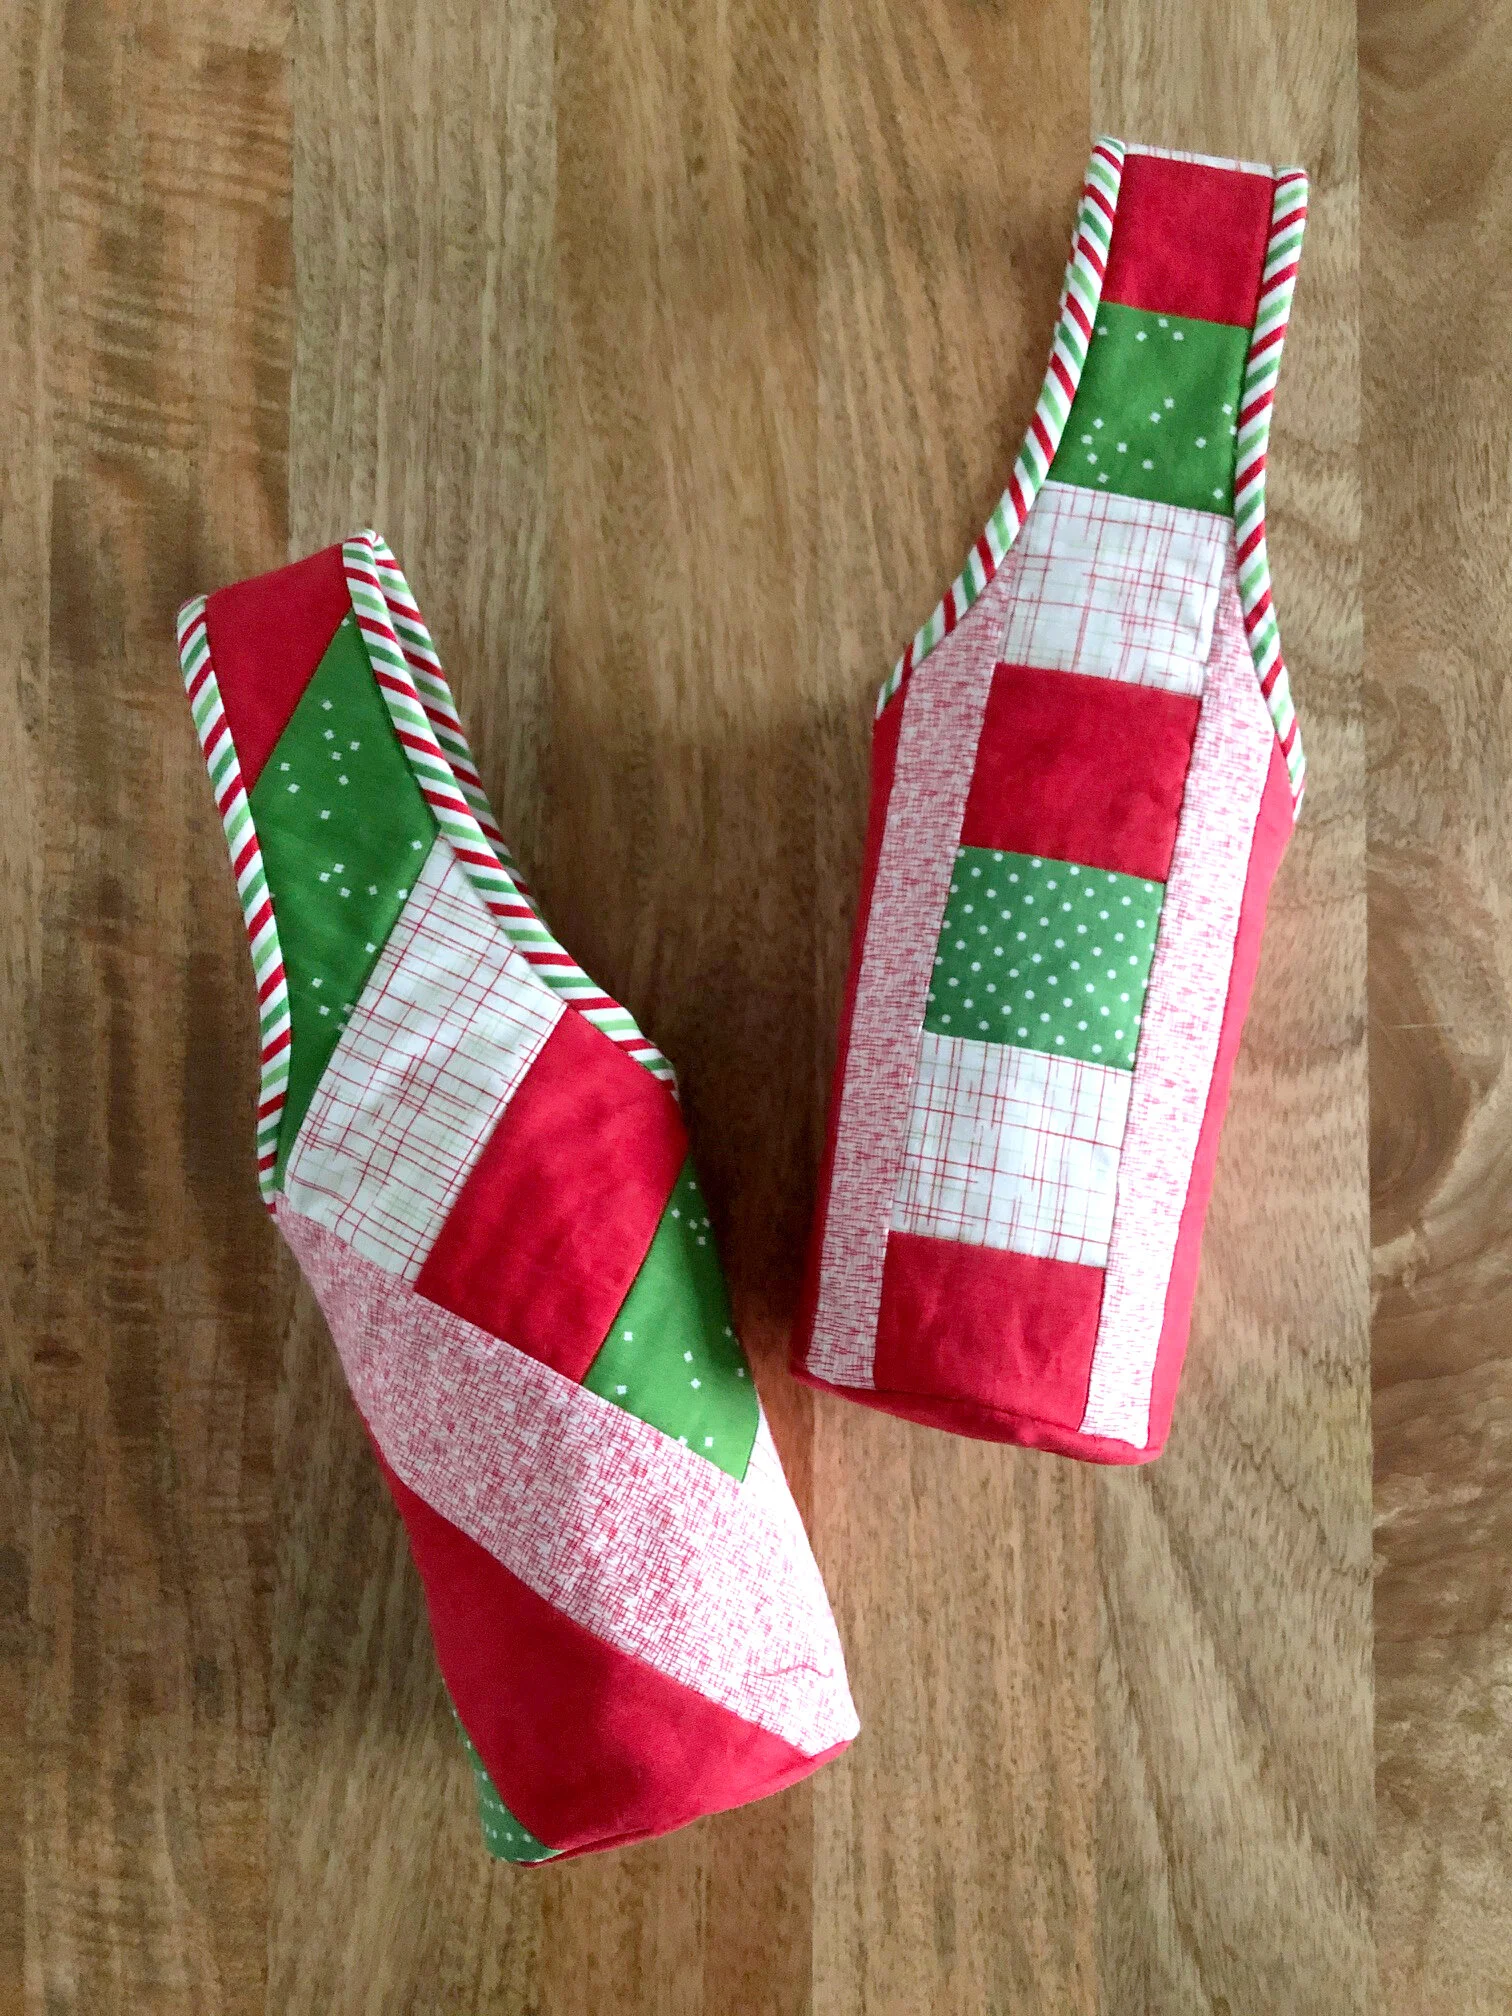
I used a sampling of Riley Blake Designs basics including:
Swiss Dot, 1/8’’ Christmas Strip, and Christmas Gunny Sack are part of the Seasonal Basics collection which was curated by Lori Holt for RBD. There is also Halloween and Americana basics collection. While these are great mixed in with other basics, they’re also amazing on their own.
The instructions for the wine totes is very clear, however, If you’re still unsure, check out this awesome video from my friends at Missouri Star Quilt Company.
Tip: If you decide to use a stripe for the binding, reversing the direction of the strip can result in a chevron pattern. Cool, right? Remember, no matter what binding you choose, cut it on the bias.
To make the two out of three wine totes, I used my BabyLock Journey and Aurifil 50 weight thread.
I also used my 1/4’’ quilting or patchwork foot with the guide and didn’t have any issues with bunching. If you feel more comfortable, use your digital dual feed foot instead.
I hope this inspires you to try Quilt As You Go!
June Tailor has an awesome line up of products and notions. Check them out today! There are lots of great stocking stuffers too—especially after you make the stocking. Hahaha.
Follow #RBDNotSoBasic to see other projects made with RBD’s Not So Basic, Basics!
cut, sew, repeat…
the tattooed quilter
Mini Masterpieces Book...


Today I’m thrilled to share my friend Alyce Blyth’s new book, Mini Masterpieces.
Published by Lucky Spool Media, this book features 12 different quilting techniques, with a sample block and a mini quilt pattern for the corresponding technique. Modern and unique, this book is perfect for beginners or experts looking for a refresh, there’s a project for everyone.
When Alyce asked me to participate in her book hop, I had to say yes. You know I love mini quilts!
Honestly, it’s a gorgeous book, photographed by my friends at Page + Pixel. I had a hard time picking one technique I wanted to focus on. But with a little nudge from Alyce, I picked complex curves.
Curves, you say? Nah, not you, Christopher!
The truth is, curves are frightening, but with the expertise instructions from Alyce’s book, you can conquer your fear! This sample block came together in a snap, so much so, that I made two!
I used my Riley Blake Designs basic, Blossom as the background. I used Lori Holt’s basic, Shabby for the center ‘‘bow-tie’’ section. Imagine an entire red and white quilt made with these blocks. Wouldn’t that be so pretty?
Each week, Alyce has an awesome line up of bloggers and designers using one technique to make a sample block. Head over to her blog to read more.
And be sure to check out the sew-along she’s hosting starting January 6th.
Until then, go buy this awesome book and check out these hashtags: #minimasterpiecesbook #blossomheartquilts #justbetterbooks and #aurifilthread for more inspiration.
cut, sew, repeat…
the tattooed quilter