RBDNotSoBasic...Palentine's Day


You’ve heard of Galentine’s Day, but have you heard of Palentine’s Day?
Palentine’s Day, which occurs February 13th is essentially Valentine’s Day for friends. You get together, do something fun, and feel the love by your closest and bestest friends (quilty friends count too!).
For my latest #RBDNotSoBasic project, I designed this quick and easy Palentine’s Day drawstring bag.
Fill these adorable bags with delicious cookies or your pal’s favorite notions (make it a theme!), cinch, and drop inside the pail. So cute, right?
Here’s what you’ll need to make your own:
1/2 Yard Fabric of Your Choice
3/8’’ Wide Twill Ribbon
Safety Pin
Basic Sewing Supplies
Optional: Small Pail
I used Riley Blake Designs 1/8’’ Stripe Basic in Baby Pink, Red, and Black. You can buy some for your stash from here. Stripes come in multiple sizes and they’re perfect for binding too!
I purchased my small pails from the Target Bullseye’s Playground. But any cute pail will do!
Here’s how I made the drawstring bag:
Cut a 16’’ x 20’’ rectangle from your fabric
Zig-zag stitch or serge all raw edges of your fabric rectangle
With right sides together, fold the rectangle in half
Using a 1/4’’ seam allowance, sew along both sides
Press open
Fold down top edge, wrong sides together 2 1/4’’
Using a 1/4’’ seam allowance and the zig-zag stitched edge, sew around the bag
Measure 1/2’’ from the previous stitch line, sew around the bag
Turn drawstring bag right side out
In between your two stitch lines, carefully remove the stitches from one of the seams
Cut a 30’’ piece of twill ribbon
Place the safety pin in one end of the ribbon
Gently glide the safety pin and ribbon through the drawstring channel
Trim the ribbon to desired length for a bow or a knot
Ta-Da! You’re all set. And trust me, you’re going to have a hard time just making one.
Wouldn’t these be perfect for Secret Santa too?
Be sure to follow the #rbdnotsobasic hashtag to see more awesome projects.
cut, sew, repeat..
the tattooed quilter
Sew Easy Hearts Featuring Shabby...


What did the thread say to the button?
I’m sew into you.
Haha.
These Sew Easy Hearts are a follow up to the Little Christmas Sew-A-Long I shared in December.
These adorable quilt blocks feature foundation paper piecing and they take about an hour to make! That’s perfect, especially if you’re looking for a sew easy Valentine’s Day decoration or gift.


Here’s what you’ll need to make your own:
Big Hearted Foundation Paper Piece Templates (click on the button below)
Fabric
Felt
3’’ or 4’’ Embroidery Hoops
Glue Gun and Glue Sticks
Fabric Safe Pen or Pencil
Ribbon
Fabric or Paper Rosette for Bow
Miscellaneous Sewing Supplies
Here’s the simple instructions for making your own:
Trace the embroidery hoop on a piece of felt.
Following the line, cut out the felt circle and set aside.
Make the Big Hearted FPP block of your choice.
Remove the paper from the back of the block.
Center and insert the block into the embroidery hoop. Tighten.
Trim the excess fabric from the back of the embroidery hoop.
With the glue gun, apply the felt circle on the back of the embroidery hoop.
Using ribbon and a rosette, decorate to the top of the embroidery hoop.
I used Riley Blake Designs Shabby and Confetti Cottons, two of my favorite basics.
To piece the blocks, I used Aurifil 50wt. #2021 and my Baby Lock Journey. I always use a size 90/14 needle and a 1.4 stitch length for FPP. A smaller stitch length makes removing the paper so much easier.
East Coast Trimming in the Garment District is my go-to shop for ribbon. Their selection is top notch! I purchased the vintage paper rosettes and black velvet ribbon I used for this project at ECT. Be sure to stop by when you visit the big apple!
New to FPP? No worries!
My friend Kristina from Center Street Quilts hosted an awesome FPP series back in the fall. You can check out her blog post here. And guess what? She also has a FREE heart foundation paper pieced template you can download. It’s perfect for beginners!
Her Instagram step-by-step videos for FPP are pretty rad too.
I hope you enjoyed this sew easy project featuring Shabby by Lori Holt for RBD!
Wouldn’t these heart quilt blocks be cute for a mini quilt or pin cushion? I can’t wait to see what you make!
cut, sew, repeat..
the tattooed quilter
RBDNotSoBasic...Valentine's Day Ombre


Valentine’s Day!
The second largest card-sending holiday of the year.
Or so they say.
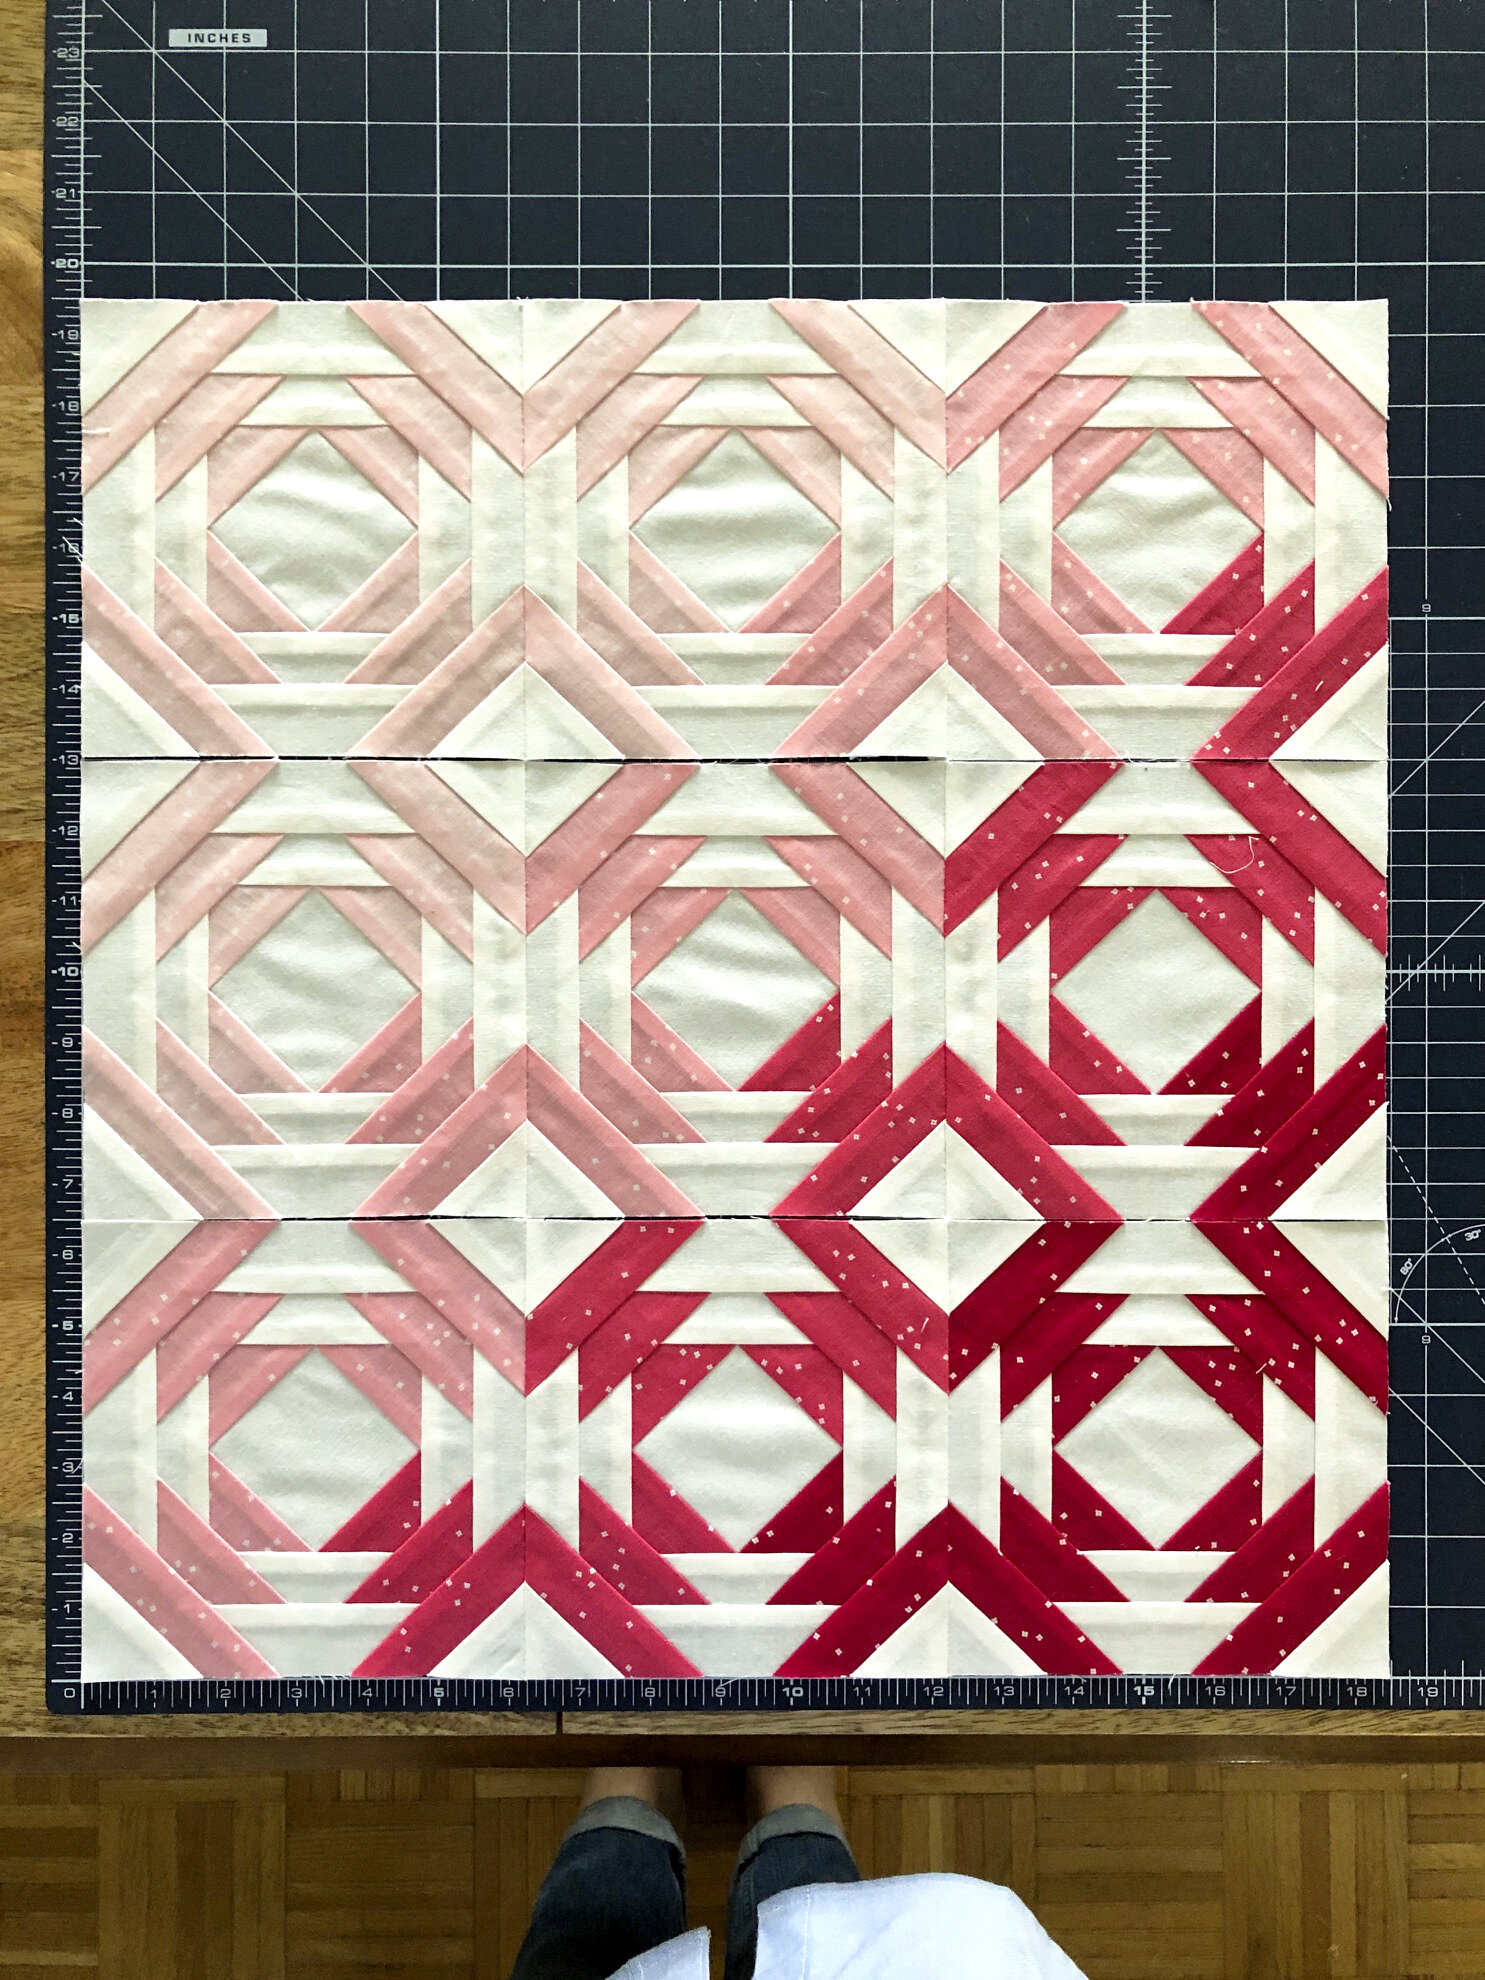
Instead of sending a card, I’m sharing my latest #RBDNotSoBasic project with you. This mini quilt combines my love for traditional quilt blocks and pink into one beautiful project.
You’ll need the following Riley Blake Design’s basics for this Valentine’s Day ombre mini quilt:
Blossom
Confetti Cotton
Kisses
My second favorite color is pink and I used four shades from my Blossom basic: Baby Pink, Peony, Raspberry, and Cranberry. Click here to purchase some for this project or to build up your stash.
I could have picked any number of traditional quilt blocks, but after seeing the Pineapple Quilt Block Foundation Paper from Fat Quarter Shop, I knew it was meant to be.
You can make up to 40 blocks with the two size pads: 6 1/2’’ or 12 1/2’’, so cool, right?
New to FPP? That’s ok! Check out Fat Quarter Shop’s step-by-step video here. And this one.


Here’s how you can make your very own Valentine’s Day Ombre mini quilt:
Carefully remove nine pineapple papers from the pad.
Cut the exact amount of pink rectangles (2 1/2’’ x 5’’).
Cut the exact amount of white background rectangles (2 1/2’’ x 5’’).
Cut nine 3 1/4’’ squares for the center of each block.
Following the order on the pineapple paper, make the nine blocks.
Remove the paper from the back of the nine blocks.
Sew blocks 1 and 2 together. Press seams to one side.
Sew blocks 1 and 2 to 3. Press seams to one side.
Repeat for blocks 4-6 and 7-9.
Sew row 1 to row 2. Press seams to one side.
Sew rows 1 and 2 to 3. Press seams to one side.
Cut two 3 1/2’’ x 18’’ strips. Cut two 3 1/2’’ x 24’’ strips.
Sew the 3 1/2’’ x 18’’ strips to the left and right of the blocks.
Press seams to one side.
Sew the 3 1/2’’ x 24’’ strips to the top and bottom of the blocks.
Press seams to one side.
Quilt and bind as desired.


Here are some helpful tips I learned along the way:
Using a pen, label each section (LP: Light Pink, MLP: Medium Light Pink, etc.). You can also label the background section too. Remember the block will be the reverse of how you sew it. Label each block (1, 2, 3, etc.) as well. Very helpful.
To save time, cut the rectangles, both pink and white all the same size.
Cut the backing and batting 2’’ bigger than the top. For example: 26’’ square.
Using a 4.5 stitch length, baste the blocks together. This will help you match the seams for better points. When you’re happy, use your regular stitch length to sew the blocks together.
Finger press the seams to one side. You may need to alternate to nest seams when sewing the rows together.
Ombre your way! When laying out the blocks, pick which colors you want more.
Take your time! Pineapple blocks can be scary, but take your time. You’ll be happy you did.
I this deliciously pink Valentine’s Day mini quilt inspires you to make something awesome!
I’d love to see your pineapple quilt block photos, so tag me!
Be sure to follow the #rbdnotsobasic hashtag to see more awesome projects.
cut, sew, repeat..
the tattooed quilter