RBDNotSoBasic: Valentine's Day Ombre


Valentine’s Day!
The second largest card-sending holiday of the year.
Or so they say.
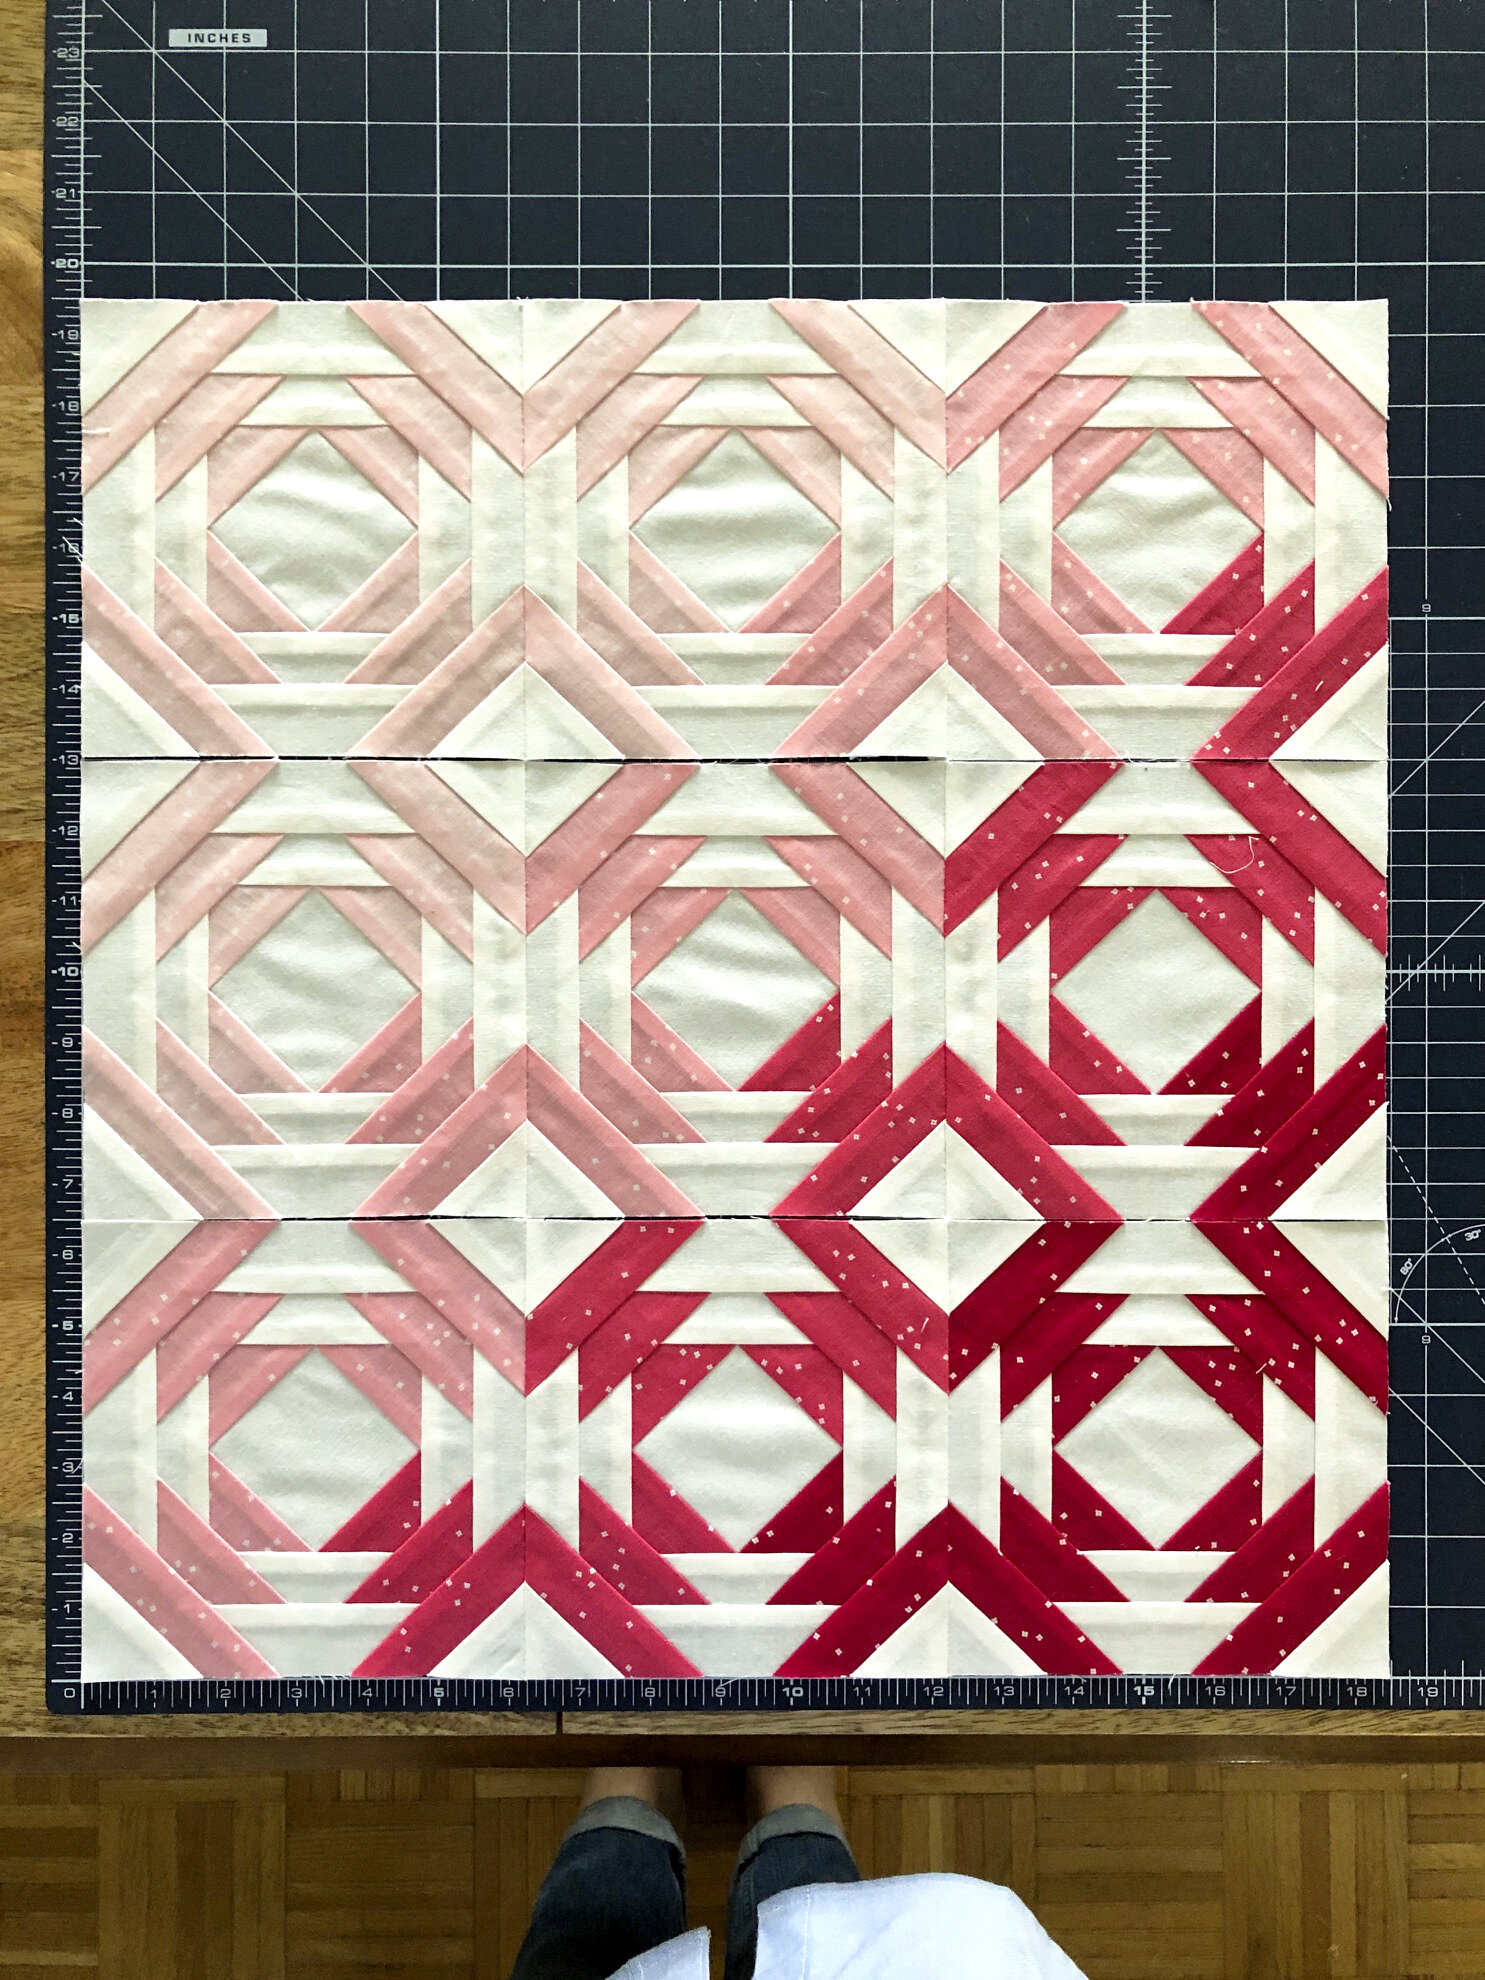
Instead of sending a card, I’m sharing my latest #RBDNotSoBasic project with you. This mini quilt combines my love for traditional quilt blocks and pink into one beautiful project.
You’ll need the following Riley Blake Design’s basics for this Valentine’s Day ombre mini quilt:
Blossom
Confetti Cotton
Kisses
My second favorite color is pink and I used four shades from my Blossom basic: Baby Pink, Peony, Raspberry, and Cranberry. Click here to purchase some for this project or to build up your stash.
I could have picked any number of traditional quilt blocks, but after seeing the Pineapple Quilt Block Foundation Paper from Fat Quarter Shop, I knew it was meant to be.
You can make up to 40 blocks with the two size pads: 6 1/2’’ or 12 1/2’’, so cool, right?
New to FPP? That’s ok! Check out Fat Quarter Shop’s step-by-step video here. And this one.


Here’s how you can make your very own Valentine’s Day Ombre mini quilt:
Carefully remove nine pineapple papers from the pad.
Cut the exact amount of pink rectangles (2 1/2’’ x 5’’).
Cut the exact amount of white background rectangles (2 1/2’’ x 5’’).
Cut nine 3 1/4’’ squares for the center of each block.
Following the order on the pineapple paper, make the nine blocks.
Remove the paper from the back of the nine blocks.
Sew blocks 1 and 2 together. Press seams to one side.
Sew blocks 1 and 2 to 3. Press seams to one side.
Repeat for blocks 4-6 and 7-9.
Sew row 1 to row 2. Press seams to one side.
Sew rows 1 and 2 to 3. Press seams to one side.
Cut two 3 1/2’’ x 18’’ strips. Cut two 3 1/2’’ x 24’’ strips.
Sew the 3 1/2’’ x 18’’ strips to the left and right of the blocks.
Press seams to one side.
Sew the 3 1/2’’ x 24’’ strips to the top and bottom of the blocks.
Press seams to one side.
Quilt and bind as desired.


Here are some helpful tips I learned along the way:
Using a pen, label each section (LP: Light Pink, MLP: Medium Light Pink, etc.). You can also label the background section too. Remember the block will be the reverse of how you sew it. Label each block (1, 2, 3, etc.) as well. Very helpful.
To save time, cut the rectangles, both pink and white all the same size.
Cut the backing and batting 2’’ bigger than the top. For example: 26’’ square.
Using a 4.5 stitch length, baste the blocks together. This will help you match the seams for better points. When you’re happy, use your regular stitch length to sew the blocks together.
Finger press the seams to one side. You may need to alternate to nest seams when sewing the rows together.
Ombre your way! When laying out the blocks, pick which colors you want more.
Take your time! Pineapple blocks can be scary, but take your time. You’ll be happy you did.
I this deliciously pink Valentine’s Day mini quilt inspires you to make something awesome!
I’d love to see your pineapple quilt block photos, so tag me!
Be sure to follow the #rbdnotsobasic hashtag to see more awesome projects.
cut, sew, repeat..
the tattooed quilter