Garden Getaway Mini Quilt


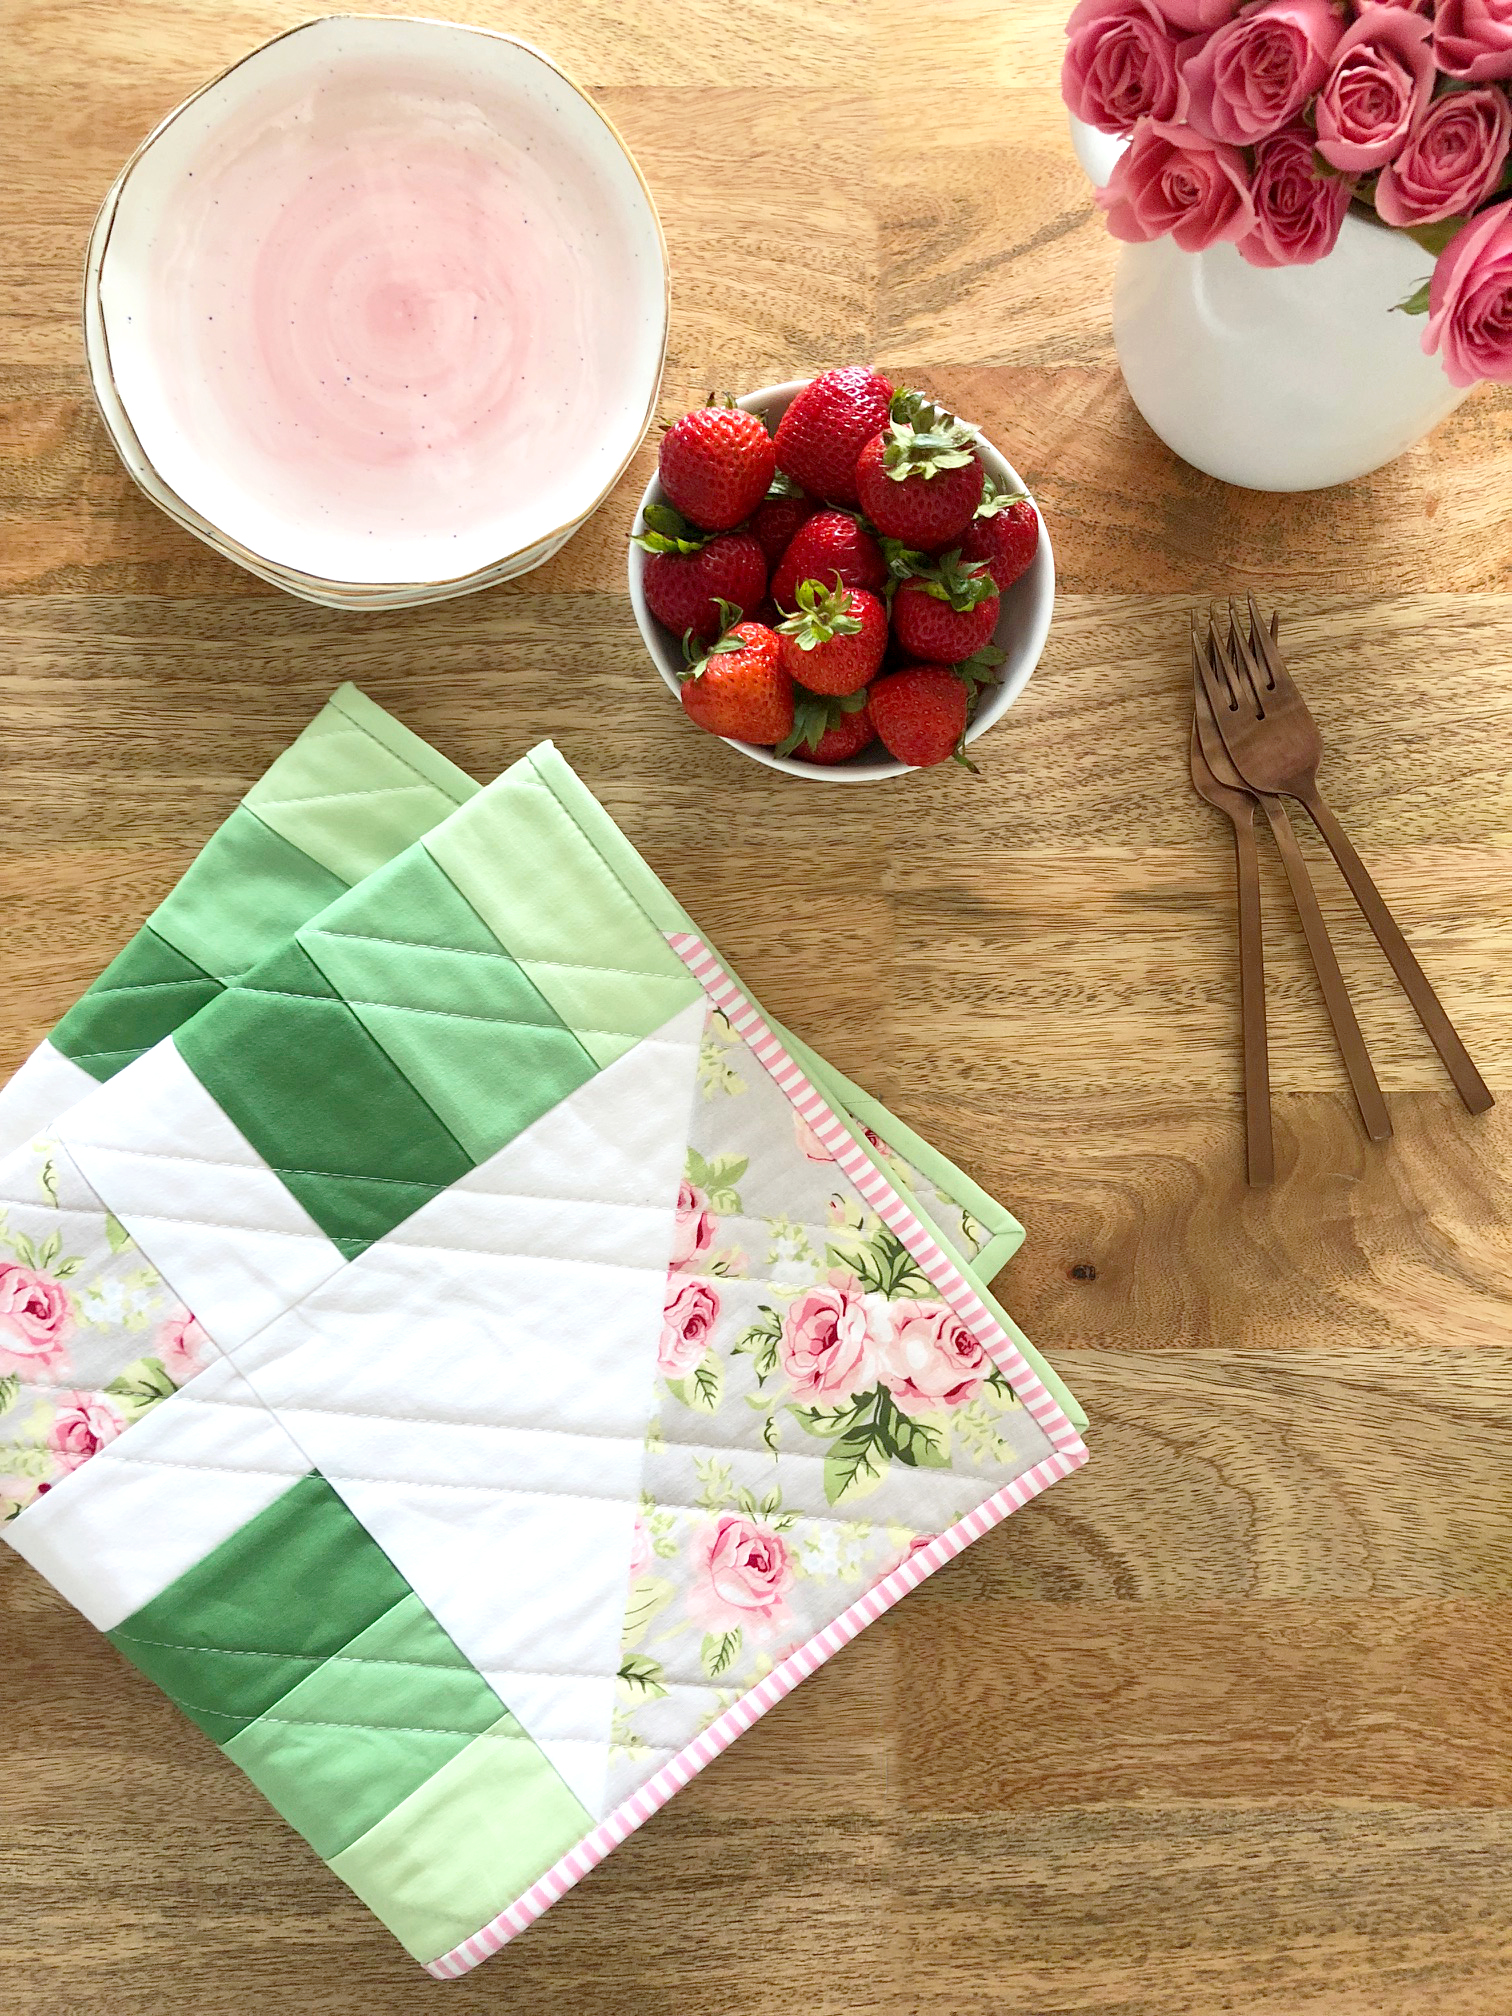
today i'm thrilled to share my latest mini quilt, garden getaway. quite lovely, right??
this 24'' finished mini quilt was made with the cricut maker, riley blake designs confetti cottons and the love story fabric collection. i love the depth the green ombre square creates.
here's the materials you need to make this mini quilt:
cricut maker rotary blade
white solid color cut down to (2) 12'' x 24'' rectangles
light green solid color cut down to (1) 12'' x 12'' square
medium green solid color cut down to (1) 12'' x 12'' square
dark green solid color cut down to (1) 12'' x 12'' square
floral print cut down to (2) 12'' x 24'' rectangles
floral print cut down to (1) 12'' x 12'' square
1/4'' yard for the binding
1/2'' yard for the backing (cutting it down to a 26'' x 26'' square)
batting (1) 26'' x 26'' square
misc. sewing supplies, including thread, iron, and small scissors


here are the cutting instructions:
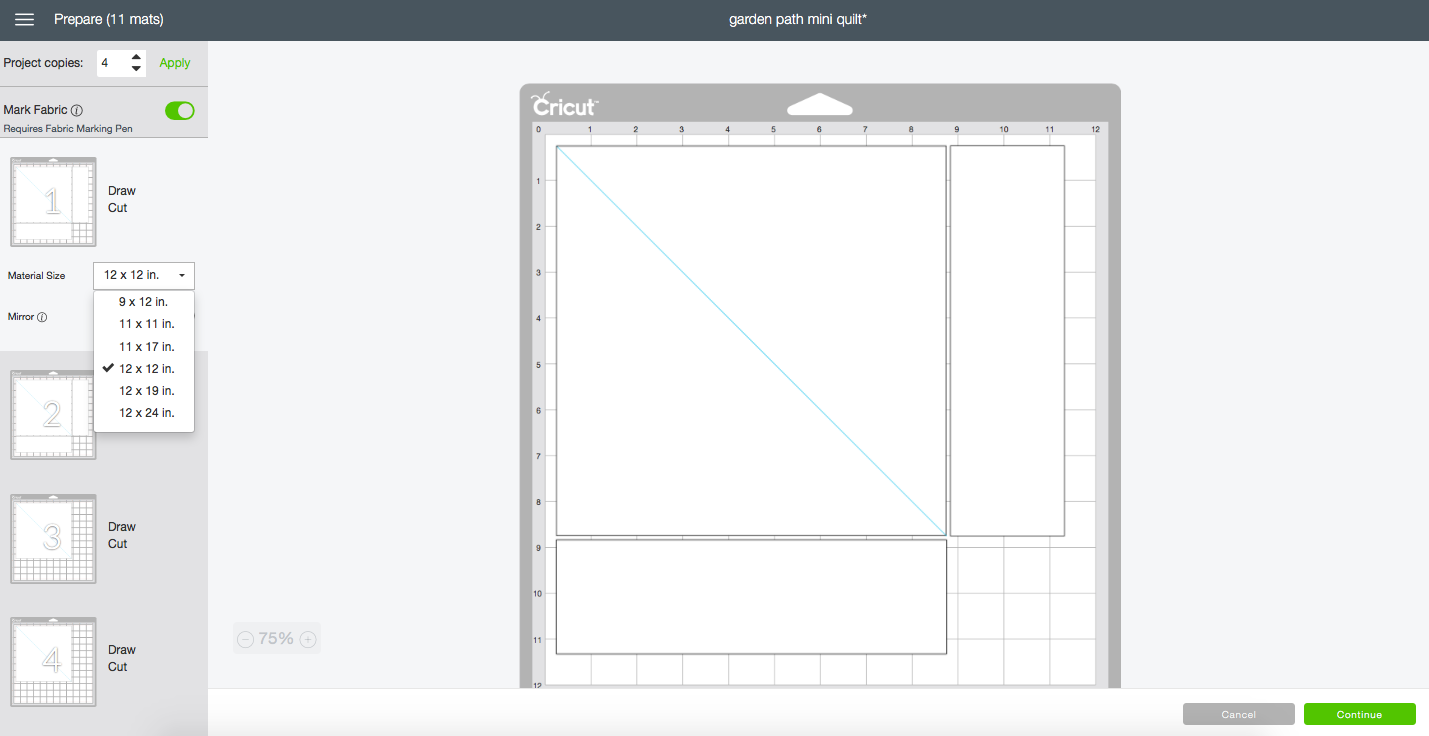
start a new project in cricut design space
using the square under shapes, create the following measurements:
8 1/2’’ x 8 1/2'' (x1 white)
8 1/2'' x 8 1/2'' (x1 floral)
8 1/2'' x 2 1/2'' (x1 light green)
8 1/2'' x 2 1/2'' (x1 medium green)
8 1/2'' x 2 1/2'' (x1 dark green)
8 1/2'' x 2 1/2'' (x1 white)
make sure you unlock and lock your measurements so the sizes won't change as you create the additional squares and rectangles
change the color of each square/rectangle as you create, making it easy for you to keep up with the measurements and mats to make each block
using the score line under shapes, draw a line, corner to corner on the white 8 1/2'' square
change the score line to a fabric pen line on the white 8 1/2'' square
you're all set, click on "make it"
you'll see your squares and rectangles broken out by color (mat)
change the number of project copies to 4
adjust the (white) mat size to 12'' x 24''
adjust the (floral) mat size to 12'' x 24''
you should have (2) 12'' x 24'' white mats and (2) 12'' x 12'' floral mats
place your pre-cut fabric on the fabric mat in order of mat
select cotton fabric, insert your cricut rotary cutter, fabric pen, and GO!
repeat the steps above for the remaining floral 8 1/2''x 8 1/2'' square
after you've finished cutting, organize your squares and rectangles to form the quilt


here are the sewing instructions (use a 1/4'' seam allowance unless other wise noted):
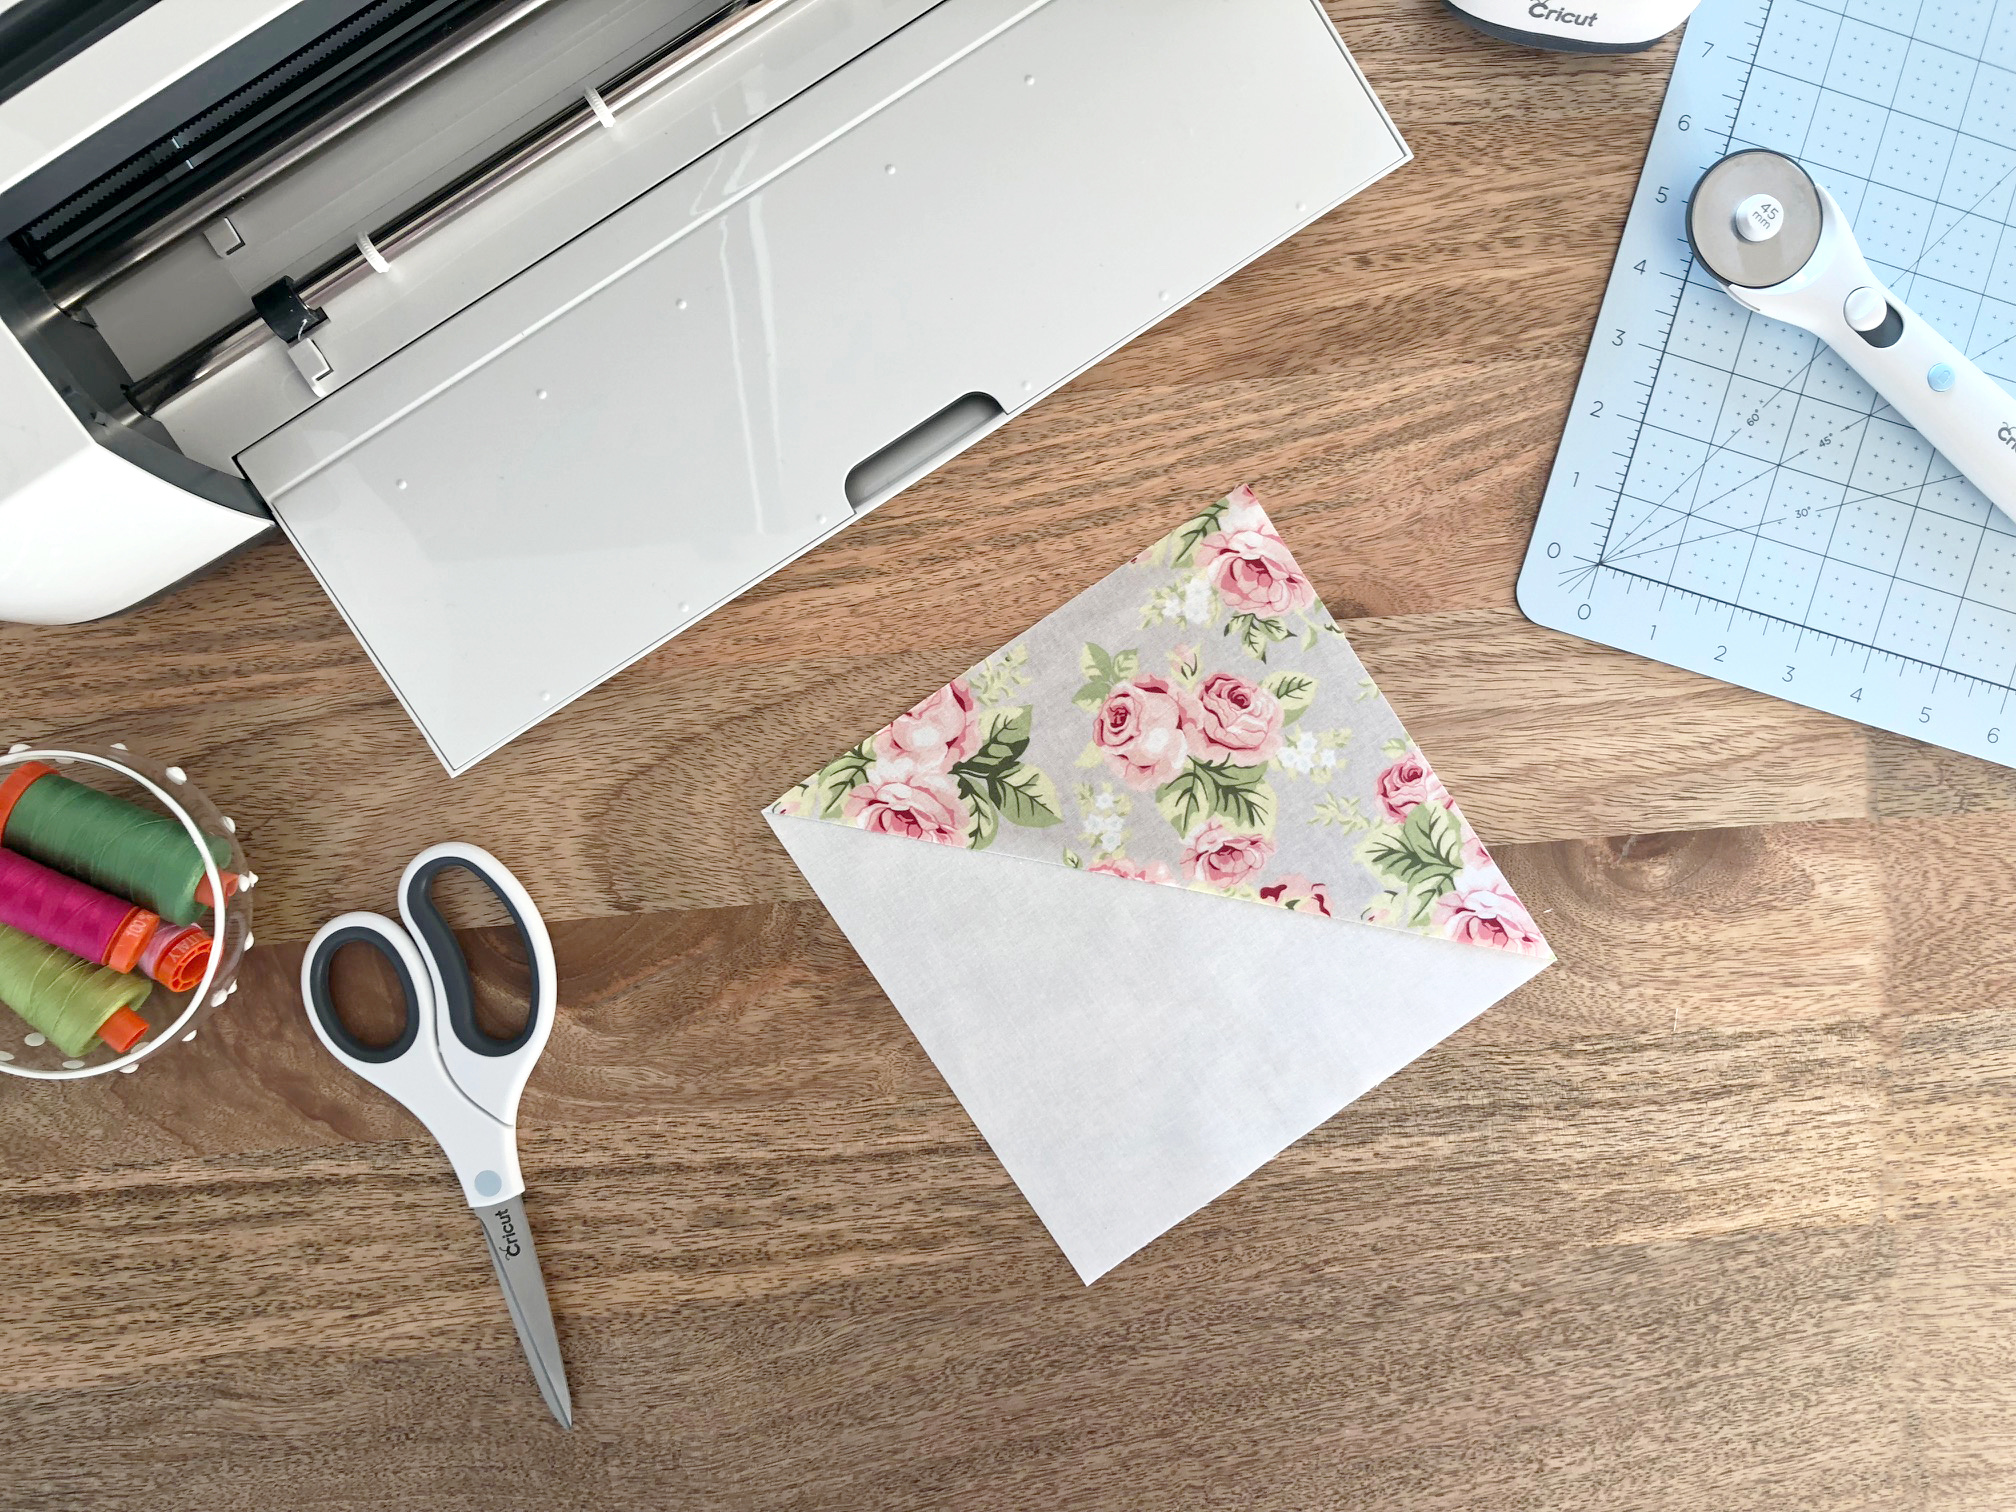
place (1) white 8 1/2'' square, fabric pen line facing up on top of (1) floral 8 1/2'' square
sew along the fabric pen line and trim 1/4'' away from the fabric pen line
press seam to the floral fabric
repeat the steps above to make (4) HST or half square triangles
sew the green ombre 8 1/2'' x 2 1/2'' rectangles together, white to light green
press seams to one side
layout the mini quilt
sew the bottom row together, press seam toward the green ombre square
sew the middle row together, press seam toward the floral square
sew the top row together, press seam toward the green ombre square
layer the quilt top with the quilt batting and backing
quilt and bind as desired
isn't this a gorgeous mini quilt? it's so easy to make with the cricut maker.
cut, sew, repeat...
the tattooed quilter
This is a sponsored conversation written by me on behalf of Cricut. The opinions and text are all mine.